Bathroom decor just got a boost from this beautiful shower curtain valance. With so many panels, it is a natural showcase for your embroidery.
Combine a series of embroidery designs with lovely fabrics of your choosing, and you have a truly personal bathroom decor item, unlike anything anywhere else.
Read on for instructions to make one of your own!
Supplies
Supplies Needed:
**2 1/8 yards fabric (for bottom embroidered portion; I used denim)
**2 1/8 yards print fabric (for top portion; I used lightweight canvas)
**Medium weight cutaway stabilizer
**Temporary spray adhesive
**Air-erase pen
**Craft knife and cutting pad
**Grommets and grommet tool (I used 3/8" grommets)
Designs used:
I used designs from the small size of the Deep Sea Baroque Design Pack.
Designs from the Underwater Adventures Design Pack and from the Waves of Watercolor Design Pack would also be pretty on a shower curtain valance.
Finished size:
I will show you how to custom fit a valance to any size shower curtain. My shower curtain is 72" wide, so the finished size of my valance is 72" wide by 12" high.
Before starting, take these measurements from your shower curtain:
a. Measure the width of the shower curtain along the top and add one inch for seam allowance (mine is 72" wide, so the final width measurement is 73").
b. Measure the distance between one of the side edges of the curtain and the center of the first hole (or grommet) closest to the side edge (mine is 1 1/2").
c. Measure the distance between the holes center to center (mine is 6 1/4")
Designs Used

First, I will prepare the fabric for the bottom portion of the valance. Take the width measurement and cut two pieces of fabric to the final width measurement by 17" high (mine is 73" wide, so I cut mine to 73" wide by 17" high).
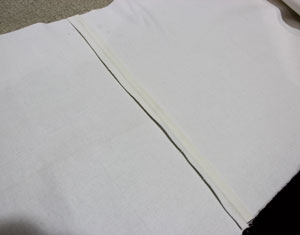
Align the pieces together, right sides together, pin in place along one of the short ends, and sew a 1/2" seam along the pinned edge only. Press the back seam open.
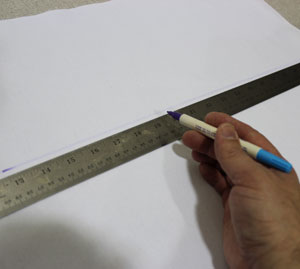
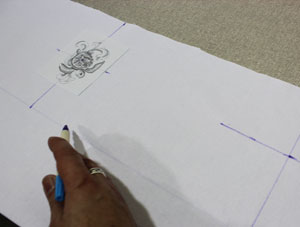
Lay the fabric flat with the right side facing up. Then, using an air erase pen or other marking tool, measure and mark the center of each short end by measuring and dividing by two.
Measure and mark the center of the fabric along the length by measuring between the top and bottom edges and dividing by two. Draw a line connecting the marks along the entire length of the fabric. The designs will be embroidered along the top edge of the fabric above the line. The line you just marked is a fold line that will be used later on.
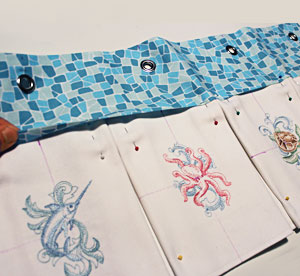
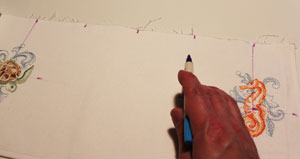
Create paper templates of the designs by printing them at full size using embroidery software. I am placing a design under each hole of the shower curtain (grommets will be added along the top edge of the valance later on at these positions).
Take the side edge to first hole measurement and multiply it by two. Take that measurement (mine is 1 1/2", so 1 1/2" multiplied by two equals 3") and starting at the upper right corner of the right short end, measure in along the top edge. Measure the same distance along the middle line starting at the outer right edge.
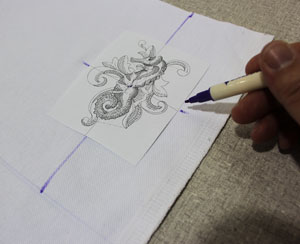
Connect the lines and mark the center of the line by measuring and dividing by two. Poke a hole in the center of the template and align it with the center point on the fabric. Make sure the design fits well within the area; there should be at least one inch of space between the top and bottom outer edges of the design and the top edge of the fabric and the middle line. Also, there should be at least one inch of space between the right outer edge of the design and the right edge of the fabric. Mark the horizontal axis points of the template.

Remove the template and draw lines connecting the marks.
To mark the next design, take the measurement between the holes of the shower curtain and multiply them by two (mine are 6 1/4", so 6 1/4" multiplied by two equals 12 1/2").
Take this measurement and measure and mark along the top edge of the fabric starting at the center line of the first design working your way to the left. Next, measure along the middle line, draw a line connecting the marks, find the center point of the line, position the template, mark the axis points, remove the template, and draw lines connecting the marks.
Repeat this process across the entire length of the fabric. When you reach the other short end, mark the fabric just as you did for the right end.
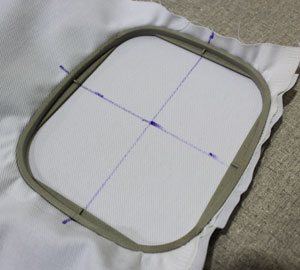
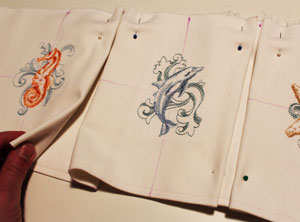
Now that the fabric is marked, I will embroider the fabric. Spray a piece of medium weight cutaway stabilizer with temporary adhesive and smooth the fabric on top. Hoop the fabric and stabilizer together by aligning the marks on the hoop with the lines on the fabric.
Attach the hoop to the machine and load the first design. Move the hoop so that the needle is directly over the center point on the fabric. Embroider the design.
When the design has finished, trim away the excess stabilizer on the backside of the embroidery. Repeat the hooping and embroidering process for the remaining designs.
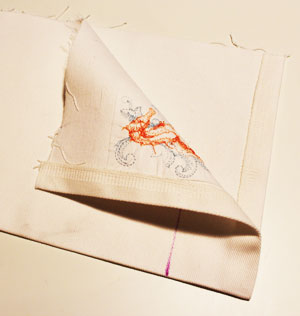
Now that the designs are complete, fold the short ends over 1/2" to the wrong side and press with an iron. Also, fold the fabric together lengthwise, wrong sides together, and press the fold. Pin in place and sew a 1/4" seam along the short ends and along the bottom edge. Leave the top edge open.
To gather and pleat the fabric, measure and mark the center between each center line of the designs by measuring and dividing by two. Then, measure and mark the center between the mark you just made and each of the center line marks by measuring and dividing by two.
Pinch the fabric at each of the marks you just made and fold the fabric in towards the center mark. Pin in place. Repeat this along the entire length of the fabric in between each of the designs.
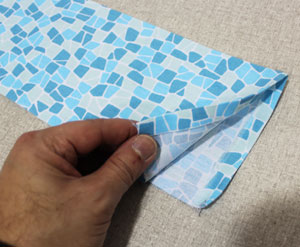
To prepare the fabric for the top portion of the valance, take the width measurement and cut one piece of fabric to the final width measurement by 10" high (mine is 73" wide, so I cut mine to 73" wide by 10" high).
Fold the short ends over 1/2" to the wrong side and press with an iron. Also, fold the fabric together lengthwise, wrong sides together, and press the fold. The folded long edge is the top edge of the top portion.
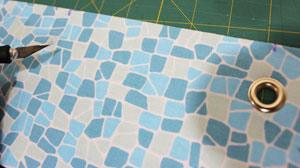
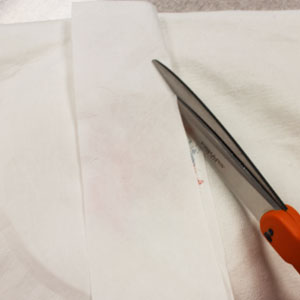
Next, I will add the grommets to the top portion. Using the hole measurements, mark along the top edge (folded edge). Mine is 1 1/2" in from each upper corner and 6 1/4" in between each hole. Measure and mark 1 1/4" down from each mark. Using a craft knife and cutting pad, cut a small "x" at each mark cutting through both layers of fabric.
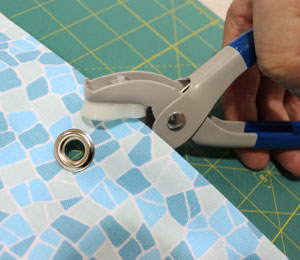
Then, add a grommet at each hole.
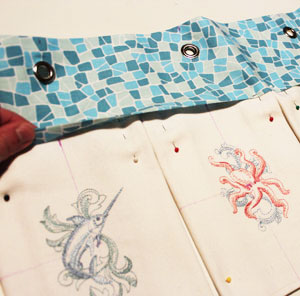
Insert the top edge of the bottom portion in between the layers of the top portion about 1/2". Pin in place and sew a 1/4" seam along the bottom edge of the top portion. Also, sew a 1/4" seam along the side and top edges of the top portion.
And your valance is complete!
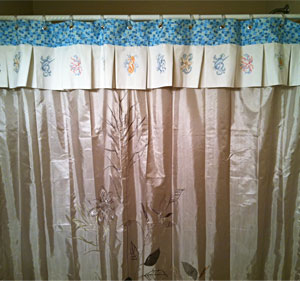
A beautifully embroidered valance is a terrific way to bring color and style to any shower curtain.
Customized with lovely fabrics and designs of your choice, an embroidered shower curtain valance is sure to add warmth and personality to your bathroom decor!


