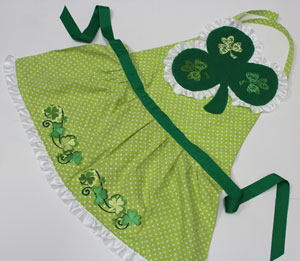
Shamrocks upon shamrocks! This apron is bursting with the good luck symbol of Ireland.
Ruffles around the top shamrock and along the bottom hem make this apron as charming as can be. Combine with fabric and embroidery designs of your choice to create your own personal style.
Read on for project instructions to create a fun and festive apron!
Supplies
Supplies Needed:
**18" by 18" piece of fabric (I used wool/polyester blend felt for the large shamrock on the front)
**1 1/2 yards denim, twill, or lightweight canvas (for the front, back, and skirt)
**1/2 yard fabric (for the back of the skirt, I used quilter's cotton)
**Medium weight cutaway stabilizer
**Temporary spray adhesive
**Air-erase pen
**2 1/2 yards ruffle trim
**80" length of 1 1/2" wide grosgrain ribbon (for waist ties)
**Fabric glue
**Two 1" D-rings (for top strap fastener)
**Scotch tape
Special Project Notes:
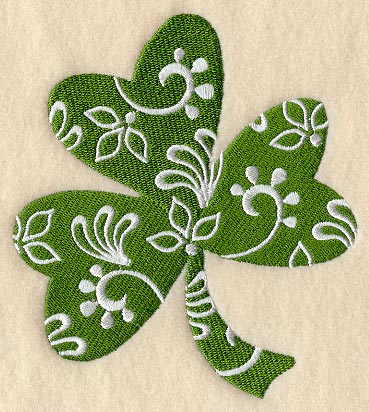
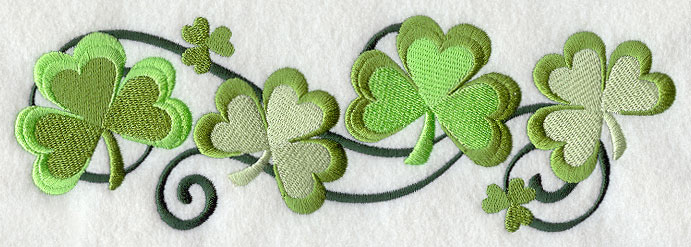
In this project, I used the small size of the Shamrock Filigree design and the large size of the Swirling Shamrocks Border. We have lots of shamrock designs to choose from that would also look terrific on this apron.
Designs Used
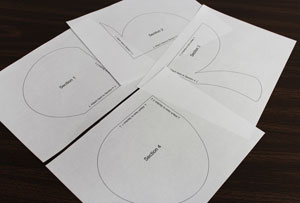
First, click here to print the shamrock pattern pieces: Section 1, Section 2, Section 3, and Section 4. The pattern is in four parts will print on four pieces of 8 1/2" by 11" paper.
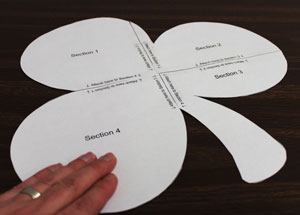
Cut out the pieces and tape them together by following the instructions on the patterns.
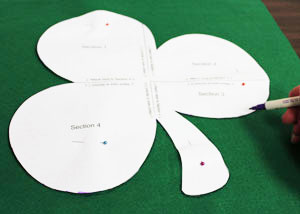
Pin the pattern onto the fabric (I used a wool/polyester felt) and using an air-erase pen, trace the shape.
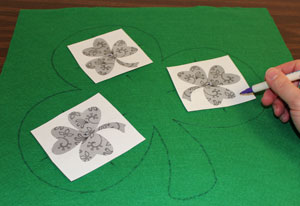
Remove the pattern and create paper templates of the design by printing it at full size using embroidery software. Arrange the templates within the shape. I placed the templates with the edges of the designs about 1 1/4" from the edges of the shape.
Be sure to keep the edges of the designs at least 1/2" from edges of the shape. Poke holes in the center of the templates and mark the fabric. Also, mark the horizontal and vertical axis points.
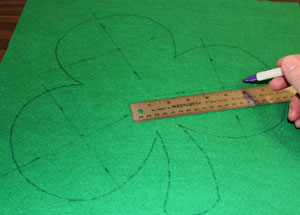
Remove the templates and draw lines connecting the marks. The lines will be used for hooping.
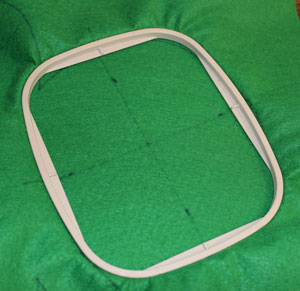
Spray a piece of medium weight cutaway stabilizer with temporary adhesive and smooth the fabric on top. Hoop the fabric for the first design by hooping the fabric and stabilizer together by aligning the marks on the hoop with the lines on the fabric. Attach the hoop to the machine and load the first design. Move the hoop so that the needle is aligned with the center point on the fabric. Embroider the design.
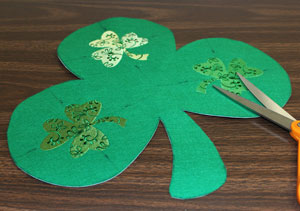
Repeat the hooping and embroidering process for each of the designs. When all the designs have finished, cut out the shape. I left the stabilizer on the backside of the embroidery to give the fabric more support.
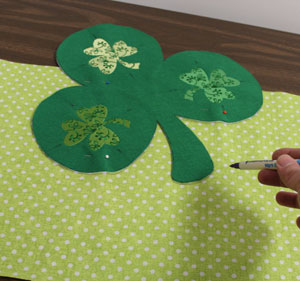
To prepare the fabric for the top of the apron, cut a piece of fabric (I used lightweight canvas) to 26" wide by 15" high and lay it flat with the right side facing up. Center the embroidered shamrock piece along the top edge of the fabric with the bottom of the stem aligned horizontally with the side edge of the left leaf (the shamrock will then be at an angle). The top edge of the shamrock should extend 5" above the top edge of the fabric. Pin the shamrock in place and trace the shape onto the fabric.
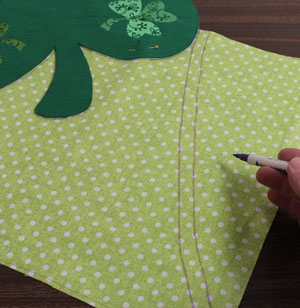
To the right of the shamrock, draw a curved line from the outer edge of the shamrock down to the bottom right corner. Measure and make marks 1/2" out from the curved line (out towards the outer right edge of the fabric) and then draw lines connecting the marks.
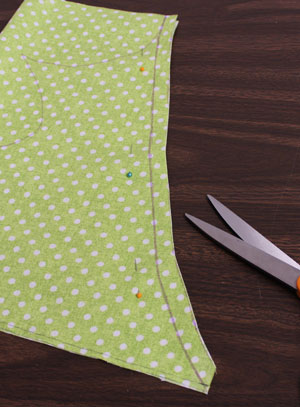
Remove the shamrock and fold the fabric together widthwise, right sides together, by aligning the left and right edges of the fabric together. Pin the fabric in place and cut through both layers of fabric by cutting along the outer line.
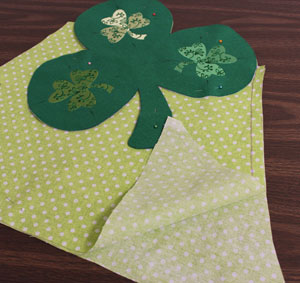
Remove the pins and fold the fabric flat with the right side facing up. Pin the shamrock back in place by aligning it with the traced lines. Place the shamrock/front fabric piece on top of the fabric, wrong sides together, and pin in place. Trace the entire outer shape (including the top edges of the shamrock) and cut out the shape.
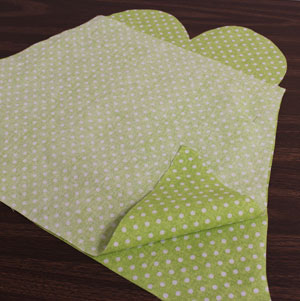
Remove the shamrock and the pins. Align the front and back fabric pieces together, right sides together, and pin in place. Sew a 1/2" seam along the left and right sides only. Leave the top and bottom edges open. Turn the fabric right side out and press the seams.
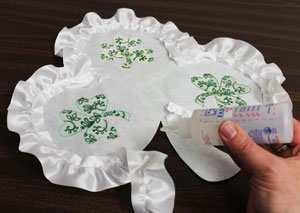
To add the ruffled trim, lay the shamrock flat with the wrong side facing up. Add drops of fabric glue along the outer edges of the leaves and glue the trim in place (keep the flat edges of the trim inside the shape). Add the trim to each leaf separately, cutting the trim as you go and overlapping the ends of the trim with each other.
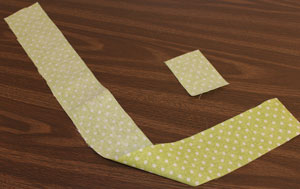
To prepare the top straps, cut one piece of fabric to 36" long by 3" wide and the other to 4" long by 3" wide. Fold the long edges of each piece in 1/2" and press with an iron. Then, fold the folded edges together and press. Sew a 1/4" seam along the folded edges.
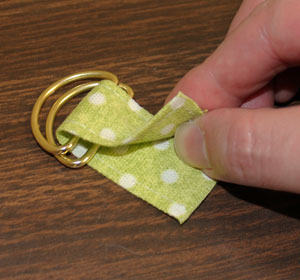
Take the short piece and loop it through the two D-rings. Tack the ends of the loops together by stitching a 1/4" seam at the rough ends.
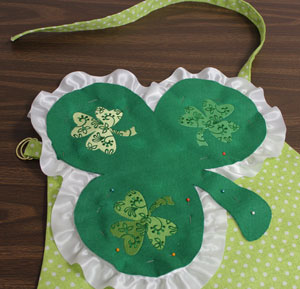
Add the shamrock back on the front piece and pin in place. Tuck the raw ends of the D-ring loop in between the shamrock and the front fabric at the left top edge of the shamrock and pin in place. Also, pin one end of the long strap at the right top edge of the shamrock in between the fabric layers.
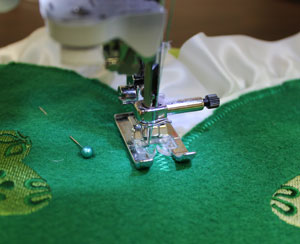
Zigzag stitch around the entire outer edge of the shamrock shape. Turn the fabric of the opening at the bottom in 1/2" to the wrong side and press.
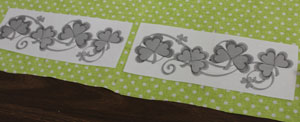
To prepare the fabric for the bottom skirt piece, cut a piece of fabric to 38" wide by 15" high. Measure and mark the bottom center by measuring and dividing by two. Create paper templates of the design and arrange them along the bottom edge of the fabric with the bottom edges of the designs about 1 1/2" from the bottom edges of the fabric.
Position the inner edges of the designs about 1/2" from the center point. Poke holes in the templates and mark the fabric. Also, mark the horizontal and vertical axis points.
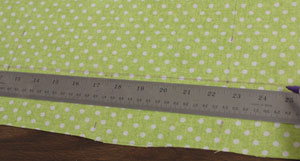
Remove the templates and draw lines connecting the marks. Hoop and embroider the designs just as you did earlier. I carefully cut away the excess stabilizer from the backside of the embroidery.
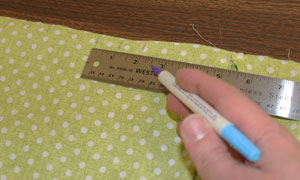
Measure and mark the center of the top edge of the fabric. Also, measure and mark out one inch along both sides of the mark. Then, measure and make marks 6" out from the center point along each side.
Measure and mark one inch along both sides of each of those marks. Then, measure and mark two more times out from the marks you just made in 4" increments. Then, measure and mark out one inch along both sides of the marks you just made.
Next, to create the pleats, pinch the fabric and bring the outer marks in to meet the inner marks. Pin the fabric and tack the pleats by stitching 1/4" seams along the top edge of the fabric.
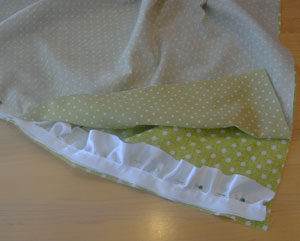
To prepare the fabric for the back of the skirt piece, cut another piece of fabric to 38" wide by 15" high (I used quilter's cotton) and create the pleats along the top edge just as you did for the front skirt piece.
Align the front and back pieces together, right sides together. Insert the ruffled trim in between the layers with the flat edge facing out. Pin the trim in place with the flat edge aligned with the bottom edge of the fabric. Pin all the layers in place and sew a 1/2" seam along the bottom, top, and one of the side edges. Leave one side edge open for turning.
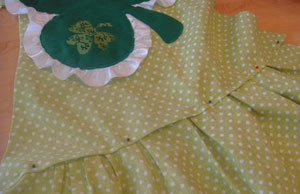
Turn the fabric right side out. Turn the fabric of the opening in 1/2" to the wrong side and press. Press the seams and the pleats along the top edge. Next, top stitch a 1/4" seam along the side and bottom edges only.
Insert 1/2" of the top edge of the skirt inside the opening at the bottom edges of the top section, pin in place, and sew a 1/4" seam along the folded edge.
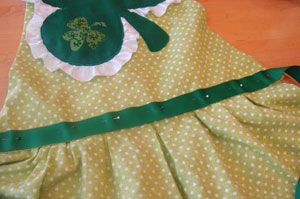
Cut a piece of 1 1/2" wide grosgrain ribbon to 80" long. Measure and mark the center of the ribbon. Then, measure and mark the center of the bottom edge of the top section of the apron. Align the center points together and pin the ribbon in place. Sew a 1/4" seam along the top and bottom of the ribbon to tack it in place.
Your apron in now complete!
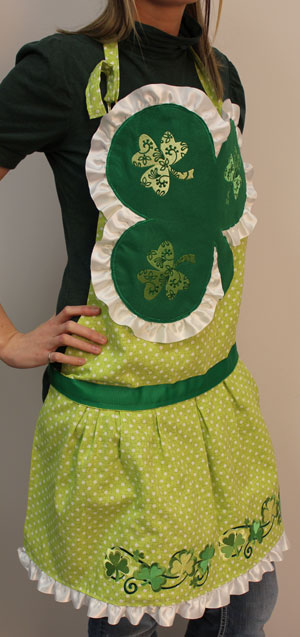
Show your Irish pride on St. Patrick's Day with a charming shamrock apron!
Wear it all year round for good luck and a stylish look in the kitchen.
