
Don't let a rock-hard stadium seat stand between you and a good time. Bring a soft and comfortable cushion to your
next baseball game, rodeo, or outdoor concert.
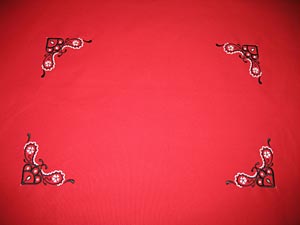
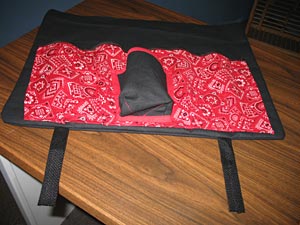
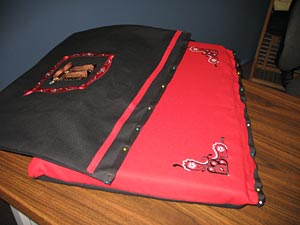
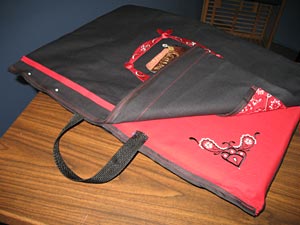
This fashionable (and functional!) stadium seat has pockets that will hold snacks, a water or soda bottle, camera, cell phone, and more. Handles and side locks make carrying convenient.
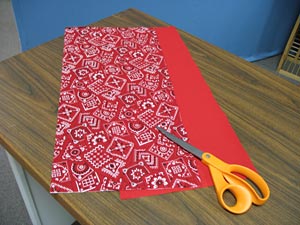
Supplies
Supplies needed:
**1 piece of high density foam: 21" x 14 1/2", 2" thickness
**1 1/2 yards of 1" wide nylon strap
**1 yard black (or color of your choice) duck cloth/canvas
**1 yard red (or color of your choice) duck cloth/canvas
**1 quarter flat companion fabric
**6 yards extra-wide bias tape
**2 side locks, for 1" strap
**2 metal snaps, and tool (usually included in snap pack)
**Small hammer
**Ruler and T-square
**Needle and thread for hand sewing
Designs Used:
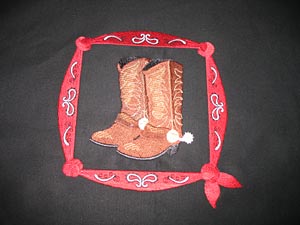
**Cowboy Boot Bandana Square (Lg or Md or Sm)
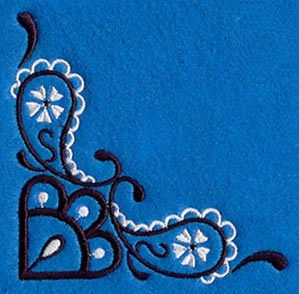
**Bandana Paisley Corner
Designs Used
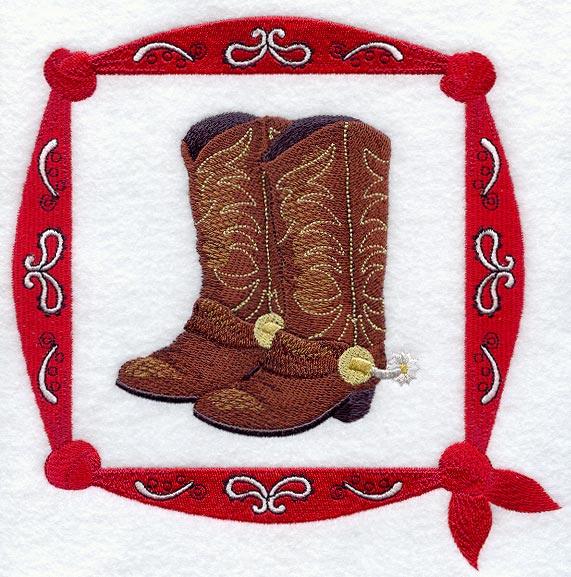
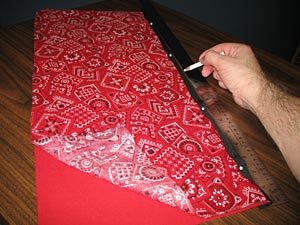
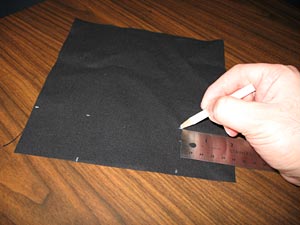
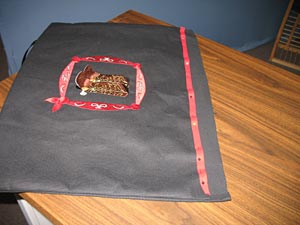
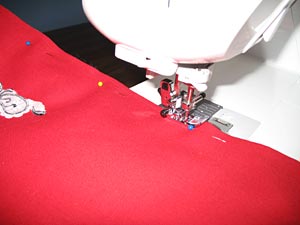
Cut a piece of duck cloth to 22" x 15". This fabric piece will be the outer side of the pocket flap. We're using black canvas for the pocket flap, and under the cushion.
Mark the center of the fabric rectangle. To do this, measure the width and divide by two, and make a mark. Then measure the height, divide by two, and make another mark. Where these marks meet is the exact center of the fabric.
When using heavier fabric, like canvas, a lighter-weight stabilizer is appropriate. We stabilized the canvas with a medium-weight tear-away stabilizer. Hoop the fabric with the stabilizer, and embroider the design. When the design has finished sewing, unhoop the fabric and tear the excess stabilizer away.
Next, we'll embroider the seat top with the bandana paisley corner design. We're going to place the corner design on each of the four corners of the seat.
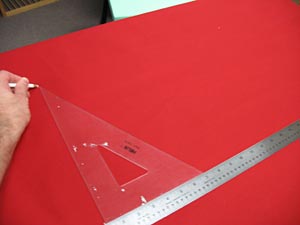
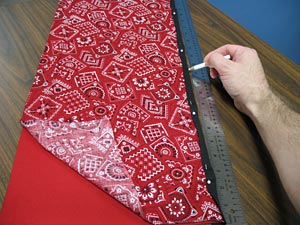
To do this, mark a 18" x 12" rectangle on the red duck cloth, leaving at least 6" excess fabric around the rectangle. Use a t-square and ruler to keep the lines even and straight.
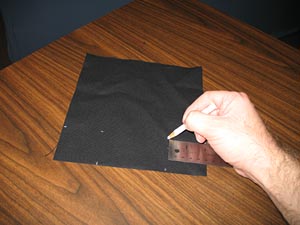
Print the bandana paisley corner design from your embroidery software, and trim around the shape to make a template. If you don't have embroidery software, then draw the shape of the design onto paper using the measurements of the design. Trim around that shape to make a template.
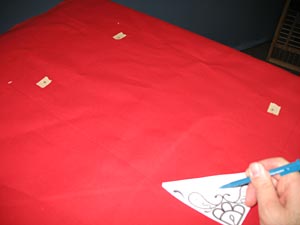
Align the corner of the template with a corner of the rectangle, and lay a piece of masking tape under the center point. Poke a pen through the center and mark the tape. Do this for all four corners.
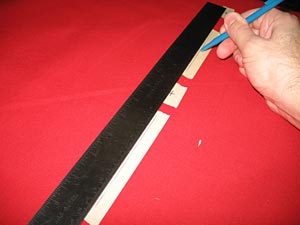
Now we'll mark the fabric with vertical axis lines. These lines will be used to hoop the fabric straight so that the corners will be embroidered at the correct angle.
Begin at one of the center points for the corner. Lay masking tape vertically from the center point, then draw a straight line on the tape. When you lay the tape and draw the lines, make sure that the tape and lines are long enough to reach the hoop.
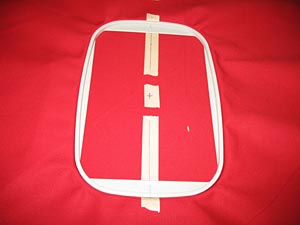
Hoop the fabric with tear-away stabilizer, making sure that the lines on the tape match the marks on the hoop.
Move the hoop so the needle is directly over the center point, peel back the tape, and embroider the design. Repeat for all four corners.
After you have finished embroidering all four corners, tear the excess stabilizer away.
Cut this piece to 23 1/2" x 17", centering the embroidery in the cut rectangle.
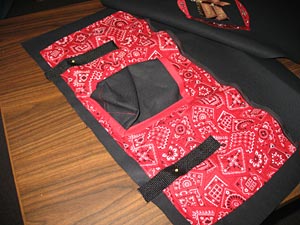
Next we'll assemble the pockets. Cut one piece of companion fabric, and one piece of duck cloth, to 22" x 10".
Lay the pieces wrong sides together. Cut a strip of bias tape to 22" and add it to one of the long edges. This will be the top of the pockets.
Pin in place.
Measure and mark the center point, 11" in from either end.
Sew a straight stitch along the inside edge of the bias tape.
To bind the two pieces together, sew a seam directly through the center of the rectangle (vertically), starting at the center that you marked.
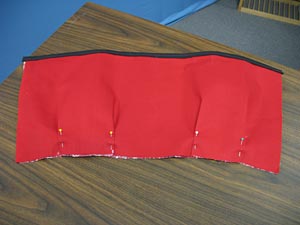
Fold a 1/4" pleat every 3 5/8" along the bottom (unsewn) side of the pocket. Pin in place.
Tack the pleats in place with a straight stitch.
Next we'll make a roomy holder for the water bottle.
Cut a piece of black duck cloth to 7 1/2" x 8."
On a short end, mark 2" in and up on both corners.
On each corner, bring the two marks together and fold in. The excess should be on the outside.
Pin into place.
Sew a straight stitch along each fold to tack into place.
Turn the water bottle holder right side out and add bias tape to all the outer edges. Pin in place.
Sew the tape in place with a straight stitch along the inner edge.
Center the water bottle holder over the center seam of the large pockets, on the side with the companion fabric.
Align the bottom of the water bottle holder one inch above the bottom of the pocket.

Sew the sides of the water bottle holder, following the inner edge of the bias tape.
Do not sew the top or bottom of the pocket.
Sew the bottom of the water bottle holder by hand, leaving an inch between the bottom of the water bottle holder and the bottom edge of the large pockets.
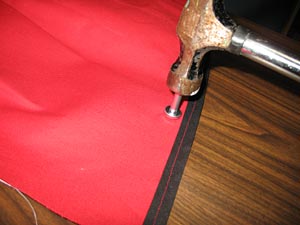
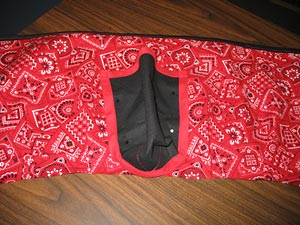
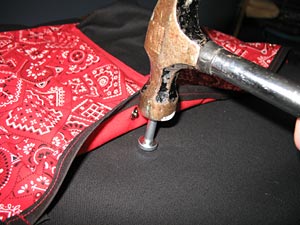
Next, add the "knob" end of the snaps to the inside top of the large pockets.
Measure and mark 5 1/2" in on both sides, just under the bias tape. Then, on a hard surface using the snap tool (usually included with the snaps) and a small hammer, tap the snaps into place.
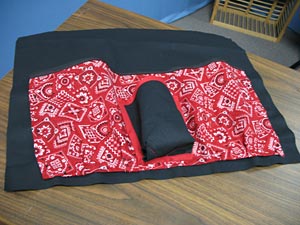
Cut a piece of black duck cloth to 22" x 16 1/4". This is the inside of the pocket flap.
Now the pocket will be attached to the inside flap. Lay the pocket on the flap piece. The pocket should be 3/4" from the bottom edge, and 1 1/2" from the sides.
Fold a 1/4" edge all around the sides and bottom of the large pocket, and pin in place.
Sew a 1/4" seam along the sides and the bottom of the pocket.
Do not sew the top.
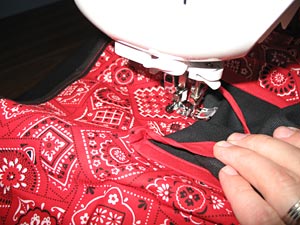
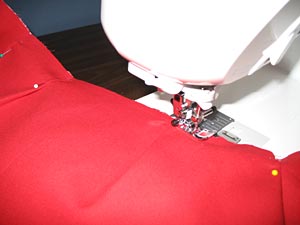
Sew the center seam. Pull the water bottle holder back slightly, and sew inside it as far as you can.
This will create a separation in the large pocket.
Next, attach the other side of the snaps.
Mark the fabric where the snaps should go. Lay the snap down, and then tap in place.
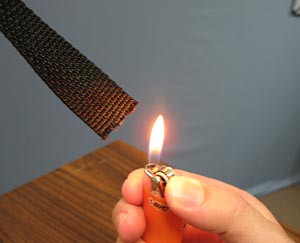
Next, add the straps. Cut four 6" strips of the nylon strap. To prevent the straps from fraying during seat use, singe the ends of the straps, using a lighter or match.
Lightly run the flame along the ends of the strap, holding just long enough to melt the loose threads.
Pin two of the straps 5 1/2" from each end, on top of the pockets. Pin the straps well away from the edge so they do not get sewn over with the next step.
Leave 1/4" of excess below the bottom of the pocket flap.
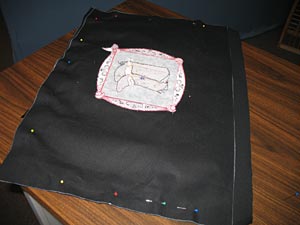
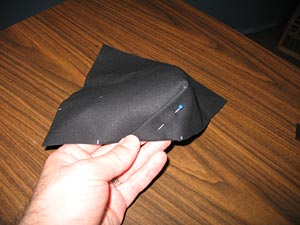
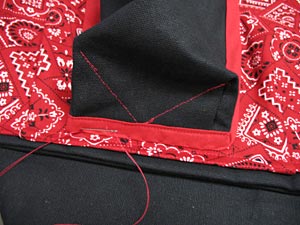
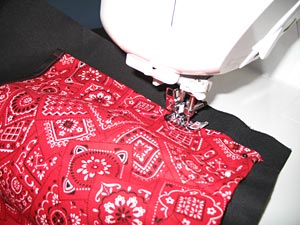
Add the embroidered outer piece. Lay it right side down on top of the pocket. Make sure that the pocket and the embroidery are facing the same direction.
There should be an excess of fabric on the top of the inner flap piece -- this is necessary for construction. Pin in place.
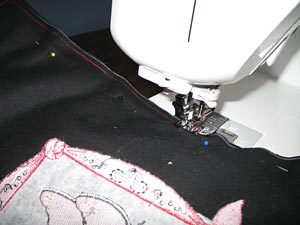
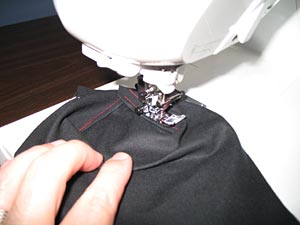
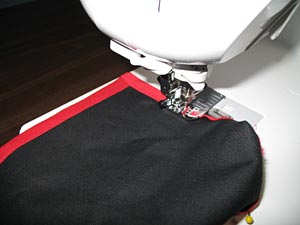
Sew a 1/4" seam around the sides and bottom. You may sew back and forth over the straps a few times to give extra support.
Remove the pins and turn the flap right side out.
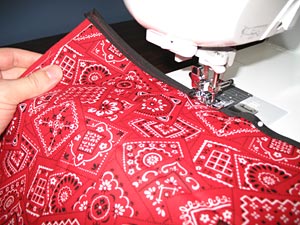
Add bias tape to the inner edge on the outside (embroidered side) of the flap, and pin in place.
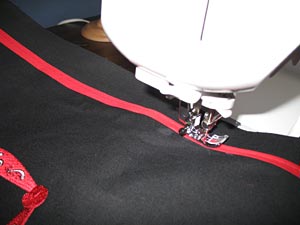
Sew a seam on the inner edge of the bias tape.
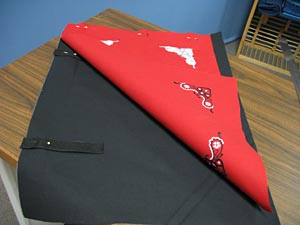
Next we'll complete the seat cover. Cut another piece of duck cloth to 23 1/2" x 18 1/4" -- this is the bottom of the seat. Pin the remaining two nylon straps 5 3/4" from each end and pin to the right side of the fabric, away from the edge as you did before.
Lay the top embroidered piece right side down on top of the straps, aligning it with the strap edge. Again, there will be excess fabric on one side.
Sew a 1/4" seam along the sides and bottom of the seat cover. Do not sew the top.
You can sew back and forth over the straps for extra support.
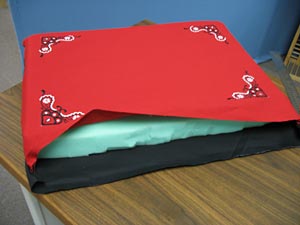
Remove the pins and turn the cover right side out. Insert the foam into the cover.
Lay the cushion top (embroidered) side down. Pin the open end fabric together by bringing the bottom fabric over the foam until it meets the top fabric.
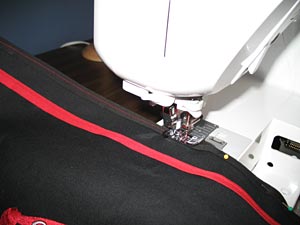
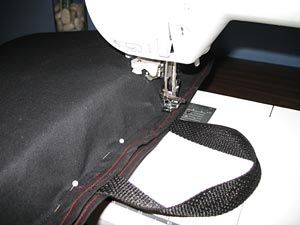
Using a zipper foot on your machine, sew the opening closed. Sew as close to the foam as possible.
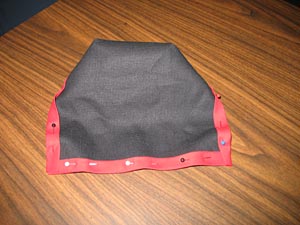
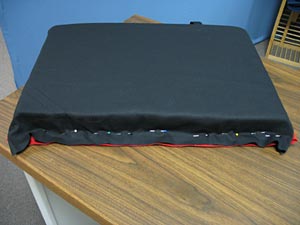
Add bias tape to the unfinished edges of both the pocket flap and the seat cushion. Pin in place.
Sew a seam along the inner edge of the bias tape.
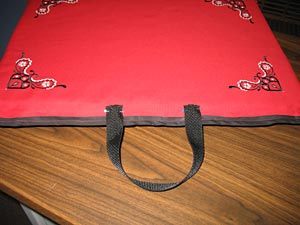
Next, sew the two sections together along with a handle.
Lay the cushion top side up. Cut a 13" piece of nylon strap. Pin each end 2 1/2" from the center of the top side of the cushion with the ends facing in. Leave about 1/2" excess past the edge of the bias tape. Pin the strap well away from the edge.
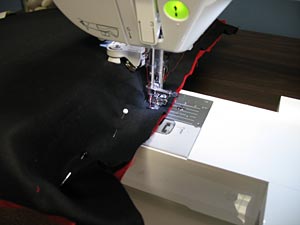
Add the pocket flap, pocket down and the top of the embroidery facing the handle. Pin along the handle (top) edge.
Sew a straight stitch along the inner edge of the bias tape.
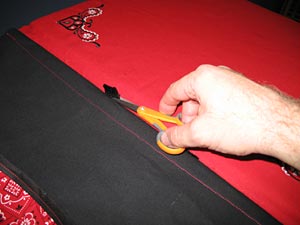
Trim the excess strap, cutting as close as possible to the fabric.
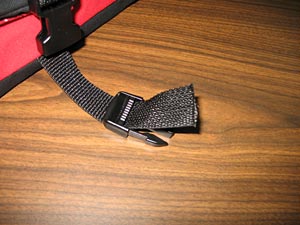
Add side locks to the nylon straps. First, with the clasp facing away from the end of the strap, thread the strap through the slot closest to the clasp.
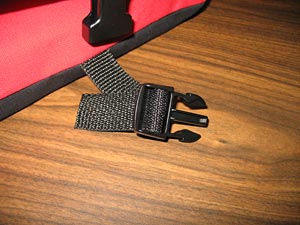
Then, thread the strap down through the back slot and pull tight. Repeat that for both locks.
Bring to your next stadium event, and enjoy the comfort and convenience!


