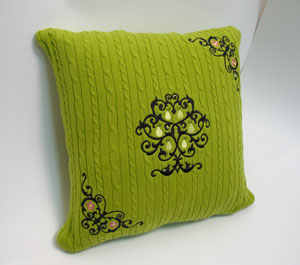
Give an old sweater new life by transforming it into a cozy pillow!
This pillow will make a beautiful and stylish decoration for your home, and is a perfect gift for loved ones.
Read below for these free project instructions!
Supplies
Supplies Needed:
**Old sweater (adult size)
**14 inch by 14 inch pillow form
**Medium weight cutaway stabilizer
**Temporary spray adhesive
**Air-erase pen or dress maker's pencil
**Water-soluble stabilizer (for topping - we prefer Sulky Solvy or Sulky Super Solvy)
**14 inch all purpose zipper
Designs used:
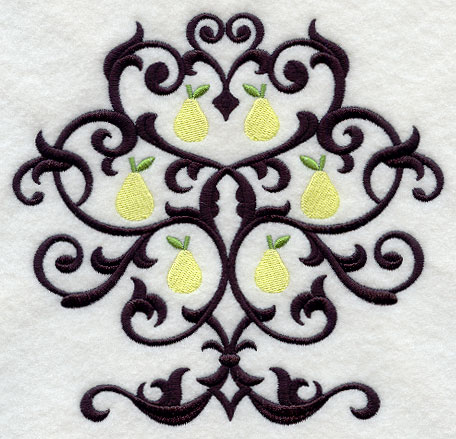
Wrought Iron Fruit Feature 1 (Md)
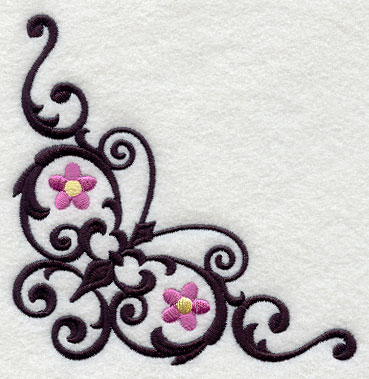
Wrought Iron Spring Corner (Sm)
These designs are also available in the following design packs:
A Wrought Iron Fruit Design Pack - Md
A Wrought Iron Spring Design Pack - Lg
A Wrought Iron Spring Design Pack - Md
A Wrought Iron Spring Design Pack - Sm
Designs Used

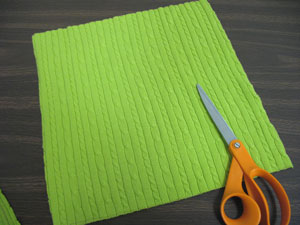
To begin, cut through both layers of the sweater in between the bottom of each sleeve and under the collar.
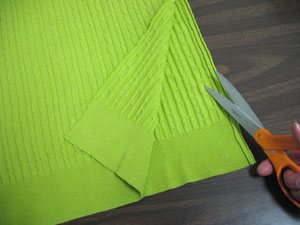
Then, cut along the side seams on each side.
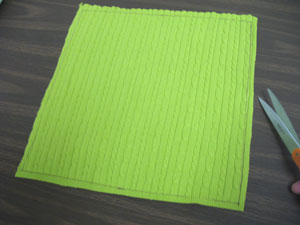
Using an air-erase pen, draw a 14 inch by 14 inch square on one of the sweater pieces. Then, trim the excess fabric away leaving 1/2 inch around the shape.
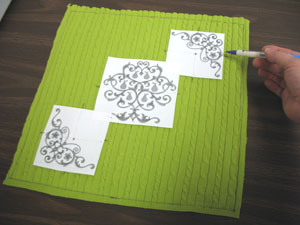
Create paper templates of the designs by printing them at full size using embroidery software. If you don't have embroidery software, you can cut a piece of paper the shape and dimensions of the design to help with placement and centering.
Arrange the templates on the fabric. We placed the designs in the center and in two of the corners. To place a design in the center, measure the center of each fabric side and divide by two. Draw lines to connect the marks - where the lines meet is the exact center of the shape. Place the remaining designs at least 1 1/4 inch from the edges of the shape. Poke holes in the center of the templates and mark the fabric. Also, mark the horizontal and vertical axis points.
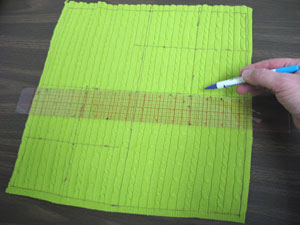
Remove the templates and draw lines connecting the marks. The lines will be used for hooping.
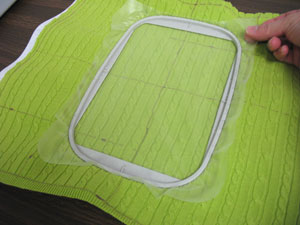
Spray a piece of medium weight cutaway stabilizer with temporary adhesive and smooth the fabric on top - stretch the fabric from side to side just slightly. This "pre-stretching" will allow the design to lay flat when the pillow is added later on. To learn more about sewing on sweater knit click here.
Also, place a piece of water-soluble stabilizer on top of the fabric and hoop all three layers together by aligning the marks on the hoop with the lines on the fabric. Attach the hoop to the machine and load the design. Move the hoop so that the needle is directly over the center point on the fabric. Embroider the design. Repeat the hooping and embroidering process for each design.

After the designs have finished, trim away the excess stabilizer on the back of the embroidery.
To prepare the back fabric, cut a 15 inch by 15 inch piece from the remaining sweater fabric.
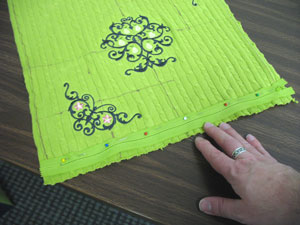
To add the zipper, lay the embroidered front piece right side up and align the zipper with the bottom edge of the front piece with about 1/4 inch of fabric extending out past the bottom edge of the zipper. Pin in place.
Sew a seam along the inside edge of the bottom of the zipper.
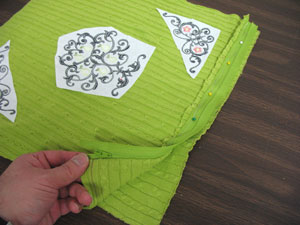
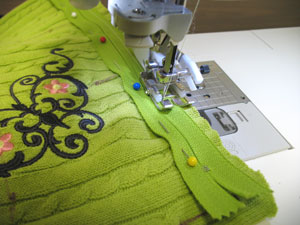
Lay the back fabric piece right side up. Align the front piece on top and fold the zipper so that the open edge of the zipper is aligned with the bottom edge of the back piece. Allow 1/4 inch of the back fabric to extend out past the zipper. Pin in place and sew a seam along the inner edge of the zipper. Unzip the zipper and align the front and back fabric together (right sides facing), pin in place, and sew a 1/2 inch seam along the side and top edges. Turn the fabric right side out, insert the pillow, and zip it up.
Your sweater pillow is now complete!


