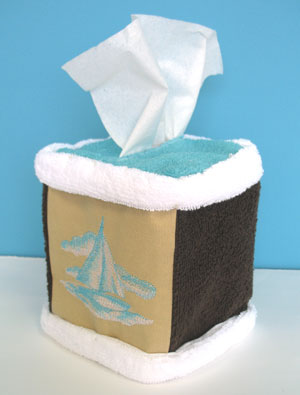
Cover unsightly tissue boxes with a uniquely designed tissue box cozy!
The cover easily fits over square tissue boxes and can be customized with your favorite embroidery designs and colors. This project can also be paired with the with the Cozy Bath Coordinates towel set to make a wonderful gift!
Read below for these free project instructions.
Supplies
Supplies Needed:
**Box of tissues (ours is approximately 4 1/2 inches wide by 5 1/4 inches high by 4 1/4 inches deep)
**4 washcloths in three different colors (approximately 12 1/2 inches wide by 12 1/2 inches high)
**8 inch by 8 inch piece of cotton fabric (for front side, we used lightweight canvas)
**Medium weight cutaway stabilizer
**Temporary spray adhesive
**Air-erase pen or dressmaker's pencil
**Craft knife and cutting pad
**Needle and thread for some hand sewing
Designs used:
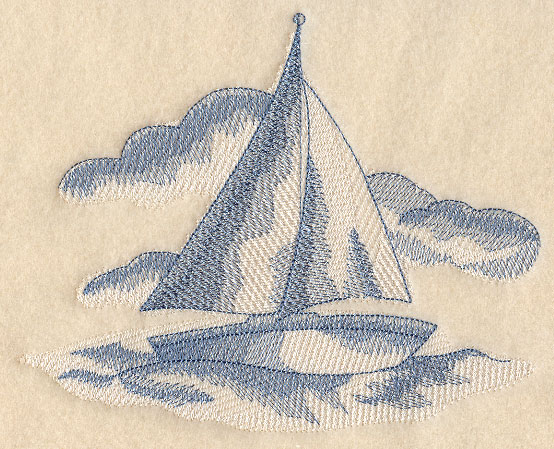
Toile Beach Scene - Sailboat (Small)
These designs are also available in the following design packs:
A Back to the Beach Toile Design Pack - Lg
A Back to the Beach Toile Design Pack - Md
A Back to the Beach Toile Design Pack - Sm
Designs Used
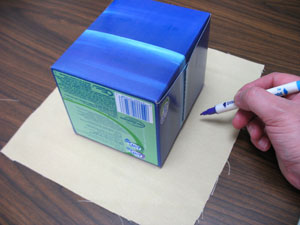
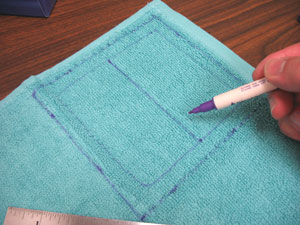
First we will prepare the fabric for the front side of the tissue box. Cut a piece of cotton fabric (we used lightweight canvas) a bit larger than your hoop. Then, lay the box on its side in the center of the piece of fabric and trace the box (using an air-erase pen or dressmaker's pencil).
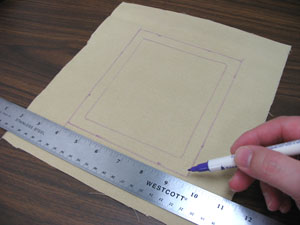
Remove the box and mark out 1/2 inch all the way around the outer edge of the shape you just traced. Then, draw lines to connect the marks - this will be the seam allowance.
Measure and mark the center of each side of the outer shape by measuring and dividing by two. Then, draw lines to connect the center marks - these marks will be used for hooping. Where the lines meet is the exact center of the fabric.
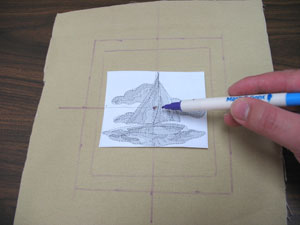
Create a paper template of the design by printing it at full size using embroidery software. If you don't have embroidery software, you can cut a piece of paper the shape and dimensions of the design to help with placement and centering. Poke a hole in the center of the template and align it with the center point on the fabric. Make sure the design fits well within the shape. There should be at least 1/4 inch space between the edges of the design and the edges of the inner shape.
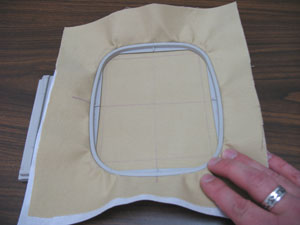
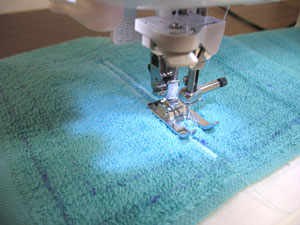
Remove the template and spray a piece of cutaway stabilizer with temporary adhesive and smooth the fabric on top. Hoop the fabric and stabilizer together by aligning the marks on the hoop with the lines on the fabric.
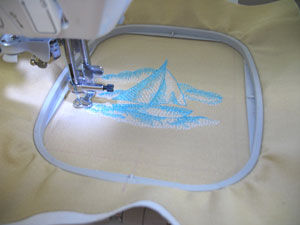
Attach the hoop to the machine and load the design. Move the hoop so that the needle is directly over the center point on the fabric. Embroider the design.
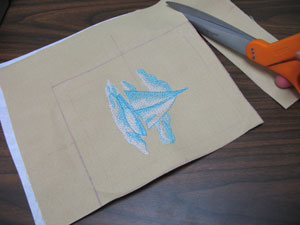
When the design has finished, cut out the shape along the outer lines.
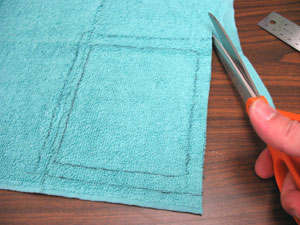
Next, lay one of the washcloths flat. Then, lay the opposite side of the box (the opposite side to what will be the embroidered side) on top of the washcloth and trace the shape. Then, draw a 1/2 inch seam allowance around the shape just as you did earlier. Cut out the shape along the outer lines.
Lay another washcloth flat and trace the remaining two sides of the box on the washcloth. Draw the 1/2 inch seam allowances and cut out the shapes.
Now, to create the top of the cover, trace the top of the box onto a washcloth, add a 1/2 inch seam allowance, and mark the center of two of the sides on the inner shape and draw a line to connect the marks. This line will be used for creating the slot on the top of the cover.
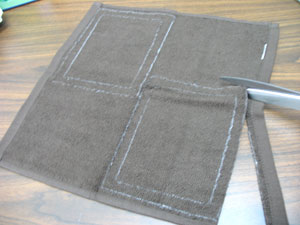
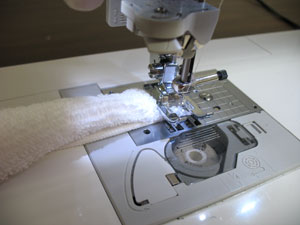
Spray a piece of cutaway stabilizer with adhesive and smooth the fabric on top. Then, sew a zigzag stitch along both sides of the line you just drew leaving about 1/8 inch in between the inner edges of the zigzags (to create a large buttonhole effect) - start and stop about 1/2 inch from the edges of the inner shape.
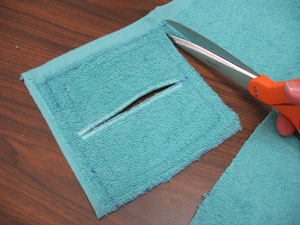
Use a craft knife and cutting pad to cut a slit in the fabric in between the zigzags. Then, cut out the shape along the outer lines.

Lay the top piece flat with the right side facing up. Then, align the top edges of the front side and back side pieces with the corresponding sides of the top piece with the right sides facing. Pin in place and sew a 1/2 inch seam along the pinned edges only. Then, press the back seams open with an iron.
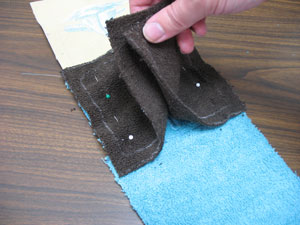
Lay the fabric flat with the right sides facing up. With the right sides facing, align the top edges of the remaining side pieces with the corresponding edges of the top piece. Pin in place and sew a 1/2 inch seam along the pinned edges starting and stopping 1/2 inch from each side of each fabric piece.
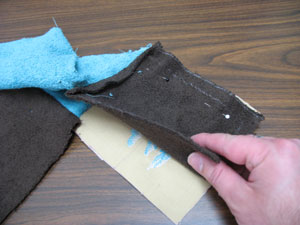
Align the side edges of each side piece together, one at a time, with the right sides facing. Pin in place, and sew a 1/2 inch seam. Turn the cover right side out and press the seams. Then, turn the bottom edge in 1/2 inch to the wrong side and press. Sew a 1/4 inch seam along the entire bottom edge of the cover.
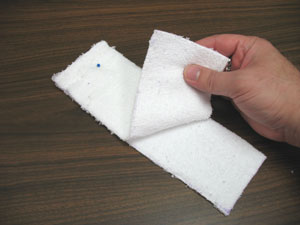
To create the top and bottom trim, measure along the bottom front edge and the side around the corner - add the two measurements together and add one inch for seam allowance (this is the width of the trim pieces). Measure, mark, and cut out four pieces of a washcloth to the width you just determined by 3 inches high (our measurements are 9 1/2 inches wide by 3 inches high). Then, pair up the pieces with the short ends aligned. Pin in place and sew a 1/2 inch seam along the pinned edges.
Next, roll the pieces up lengthwise starting at one of the long edges. Stitch the ends closed using a zigzag stitch. Then, sew a straight stitch at the middle to tack the roll in place.
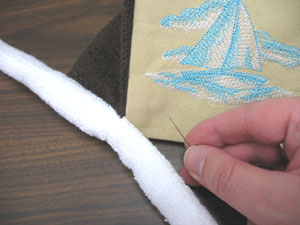
Align the center seam of one of the pieces of trim at one of the bottom corners of the cover and tack in place by hand sewing it with needle and thread. Then, wrap the ends of the trim around the bottom edges of the cover and tack in place. Repeat this process for the top trim. Then, slide the cover over the tissue box, pull the tissue through the slot, and you are done!


