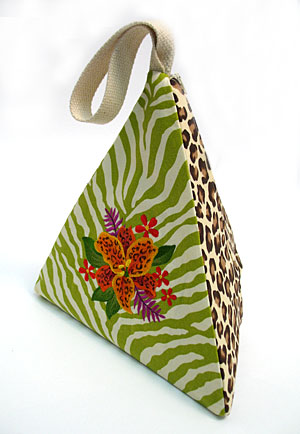
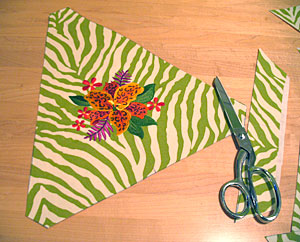
Stash craft supplies in this clever triangle tote, or even use it as a purse! Choose your favorite fabrics and embroidery designs to show off your personal style.
Read below for these free project instructions!
Supplies
Supplies Needed:
**1 yard (total) lightweight canvas (two different prints, 1/2 yard each)
**1/2 yard medium weight iron-on backing or interfacing
**Medium weight cutaway stabilizer
**Temporary spray adhesive
**Air-erase pen or dress maker's pencil
**Large piece of paper or tag board
**12 inch all purpose zipper
**15 inch length of 1 inch wide strapping
**Fabric glue
**Needle and thread for some hand sewing
Designs used:
Leopard Lily Bouquet - Sm
This design is also available in the following design pack:
A Wild Flowers Design Pack - Sm
Finished size:
10 1/2 inches wide x 10 1/2 inches high
Designs Used

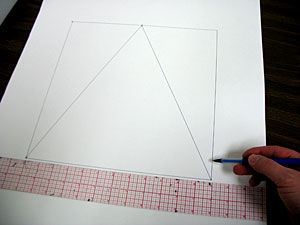
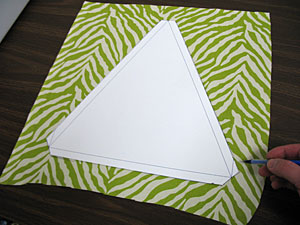
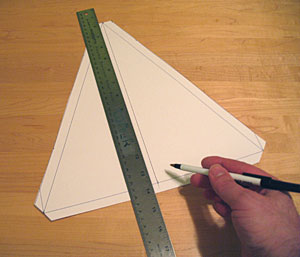
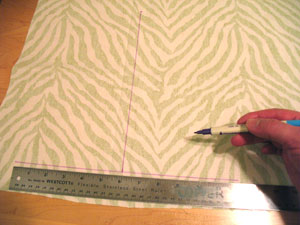
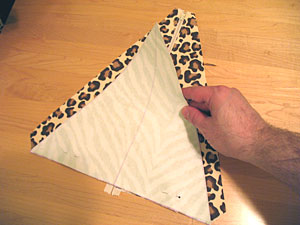
First we will prepare the pattern piece for the sides of the tote. Draw a 12 inch by 12 inch square on a large piece of paper or tag board. Then, mark the center of the top edge of the square by measuring and dividing by two. Draw lines connecting the mark you just made with the two bottom corners, creating a triangle.
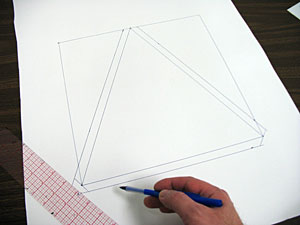
Measure and mark 1/2 inch out from the triangle shape. Draw lines connecting the marks and square off the shape at the two bottom corners.
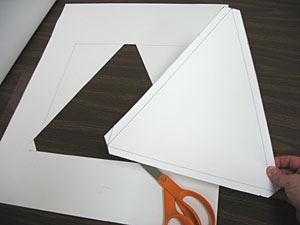
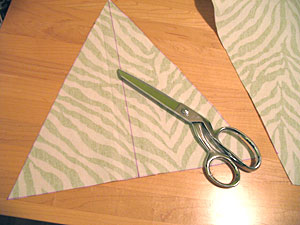
Cut out the shape along the outer lines that you just drew.
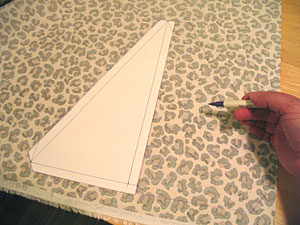
Now we will prepare the fabric for the outer shell of the tote. Lay the pattern piece on top of the fabric and trace the shape - leave a couple of inches excess fabric around the shape.
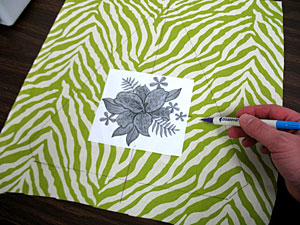
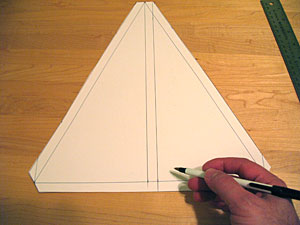
Using an air-erase pen or other marking tool, measure and mark the center top and center bottom of the shape by measuring and dividing by two. Then, draw a line connecting the marks. Create a paper template of the design by printing it at full size using embroidery software. If you don't have embroidery software, you can cut a piece of paper the shape and dimensions of the design to help with placement and centering.
Poke a hole in the center of the template and align it with the line on the shape. Position the design how you would like it and then mark the horizontal axis points. We positioned the design leaving at least 1 1/2 inches between the edges of the design and the edges of the shape.
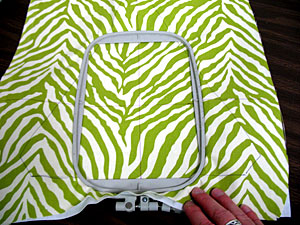
Remove the template and draw a line connecting the horizontal axis points. Then, spray a piece of medium weight cutaway stabilizer with adhesive and smooth the fabric on top. Hoop the fabric and stabilizer together by aligning the marks on the hoop with the lines on the fabric. Attach the hoop to the machine and load the design. Move the hoop so that the needle is aligned with the center point on the fabric. Embroider the design.
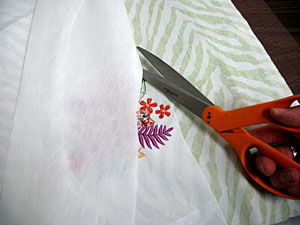
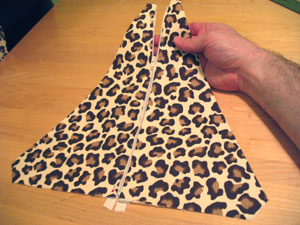
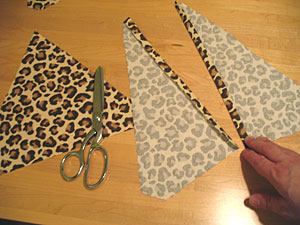
When the design has finished, trim away the excess stabilizer on the backside of the embroidery. Repeat the pattern tracing, hooping, and embroidering process to create another side for the tote (a total of two embroidered side pieces).
Next, add the iron-on backing or interfacing to the back of the embroidered side pieces (follow the instructions on the packaging). Then, cut out the shapes.

Using the pattern piece, trace and cut two pieces of fabric for the sides of the inner lining. We did not add backing or interfacing to any of the inner lining pieces.
Now we will trim the pattern piece to create the front zippered panels. Measure 1/2 inch out along the right side of the vertical center line on the pattern piece.
Draw a line connecting the marks and trim the pattern piece along the line you just drew. Discard the smaller piece.
Trace the shape onto the fabric. Then, flip the shape over and trace it a second time. Cut out the shapes and add backing or interfacing to the backside of the fabric. Fold the inside vertical edges 1/2 inch over to the wrong side and press.
Align the folded inside edges with the sides of the zipper and pin in place.

Sew a 1/8 inch seam along the inside edges of the fabric.
To prepare the bottom of the outer shell, draw a 12 inch line on the fabric. Then, measure and mark the center of this line and draw a 10 1/2 inch line, perpendicular to the first line, up from the mark you just made.
Draw lines from the top of the vertical line you just drew down to the ends of the first line. Cut out the shape and add backing or interfacing to the wrong side of the fabric.
Trace the bottom fabric you just cut onto the inner lining fabric and cut out the shape - this is the bottom piece of the inner lining. Also, cut two more pieces of the inner lining fabric, using the trimmed pattern piece, to prepare the fabric for the front of the inner lining. Then, fold the inside vertical edges 1/2 inch over to the wrong side, press, and sew a 1/4 inch seam along the folded edges only.
Now it is time to assemble the tote! First we will assemble the outer shell - lay the zippered front piece with the right side facing up. Then, align one of the edges of the bottom piece with the front piece, right sides together, and pin in place. Sew a 1/2 inch seam along the pinned edge only.
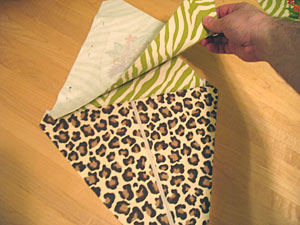
Lay the assembled front and bottom piece right side up and align the bottom edge of one of the side pieces with the one of the remaining sides of the bottom piece, right sides together, and pin in place. Sew a 1/2 inch seam along the pinned edge only.
Lay the assembled bottom, front, and side pieces right side up. Align the bottom edge of the remaining side piece with the remaining side on the bottom piece, right sides together, pin in place, and sew a 1/2 inch seam along the pinned edge.
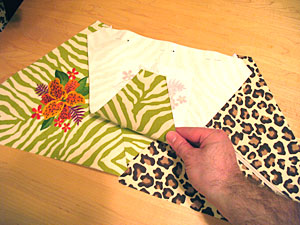
Unzip the zipper, and align all the side edges together, right sides together, pin in place and sew a 1/2 inch seam along each side leaving about one inch open on each top edge.
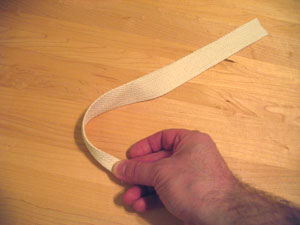
To create the handle, cut a 15 inch length of strapping and fold an end in bringing the edges together.
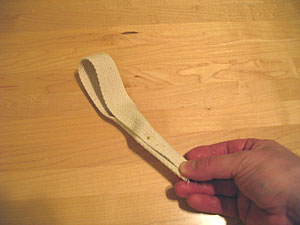
Then, fold the other end in and wrap it around the opposite end. Pin in place and tack the end in place with a few stitches. Insert the end of the handle inside the outer shell (at the top) with about 1/4 inch of excess extending out. Sew the handle in place by continuing the seams along each side of the outer shell. Then, turn the outer shell right side out an press the seams with an iron.

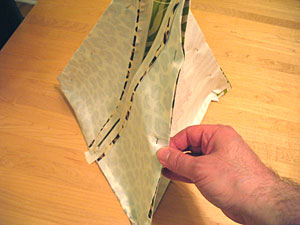
Assemble the inner lining just as you did with the outer shell (the front pieces will be attached to the zipper after the inner lining is assembled). Insert the inner lining inside the outer shell and hand sew the corners in place to secure it.

Align the seamed edges of the front of the inner lining with the inside edges of the zipper and hand sew in place or glue it in place with fabric glue.
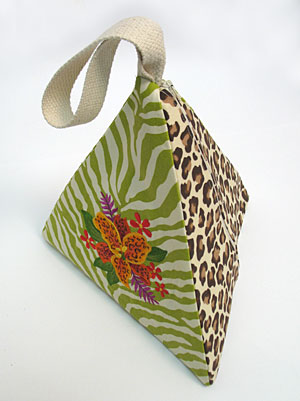
Your tote is complete!


