
First and foremost, this wonderful Walker Bag is very functional, with many pockets to hold everything from tissues and eye glasses to note pad and pen.
Second, it has eye-catching appeal and fabulous style!
It will dress up a walker with someone's favorite colors, cheerful fabrics, and choice of design for a distinctive touch.
Serina designed this handy solution for a customer's mother who uses a walker. And, we thank her for sharing both the idea and instructions.
The finished size for this project is approximately 30 inches wide x 12 inches tall, but it can be easily adjusted to fit any walker.
Supplies
Supplies needed:
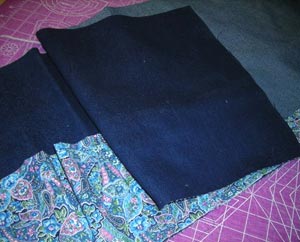
** 1/2 yard of sturdy material (denim)
** 1/2 yard of backing material (cotton)
** 1/2 yard of coordinating material for pockets (cotton paisley)
** Cut-away stabilizer
** Velcro strips
Designs used:
** Curlz Alphabet
Designs Used


Serina's Instructions:
Measure the walker to see what dimensions you will need.
The walker bag will wrap around on three sides, so I measured from the side, around the front, and to the other side.
I determined I needed the finished bag to be about 30 inches wide by 12 inches tall.
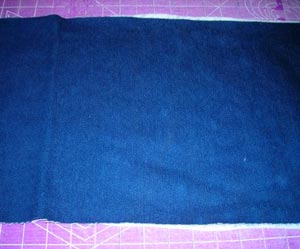
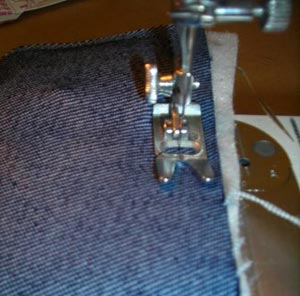
Cut the sturdy fabric, backing, and stabilizer to size.
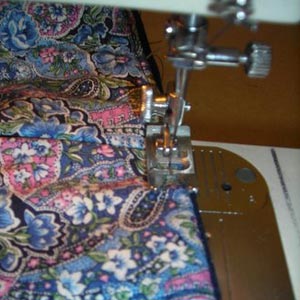
The pocket fabric will need to be cut wider than the main pieces of fabric because you will need the extra fabric for pleats. (I cut the pocket fabric to 48 inches long by 24 inches tall.)
Fold the pocket fabric in half to 12 inches tall by 48 inches wide and top stitch along the fold.
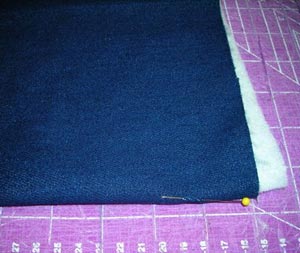
Fold the main piece of fabric in half and pin or mark the center.
Do the same for the pocket fabric to find the center.
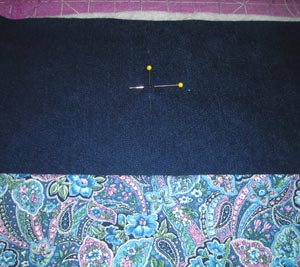
Place the pocket fabric on top of the main fabric to determine how tall you want your pockets to be. Measure from the top of the pocket fabric to the top of the main fabric and divide by two. Mark this point with an air-erase marker, dress maker's chalk, or pins. This is the center point for your embroidery design.
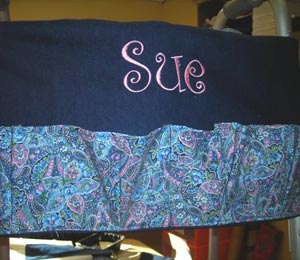
You can use letters to personalize with a name or any design...it's up to you!
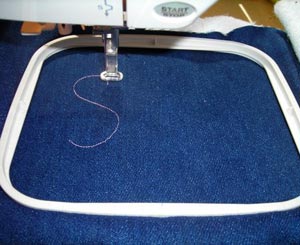
Hoop the fabric with the stabilizer, attach the hoop to the machine and align the needle over the center point on the fabric.
After the design has been embroidered, carefully trim away the excess stabilizer.
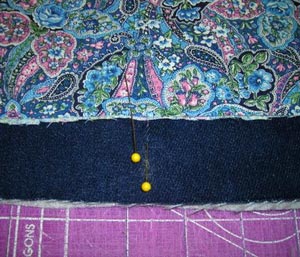
Pin the pocket sleeve in the center and pin both ends together evenly.
Mark every 5 inches on the main piece. Place pockets, adding pleats where necessary. Pin in place.
Sew the pockets down to the main piece so it will be easier to sew the backing fabric on later.

After sewing the pockets down, on the 5 inch mark, you are going to sew a straight line separating the pockets.
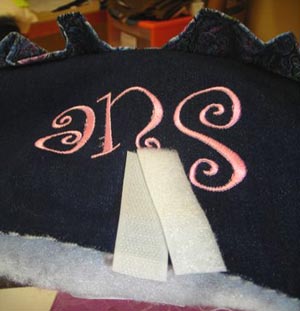
Cut Velcro into 5 inch lengths. Lay the material over the walker to find the right placement. (I have used Velcro above the name, one on each end, and on both sides of the bottom.)
Lay the Velcro strips with the hook and loop sides facing up. Position them so the strips will contact each other when they wrap around the poles and legs of the walker.
Pin the Velcro strips to the top edge of the front panels. Allow about 1/4 inch of the end of the strips to extend past the edge of the fabric.
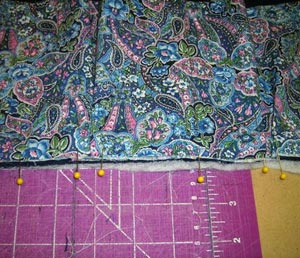
Lay the piece right side up and lay a backing piece on top. Pin in place along the top, bottom, and one side.
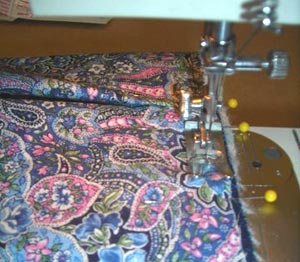
Stitch the pieces together, leaving one side open for tuning.
Turn the piece right side out. Fold the open end in about 1/4 inch and top stitch all the way around the piece.
Hang the bag on the walker by wrapping the Velcro around the posts. Make sure that the Velcro is snug, but not so tight that the walker will not fold up.
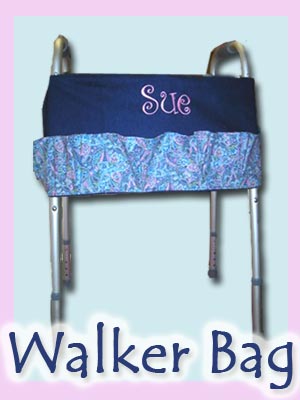
Pockets and embroidery give a plain walker pizzazz and personality!


