70% off - Code: BDAY27 + Gift with $5 Purchase! Click the "Deals" tab for details. 🎂
 70% off - Code: BDAY27 + Gift with $5 Purchase!
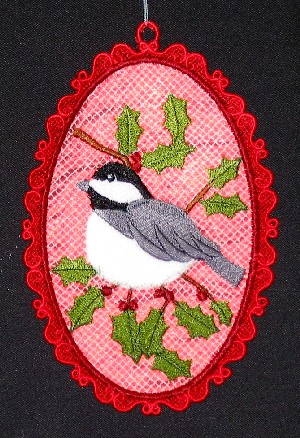
An amazing combination!
Freestanding lace, with a fabric backing peeking through the cross hatching, makes a dramatic combination.
It's a fantastic ornament for a Christmas tree, and they're light enough to include as a small gift in a Christmas card, or to use as a decoration on a larger gift.
Keep in mind for Secret Santa gifts!
Supplies
Supplies needed:
Scraps of lightweight fabric for the ornament's back. (We used metallic lame.)
Templates (make these by printing out dieline from embroidery software, or by embroidering dieline file onto hooped paper with unthreaded needle)
Heavy-weight water-soluble stabilizer
Embroidery Designs from Embroidery Library:
Special Project Notes:
You can use either 40 weight rayon thread or 30 � 35 weight cotton thread.
I use Coats and Clark 30 and 35 weight cotton thread. It's labeled as Mercerized ELS Cotton for Machine Quilting & Crafts; Machine Quilting; or All Purpose. I find Coats and Clark cotton thread at JoAnn's. I've also used Madeira Cotona, which is a 30 weight cotton thread.
I use the 30 - 35 weight cotton thread both in the bobbin (I wind my own bobbins) and in the top (needle).
A note about water-soluble stabilizers and needles:
There are many, many different brands of water-soluble stabilizer available. Some are thin and light, some are fibrous, and some are thick and heavy. It can be confusing to pick the right one for your lace project.
We've digitized and stitched thousands of freestanding lace designs, and have consistently excellent results with Sulky Ultra Solvy (the heavy weight water-soluble stabilizer by Sulky) and Vilene, a fibrous water-soluble stabilizer. We order Vilene from www.pointetopointe.com.
Use a sharp needle (as opposed to an embroidery needle) when embroidering onto water-soluble stabilizer - especially if using the "plastic-looking" kind (such as Sulky Ultra Solvy). An embroidery needle has a larger point, which makes larger holes in the water-soluble stabilizer, leading to tearing and misalignment.
Designs Used
Instructions:
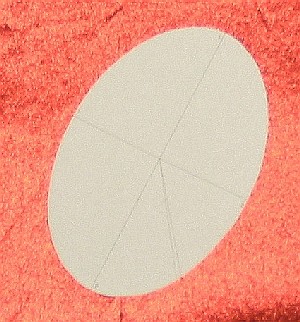
First, begin by making the back piece of the ornament. Take two fabric pieces, and spray the wrong side of one with spray adhesive. Smooth them together.
Using the template (that you have created from the dieline) cut the shape from the fabric.
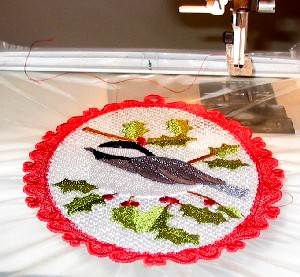
Hoop one layer of heavy-weight water-soluble stabilizer (WSS). Embroider the design directly onto the WSS. On the color change sheet for the design you'll note a line that says, "dieline." Stop the machine right after this color stop. The next step is to add the back piece.
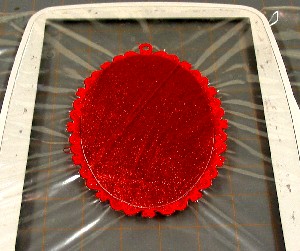
Remove the hoop from your machine, but do not unhoop the stabilizer.
Lightly spray the edges of one side of the back fabric piece. Place the back fabric piece onto the backside of the hooped embroidery. Place the fabric inside of the sewn dieline. Turn the hoop right side up, and press the back fabric to the back of the embroidery.
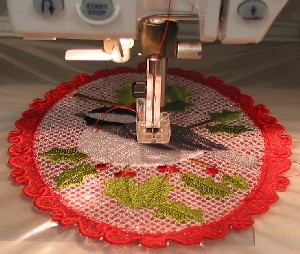
Continue embroidering until finished. The next part of the design that will embroider is the tack down stitch, or zig-zag stitch, that attaches the back fabric to the lace ornament. Then, the outer border will sew, and the loop on top.
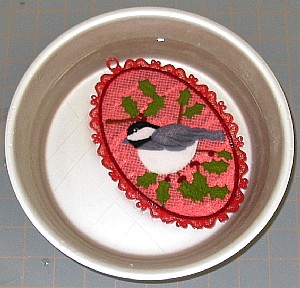
Next, soak the piece in water to dissolve the WSS. Allow the piece to dry flat. Press if desired.

Tie a string or cord through the top loop for hanging on the tree, or use a hook on a suction cup to hang it in a window.
Try it with different fabrics for the back to make the lace sparkle and shine. Experiment with translucent organza, and watch the winter sun stream through the window, making the ornament's colors dance in your home. It will look fantastic!


