
We were so inspired by Antonia's wonderful towels featured in the Stitchers Showcase, we had to make one of our own! Designed to hang over a stove handle or towel rack, this fancy dancy towel is an outstanding decoration for your kitchen, and an absolutely terrific idea for a hostess gift.
Choose a pretty fabric for the top, a nice towel for the "skirt," and your favorite embroidery designs to make it complete, and you'll have a unique towel sure to be a crowd pleaser. The skirt even has pleats!
Read on for instructions to make one of your own!
Supplies
Supplies Needed:
**One dish towel (or terry cloth towel. Mine is 18 1/2" wide by 28" high)
**18" by 18" piece of fabric (for top -- I used quilter's cotton)
**Small piece of fabric (for pocket -- I used quilter's cotton)
**Medium weight cutaway stabilizer
**Temporary spray adhesive
**Air-erase pen
**2 yards - 3/4" to 1" wide ribbon (for ties and trim)
**Scotch tape
**Fabric glue or needle and thread for some hand sewing
Designs used:
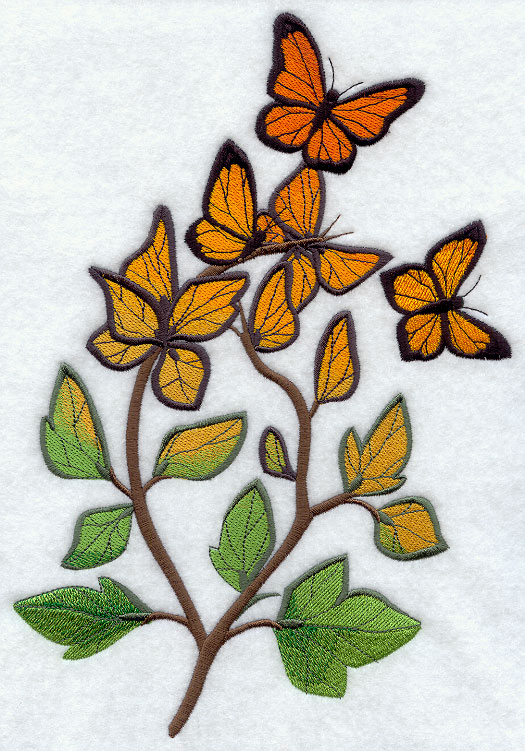
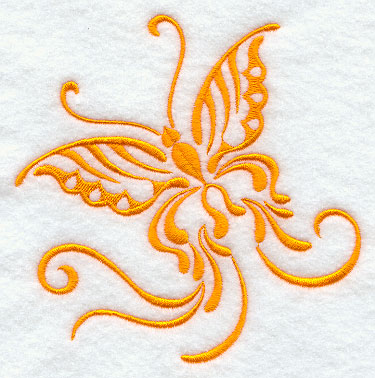
I used the small size of the Butterfly Glow 1 design from the Nature's Beauty Design Pack and the small size of the Butterfly Essence design from the In the Garden Design Pack.
Designs from the Jacobean Hibiscus Design Pack would also be lovely on a fancy dancy towel.
Finished size:
18" wide (at the bottom) by 20 1/2" high
Designs Used
First, I will prepare the bottom section. To do this, first fold the towel in half lengthwise (short ends aligned). Press the fold with an iron, and cut the towel in half. Then, lay one half of the towel flat right side facing up and with the raw edge at the top.
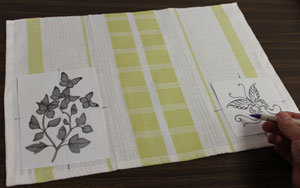
Create paper templates of the designs by printing them at full size using embroidery software. Arrange the templates on the towel how you want them. I positioned both designs in the lower corners of the towel with the outer edges of the designs about 1 1/2" from the edges of the towel.
Keeping the designs in the lower corners will help them to be visible after the towel is pleated later on. Next, using an air-erase pen or other marking tool, poke holes in the center of the templates and mark the fabric. Also, mark the horizontal and vertical axis points.
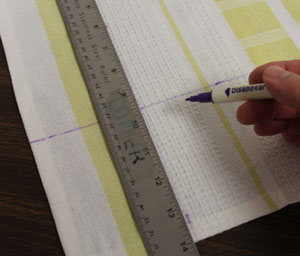
Remove the templates and draw lines connecting the marks.
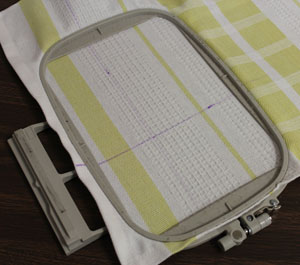
Spray a piece of medium-weight cutaway stabilizer with temporary adhesive and smooth the fabric on top. Hoop the fabric and stabilizer together by aligning the marks on the hoop with the lines on the fabric. If you are embroidering on terry cloth, we suggest adding a layer of lightweight water soluble stabilizer on top of the fabric. The stabilizer helps to prevent the stitches from sinking into the fabric.
Click here for more information on embroidering on terry cloth.
Attach the hoop to the machine and load the design. Move the hoop so that the needle is directly over the center point on the fabric. Embroider the design. Repeat the hooping and embroidering process for the remaining design(s).
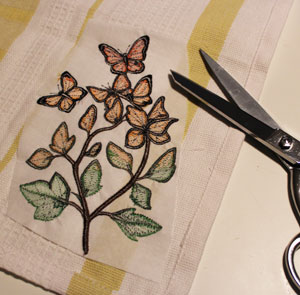
When the designs have finished, trim away the excess stabilizer on the backside of the embroidery.
If you prefer, you can finish off the back by aligning the other half piece of towel on the backside of the towel, wrong sides together, pin in place, and sew a 1/4" seam along the entire outer edge. Doing this will, of course, make the towel section twice as thick which will make it somewhat stiff when draping later on.
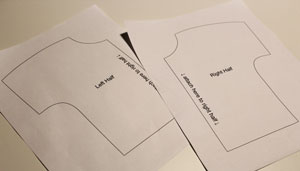
Next I will prepare the top section. Click on the link above to download the project pattern. The patterns will be in two parts which will print on two 8 1/2" by 11" pieces of paper.
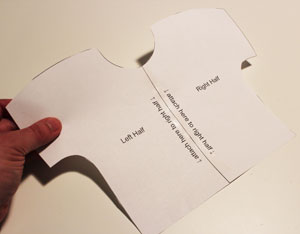
Cut out the patterns and tape them together by following the instructions on the patterns.
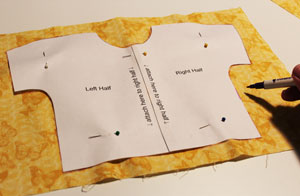
Pin the pattern piece to the fabric (I am using quilter's cotton), trace the shape, and cut out the shape. Repeat this process for a total of two pieces, one for the front and one for the back.
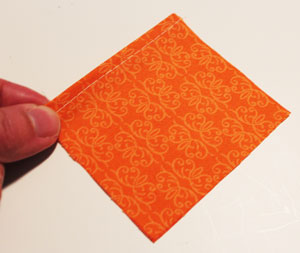
To prepare the front pocket, cut a piece of fabric to 3 1/2" wide by 4" high. Fold the top edge over 1/4" to the wrong side and press. Fold the top edge over another 1/4" to the wrong side and press. Then, sew a 1/8" seam along the top edge only.
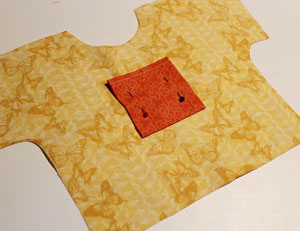
Fold the side and bottom edges over 1/2" to the wrong side and press. Then, place the pocket about 1 1/2" down from the center of the collar on the front fabric piece. Pin in place and sew a 1/4" seam along the side and bottom edges only.
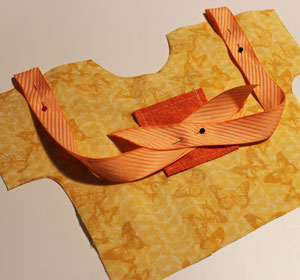
Cut two pieces of ribbon to 22" long. Fold the ribbon in half by bringing the ends together. Place the folded ends in the center of each sleeve along the top edge with the ribbon extending out about 1/4" past the outer edge of the fabric. Pin in place. Gather the ribbon and pin it in the center on top of the pocket so that it will not be sewn over later on.
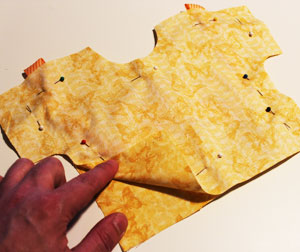
Align the back piece with the front/ribbon piece, pin in place, and sew a 1/4" seam along the side and top edges only. Leave the bottom edge open for turning. Turn the fabric right side out, press the seams, and fold the fabric of the opening in 1/2" to the wrong side and press.
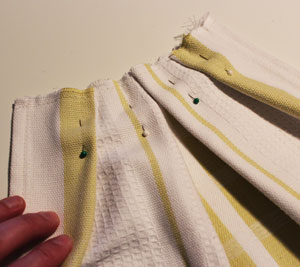
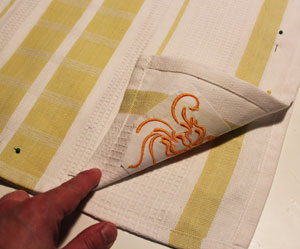
On the bottom section, add four 1 1/4" pleats across the top edge (the top edge should be 8" wide after the pleats have been added). I folded two pleats on each side, folding them in towards the center of the towel. Pin the pleats in place and tack them in place by sewing a 1/4" seam along the top edge.
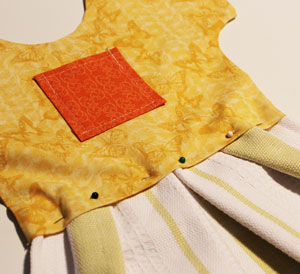
Insert about 1/2" the top of the bottom section in between the layers of the bottom of the top section. Pin in place and sew a 1/4" seam along the folded edge of the top section and top stitch a 1/8" seam along the side and top edges of the top section only.
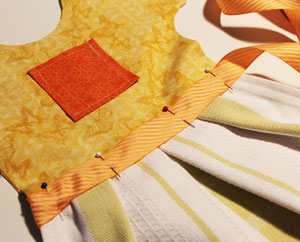
To add the ribbon trim at the "waist," wrap the ribbon around one side and pin it in place across the front. Then, with the excess ribbon still attached, sew the ribbon in place by sewing a 1/8" seam along the entire outer edges
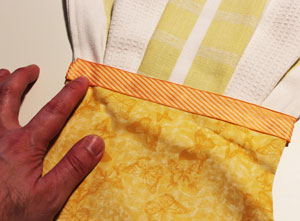
Wrap the ribbon around to the back, cut it to fit leaving about 1/2" excess at the end. Fold the end over and glue the ribbon in place with fabric glue, or tack the ribbon in place by hand sewing it with needle and thread.
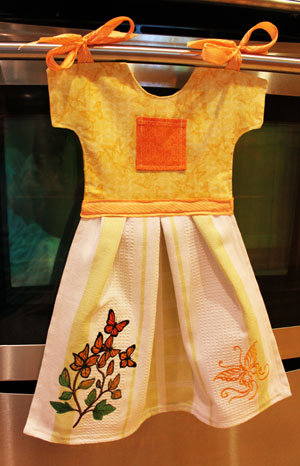
Make your kitchen fancy dancy with this fun and decorative towel. Kids will love it, and adults will, too!


