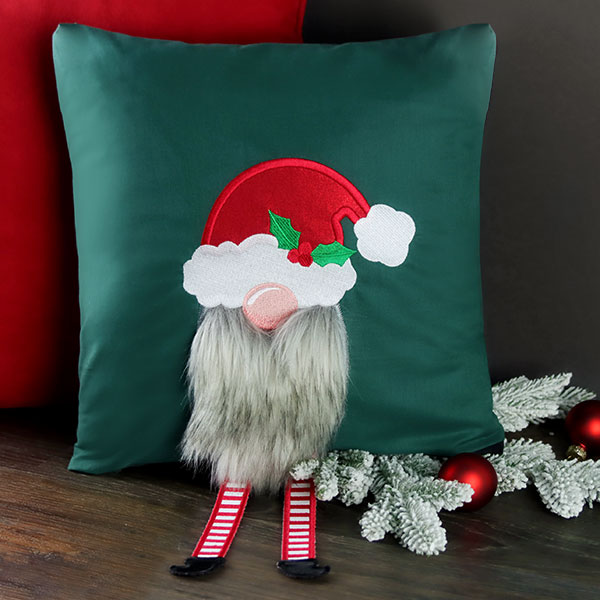
Make your own long-legged gnome friend with a faux fur applique gnome and in-the-hoop legs. Follow along with the helpful how-to instructions below to learn more!
Supplies
- Quilters cotton
- Faux Fur
- Cutaway stabilizer
- Water-soluble stabilizer
- Temporary spray adhesive
- Embroidery thread
Tools
- Craft knife
- Scissors
- Hand sewing needle
- Hot glue gun
Designs Used
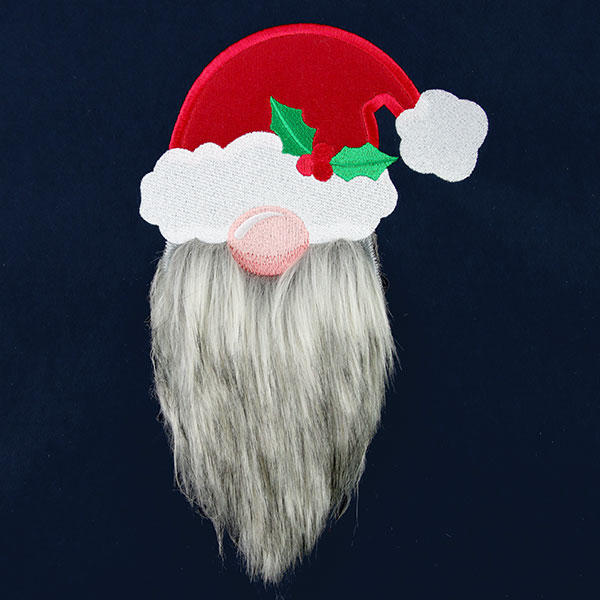
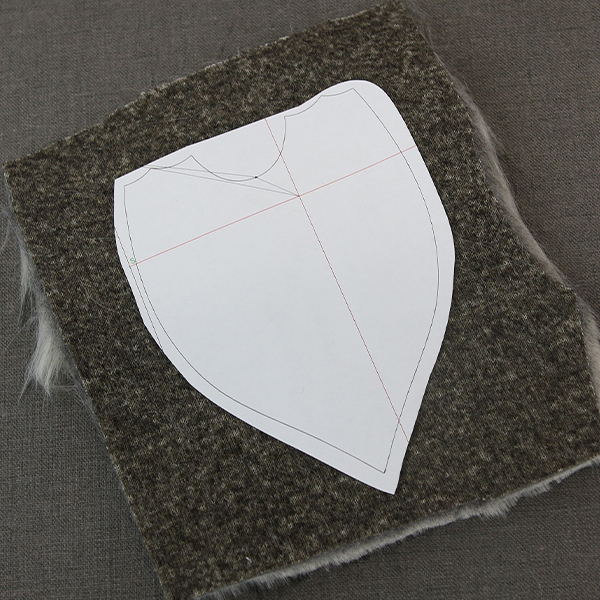
For the faux fur fabric pieces, spray the back side of the printed back piece dieline with temporary adhesive, and smooth it onto the wrong side of the faux fur.
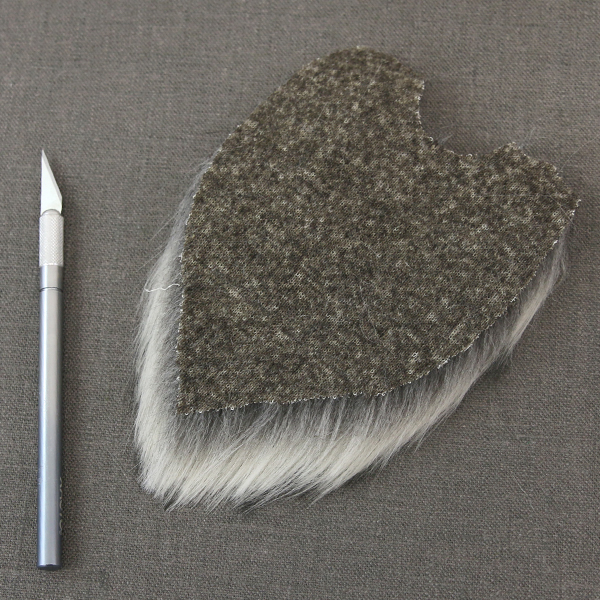
With a craft knife, carefully cut out the faux fur along the dieline. Only cut through the fabric backing; do not cut the actual fur. Using a craft knife rather than scissors will help keep the fur from becoming blunt and choppy.
Keep the direction of the fur in mind when cutting the fabric piece. In this demonstration, since the faux fur is being used as a beard for the gnome, the faux fur should point downward.

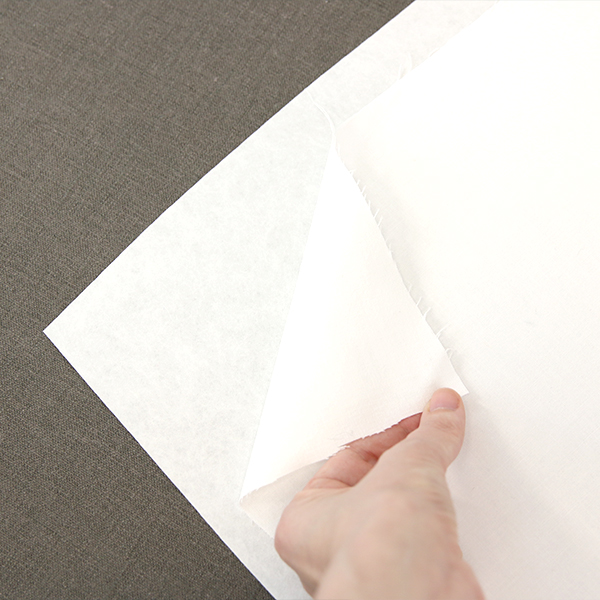
Next, spray the back of all the non-fur paper dielines with temporary spray adhesive. Then smooth them onto the right side of the appropriate fabrics.
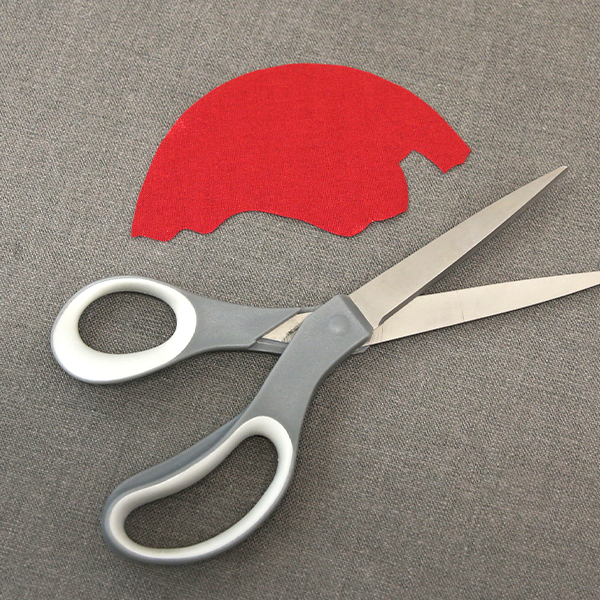
Cut out your fabric around the placed dieline.
Spray the wrong side of the fabric that you've chosen for your finished project with temporary spray adhesive. Smooth it on top of a piece of cutaway stabilizer.
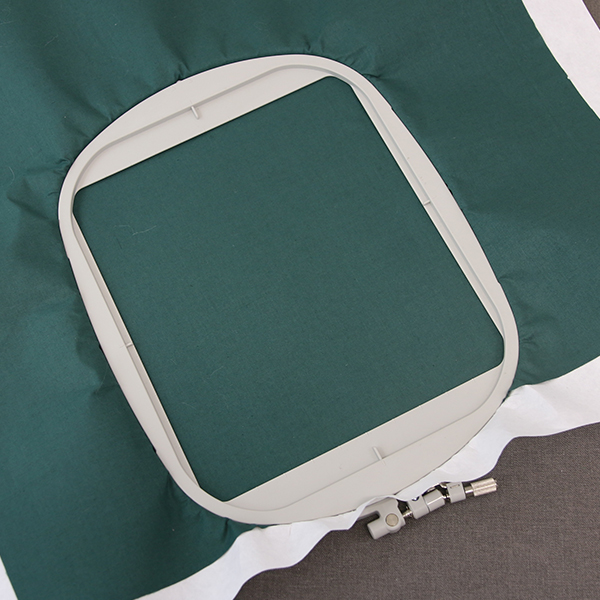
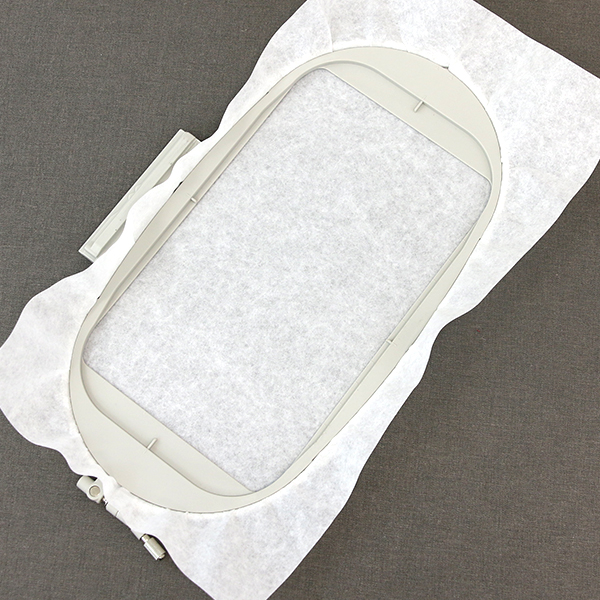
Hoop the cotton fabric and cutaway stabilizer together.
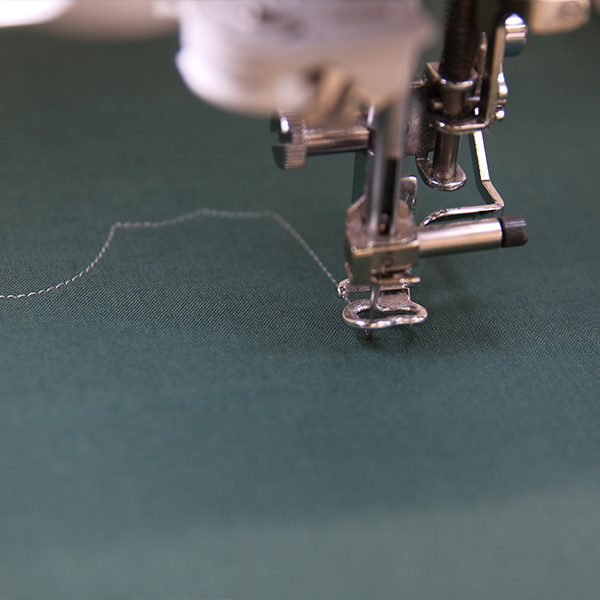
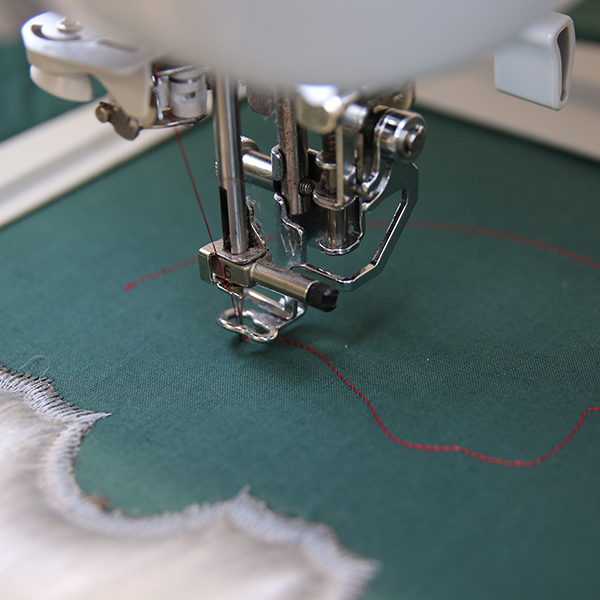
Attach the hoop onto the machine and load the embroidery file (not the dieline files). Embroider the design. The first thing to embroider will be a dieline (or outline stitch). This marks the area on the stabilizer and fabric where the fabric will be placed.

After the dieline has sewn, remove the hoop from the machine, but do not unhoop the stabilizer. Spray the wrong side of the first applique fabric piece with temporary spray adhesive. Then place the faux fur within the sewn dieline.

Once the fur is placed within the dieline, smooth the fur inward from the edges toward the center of the piece. Then take water-soluble stabilizer and tape it over the fur piece. This will keep the embroidery foot from getting tangled in the fur.
Place the hoop back onto the machine and embroider the tackdown for the previously placed fabric piece. A tackdown holds the fabric piece in place for the remainder of the design.
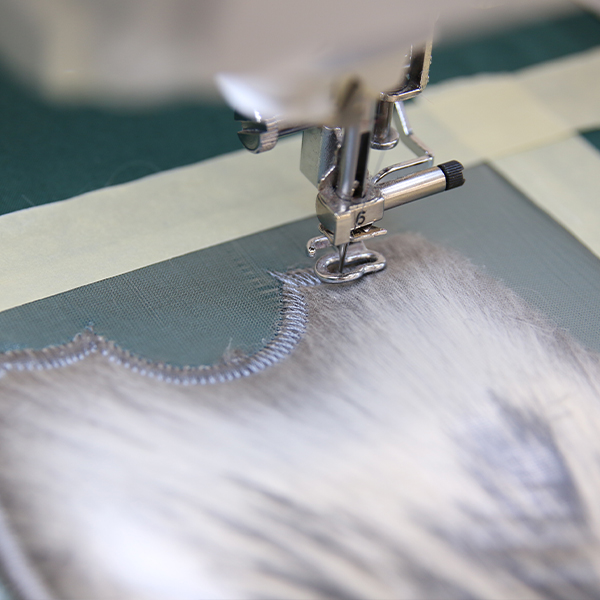
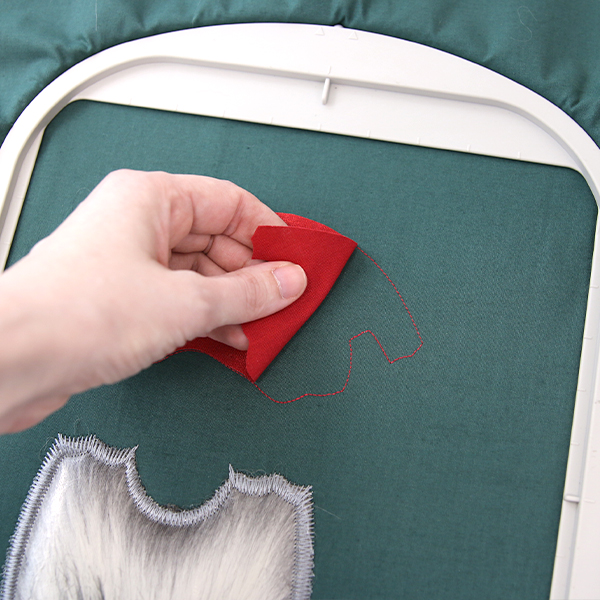
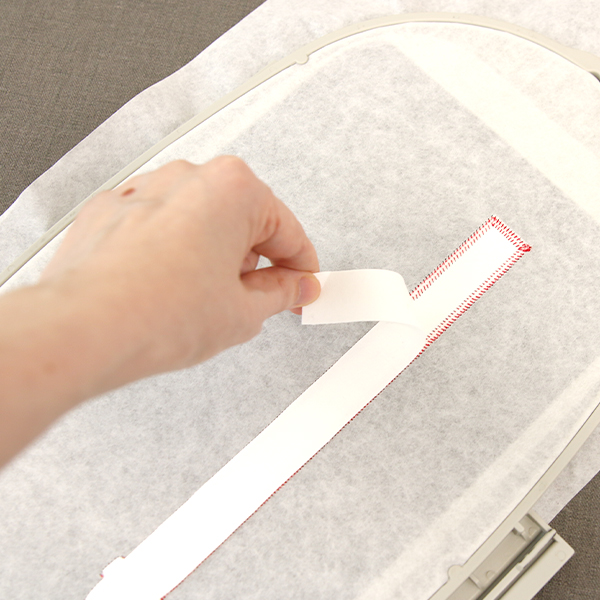
Remove the excess water-soluble stabilizer from around the outside of the faux fur. As there are still some details that will need to be sewed out over the faux fur, keep what’s left of the water-soluble stabilizer in the center to prevent the presser foot from getting tangled.
Follow the color change sheet and embroider the next dieline.
Repeat to remove the hoop from the machine. Then spray the wrong side of the next applique fabric piece, and place it inside the sewn dieline.

Embroider the tackdown and finishing seams steps.
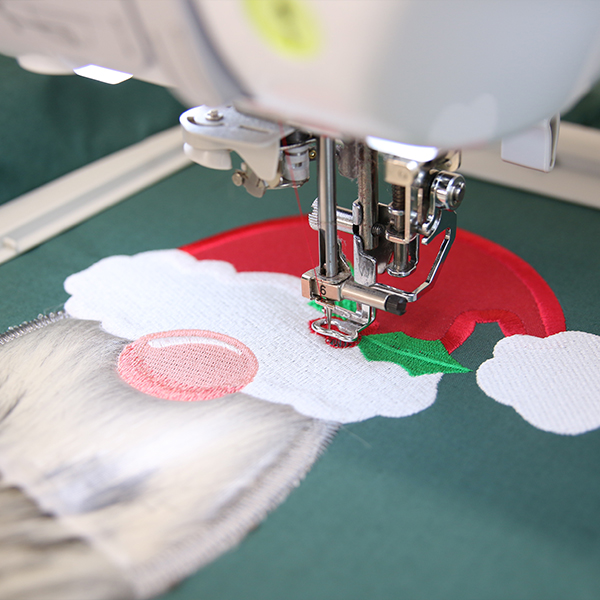
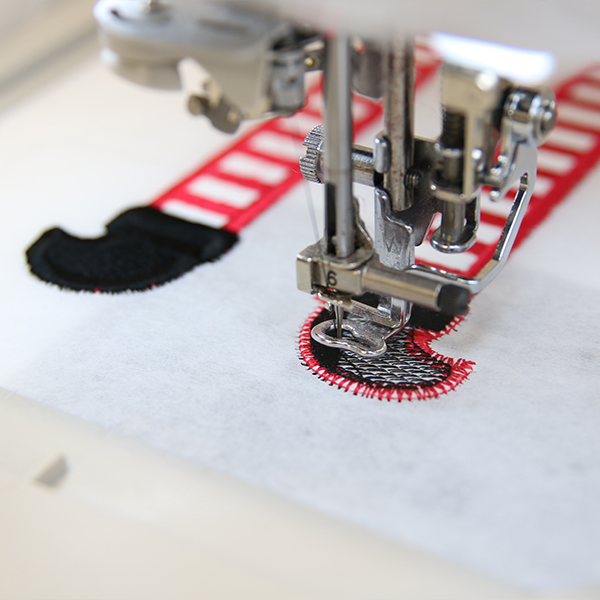
Continue to sew out the inner details.
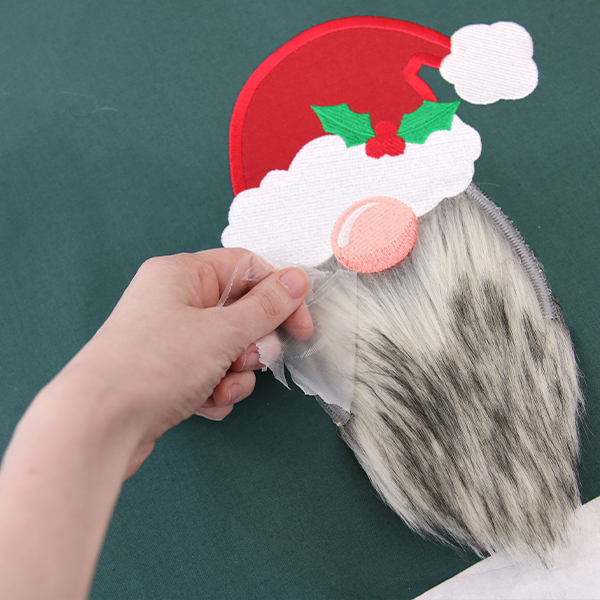
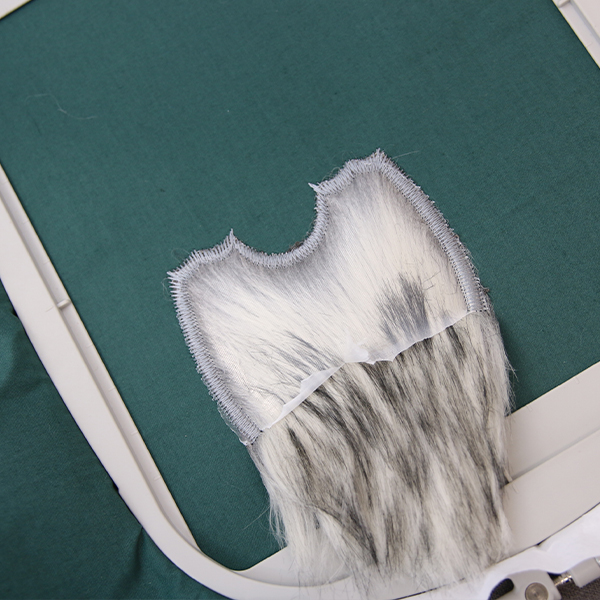
When the tackdown and inner details are done, remove the water-soluble stabilizer from on top of the applique piece.
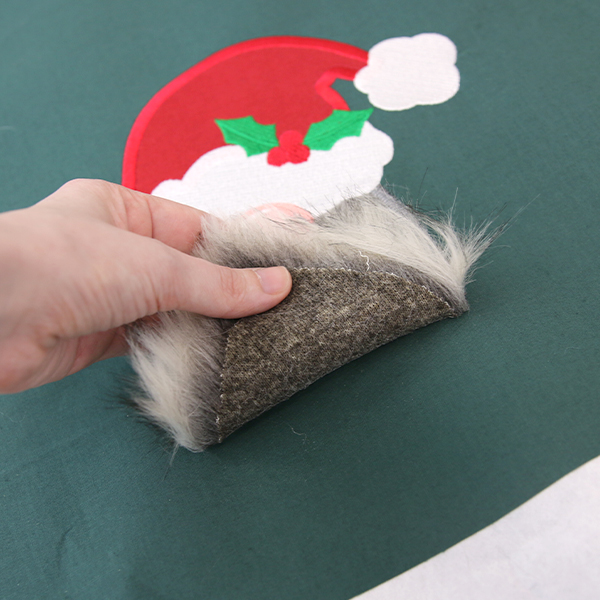
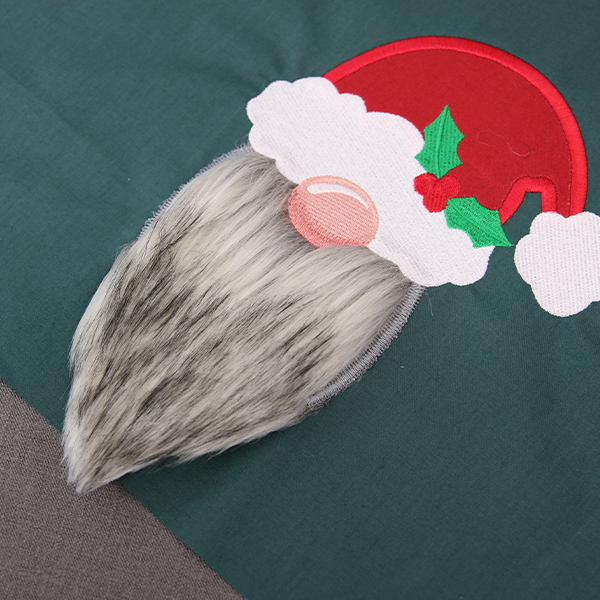
In some designs the tack down step will intentionally leave openings along one side of the fur. In this design, the opening is left along the bottom, so the fur remains free and looks more like a beard.
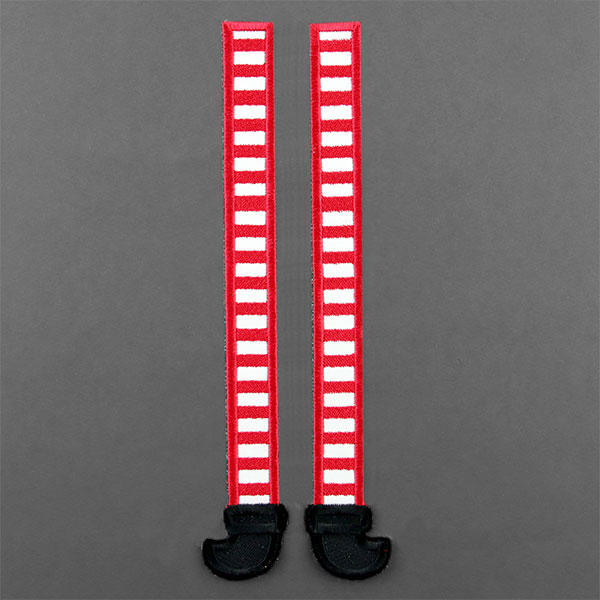
To make the legs, spray the wrong side of your quilter's cotton with temporary spray adhesive and smooth over a piece of cutway stabilizer.
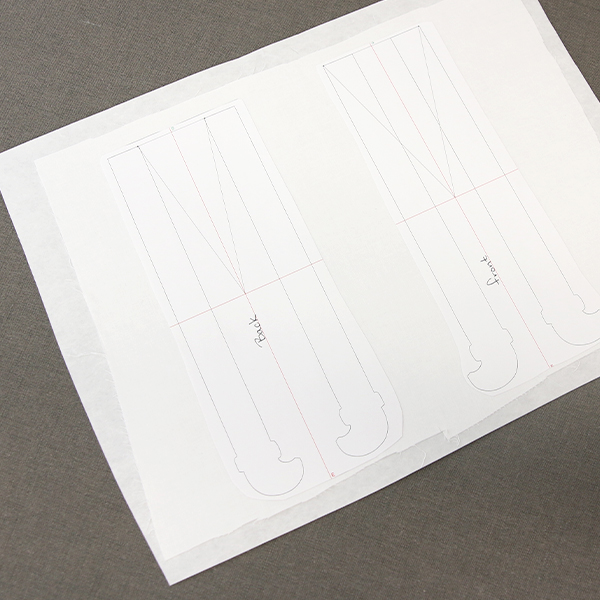
The spray the wrong side of paper dieline pieces with temporary spray adhesive, and smooth them onto the right side of the fabric. Both the front and back pieces of the legs will need cut away stabilizer.
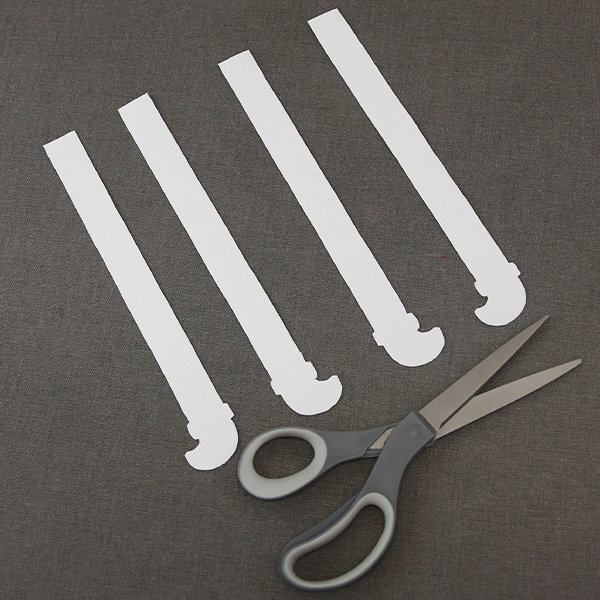
Cut the dieline shapes out of the adhered fabric and cutaway stabilizer. Remove the paper dielines.
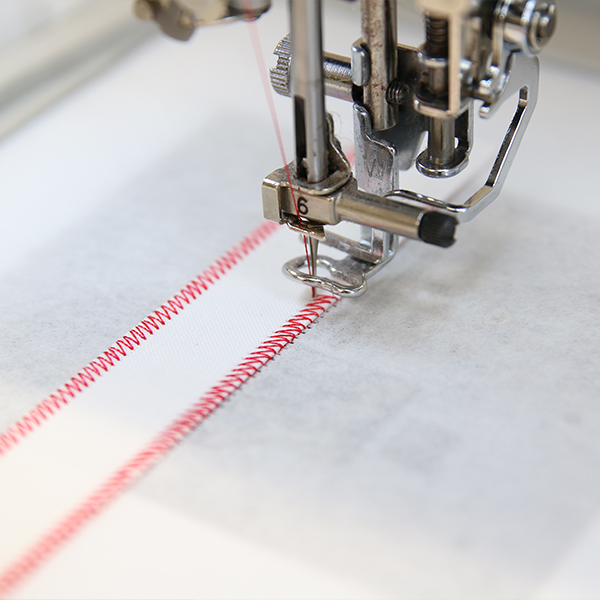
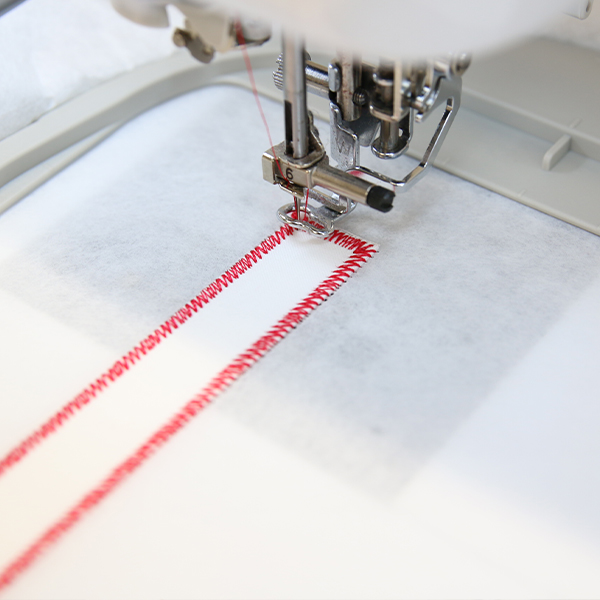
Hoop a piece of tear-away stabilizer firmly. Make sure it is nice and tight with no wrinkles.
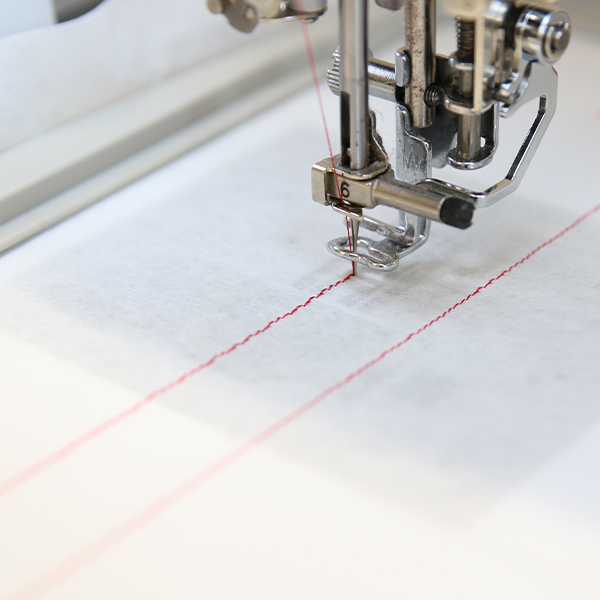
Attach the hoop onto the machine and load the first embroidery file (not the dieline files). Use a 75/11 sharp sewing needle instead of an embroidery needle. The sharp sewing needle has a finer point, and it will make smaller perforations in the stabilizer. Embroider the design.

After the dieline has been sewn, remove the hoop from the machine, but do not unhoop the stabilizer. Spray the stabilizer side of the front fabric piece with temporary adhesive. Smooth the fabric piece onto the stabilizer inside the sewn dieline.
Place the hoop back onto the machine and embroider the tackdown for the front fabric piece.
Place the back fabric piece.
Sew the back fabric piece tackdown step.
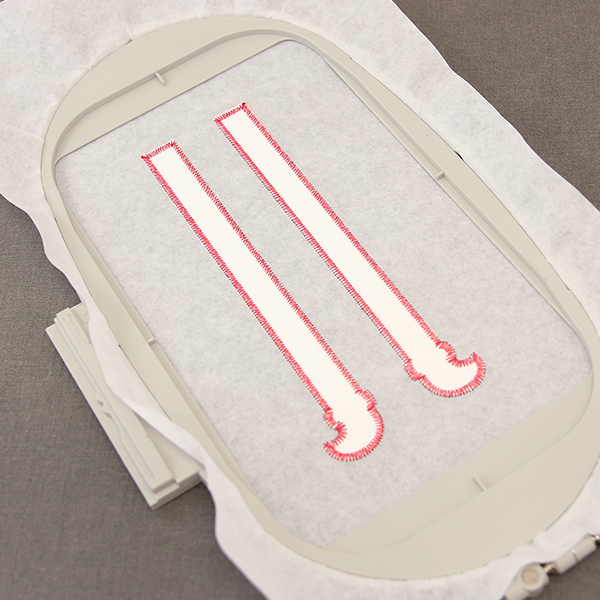
Repeat the above process for the other leg.

Since the next steps will be seen from the front and back, we recommend matching the bobbin thread with the top needle thread.
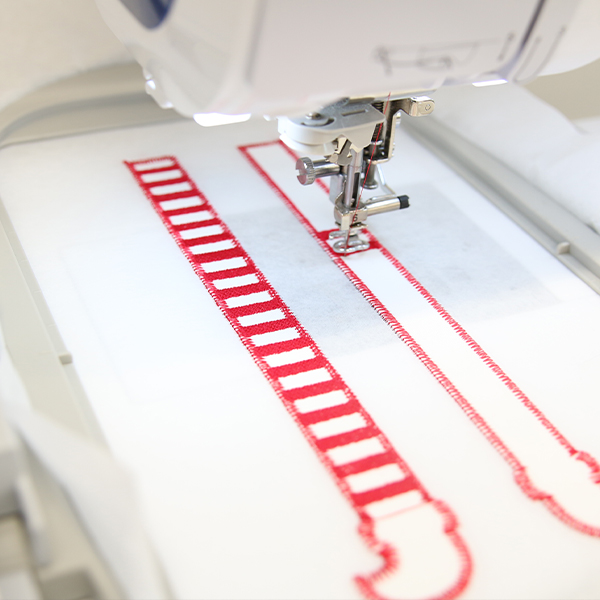
Begin to sew out the inner details. Match the bobbin for each color.
Continue to match the bobbin and sew out the design.
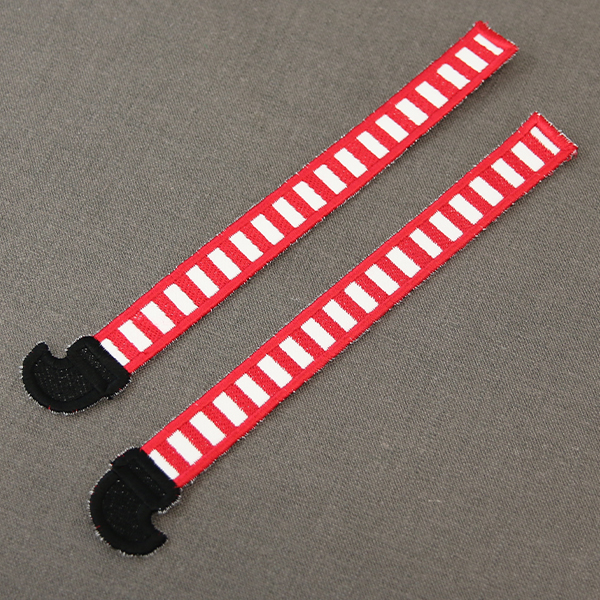
Remove the legs from the stabilizer.
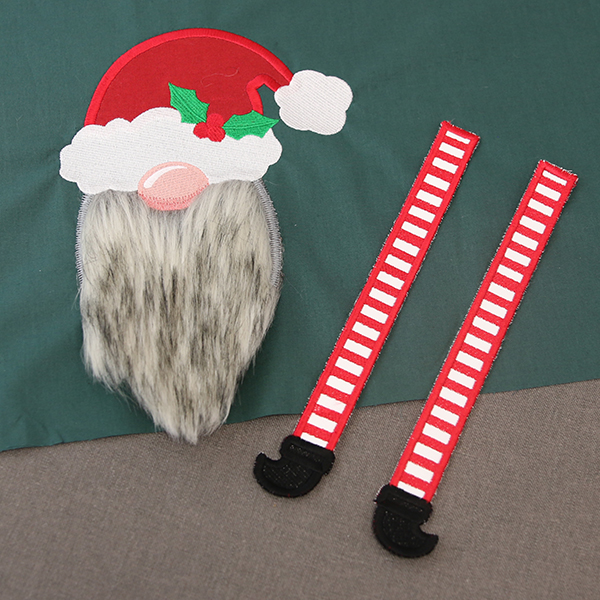
In this tutorial, we're showing how to utilize the freestanding gnome legs with the fuzzy beard gnome applique to make a single fun project.
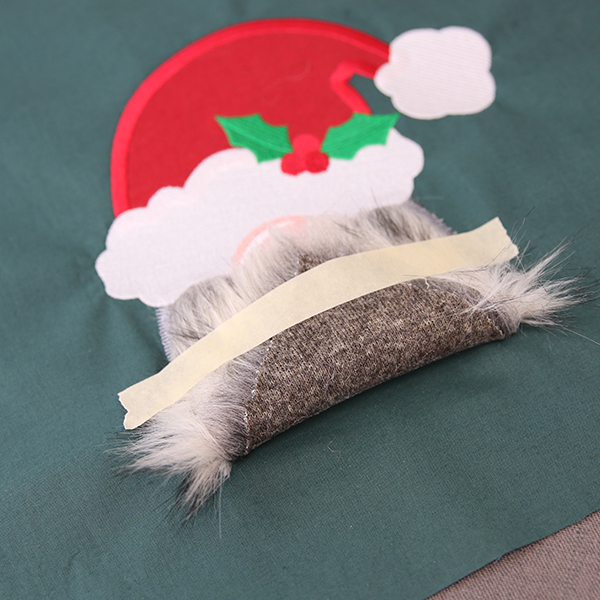
Use masking tape to keep the beard out of the way while attaching legs.
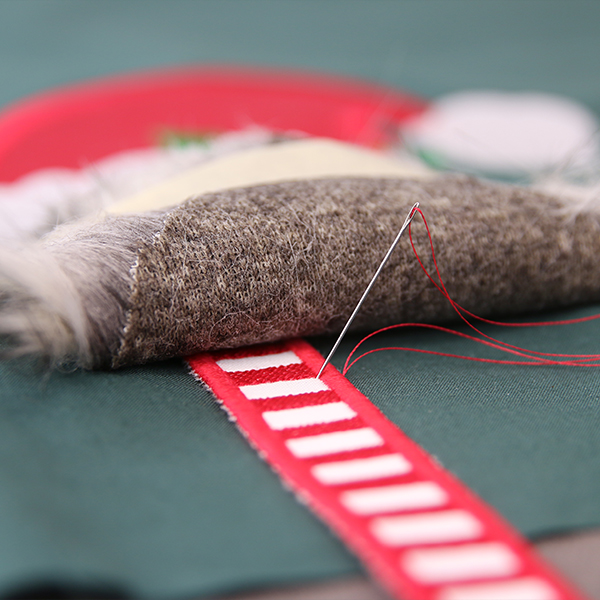
You can choose to either sew the legs in place or use hot glue. In this tutorial we'll be using hot glue.
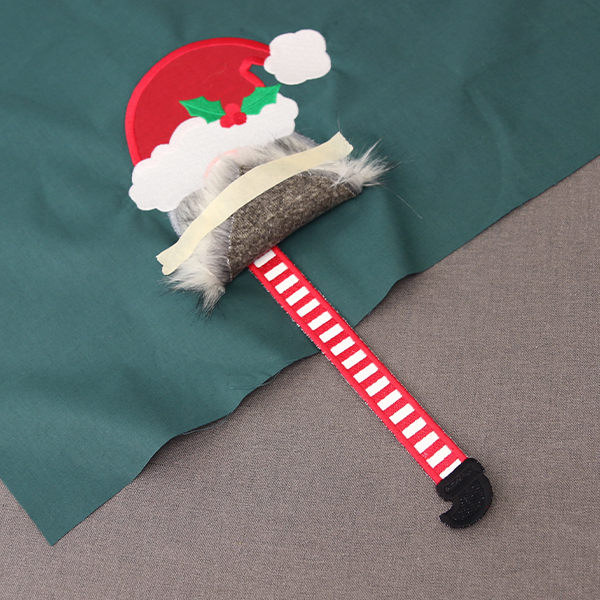
First, determine the length of the legs you'd like. This will vary from project to project. The best effect is achieved when the tops of the legs are hidden under the open-ended applique.
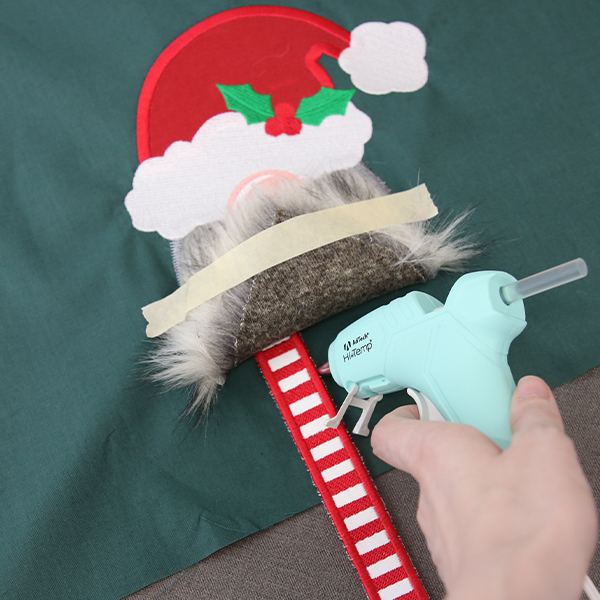
Glue or sew the first leg in place after determining the length you'd like.
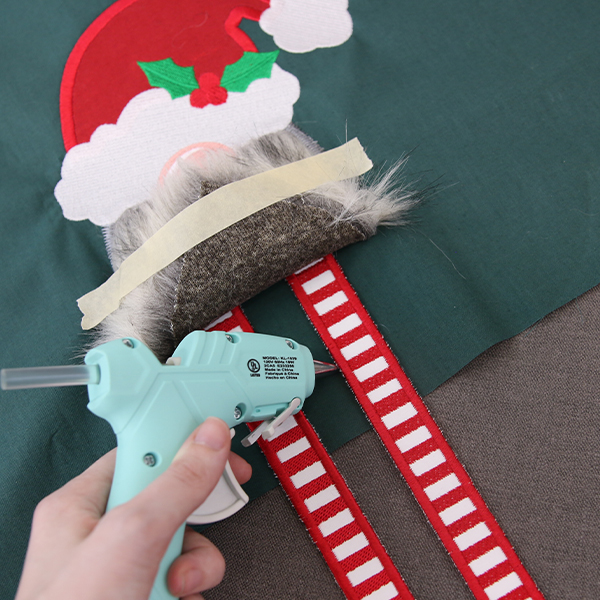
Repeat to attach the other leg in place.
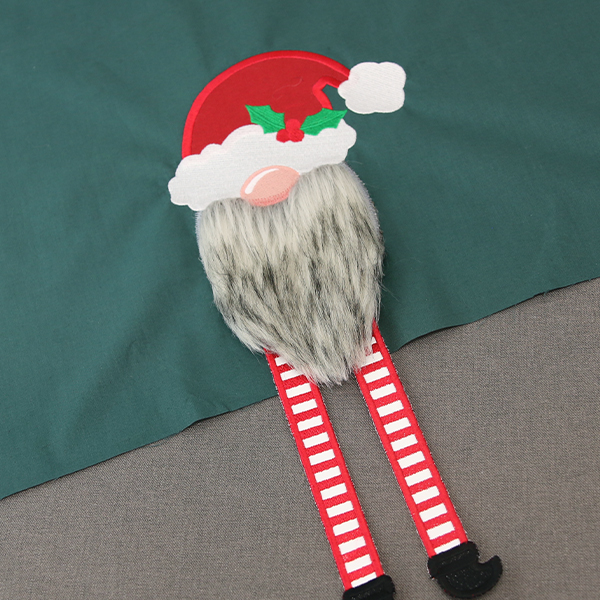
After the legs have been attached, remove the masking tape. Your faux fabric long-legged gnome is now ready to be made into a project!


