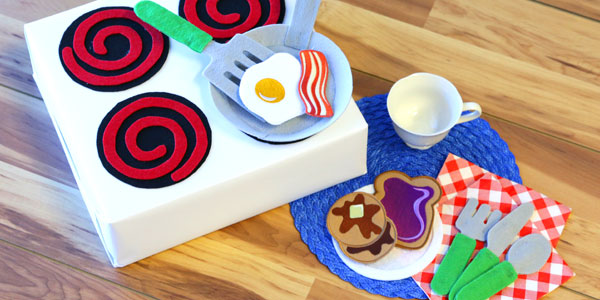
Serve up delicious in-the-hoop play food with a tasty felt kitchen set! Complete with a stovetop, frying pan, plate, and utensils, this do-it-yourself play set is the perfect gift for any kiddo.
Supplies
- Hot glue gun or hand sewing supplies
- Air-erase pen or marking chalk
- Craft knife
- Box
- Paper for wrapping
- Wooden craft sticks
- 9" x 12" sheets of stiff crafting felt in various colors
Designs Used
For 5" x 7" size, you'll need 4 sheets of red, 4 sheets of black, 3 sheets of grey, 1 sheet of green, and 2 sheets of white felt.
For the 4" x 4" size, you'll need 2 sheets of red, 2 sheets of black, 2 sheets of grey, 1 sheet of green, and 1 sheet of white felt.
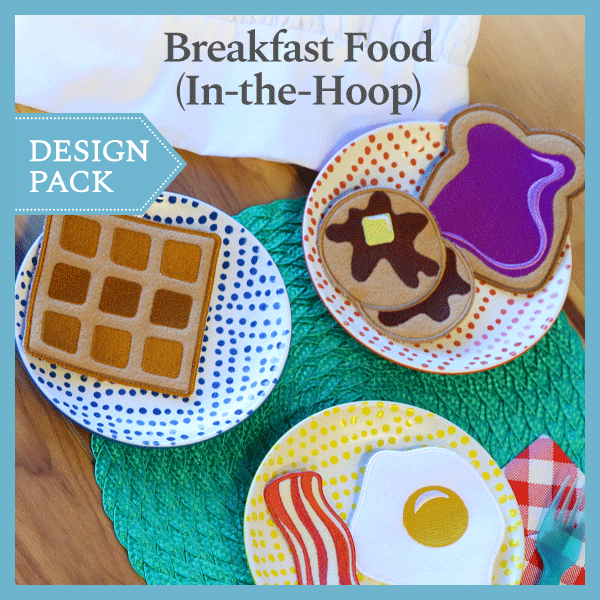
This felt kitchen set is made to coordinate with the Play Food, In-the-Hoop designs.
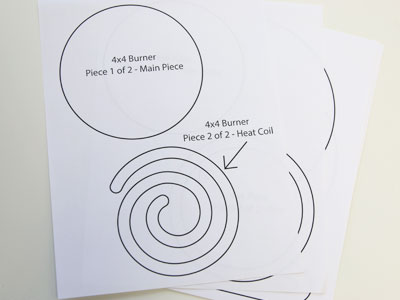
To get started, choose which size of play set you'd like to make and print the PDF of the pattern pieces. Both patterns are included in the link above.
For each set there are fourteen pattern pieces that will print on 8 1/2" x 11 pieces of paper. The 5x7 will have eight printed pages, and the 4x4 will have six.
Cut out the two paper pattern pieces for the burners.

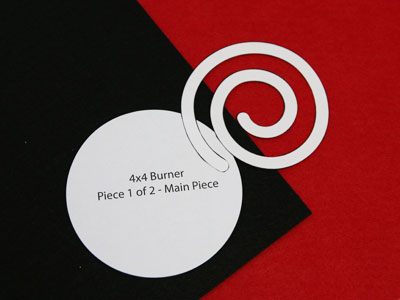
Trace the paper pattern pieces onto felt using an air-erase or chalk marking pen, and cut out the shapes.
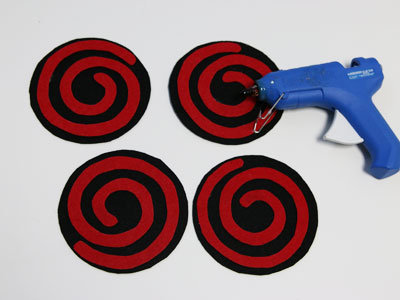
Glue the heat coil onto the main piece. Repeat to make as many burners as desired.
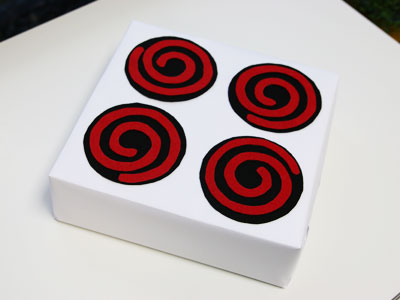
Wrap a box in white craft paper, and glue the burners on top to create the stove.
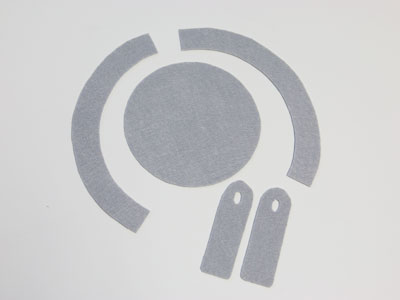
To make the frying pan, cut out the paper pattern pieces and trace them onto the grey felt.
Then cut out the shapes. Make sure to cut two handle pieces.
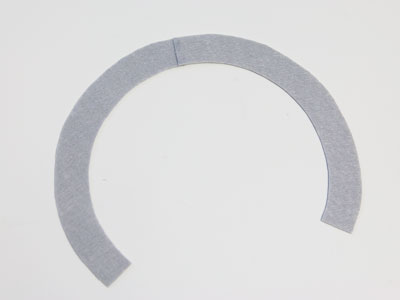
Slightly overlap and glue the edges of the two side pieces together, and wait for the glue to dry before continuing.
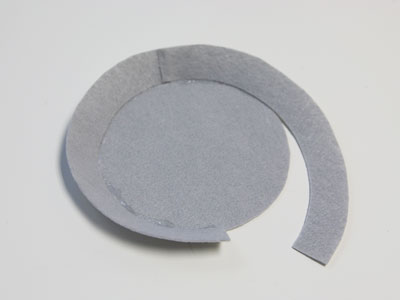
Carefully glue the sides onto the bottom piece, gluing just a little bit at a time and allowing it to dry before moving forward around the circle.
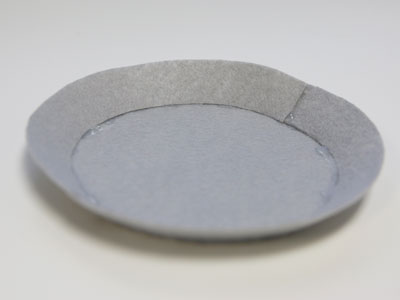
Once you've attached the sides all the way around, glue the final two edges of the sides together, and allow to dry.
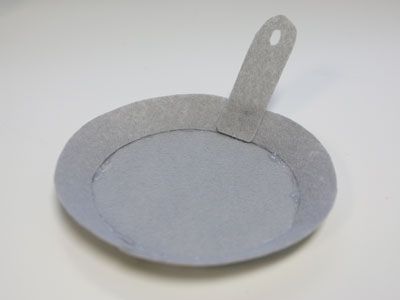
Glue one handle piece to the inside of the pan, lining up the edge of the handle with the bottom piece.
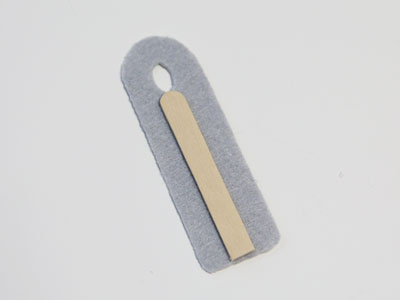
Next, glue a wooden craft stick to the remaining handle piece to add sturdiness.
You may have to cut the craft stick shorter with a craft knife to make it the same length as the handle.
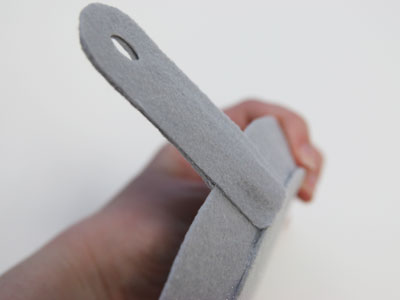
Glue the second handle piece to the outside of the pan, carefully matching up the edges of the two handle pieces.
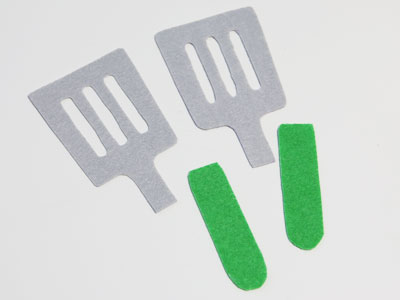
To make the spatula, fork, spoon, and knife, trace and cut out the pattern pieces and felt the same way as before.
Make sure to cut out two of each piece to create both sides of each utensil.

Glue one top piece to one handle piece and wait for it to dry.a
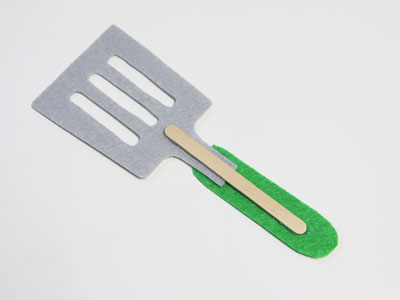
To add sturdiness, glue a wooden craft stick to the connected top and handle.
Glue the second top piece on top of the first, lining up the edges and covering the craft stick.
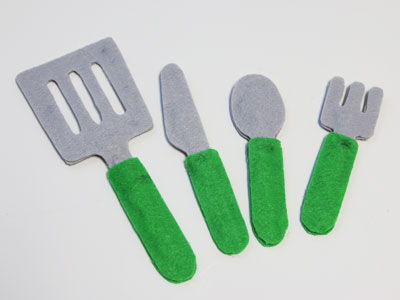
Add the second handle piece, and allow to dry.
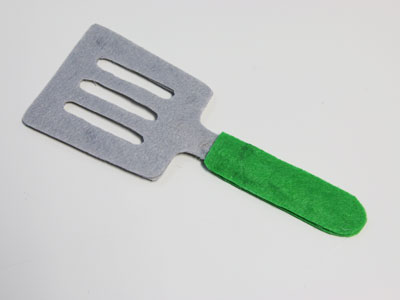
Repeat the same steps to make the rest of the utensils.
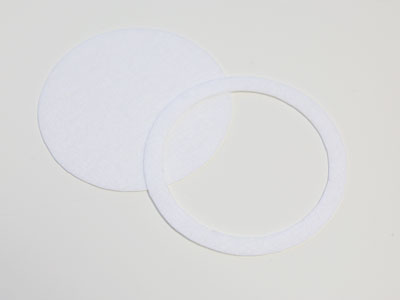
To make a plate, trace and cut out the two pattern pieces and felt like before.
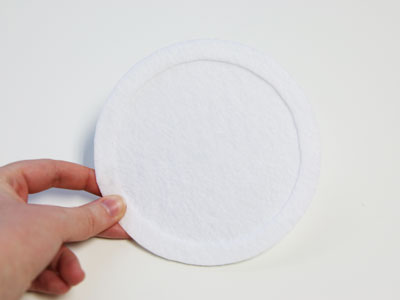
Carefully glue the rim onto the main piece, making sure to line up the edges.
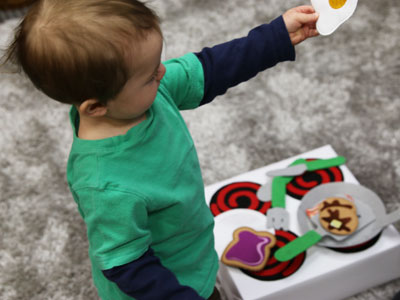
Make them all to accompany the in-the-hoop play food, creating a whole little play set for your young loved ones to enjoy.

This project is featured on the Embroidery Library Pinterest page.
Pin it yourself using the "Pin It" button on this page.


