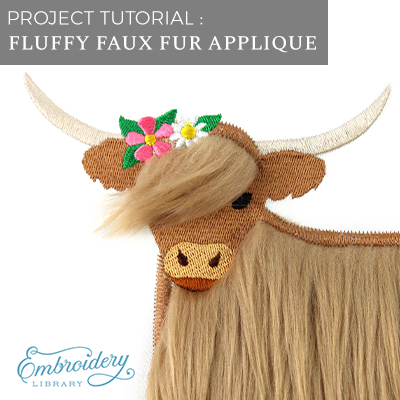
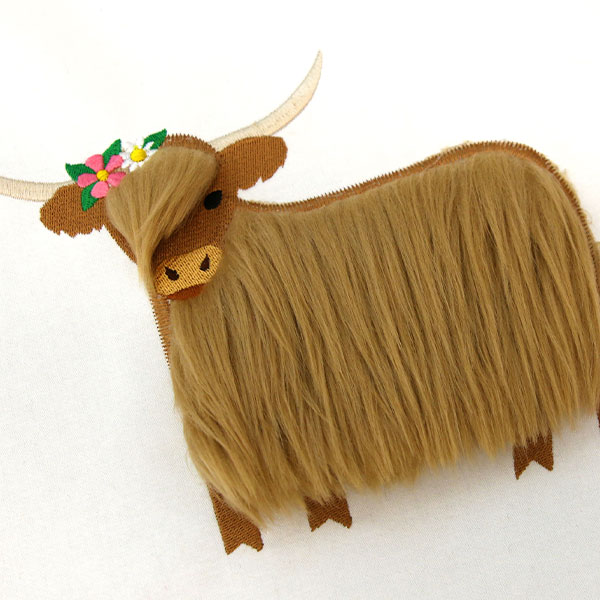
Add a whimsical touch to your projects when you work with faux fur applique motifs. Learn all the best tips and tricks for using this type of machine embroidery design by following along with step-by-step project instructions below.
Supplies
- Embroidery thread
- Faux fur
- Cut away stabilizer
- Water-soluble stabilizer
Tools
- Temporary spray adhesive (such as Gunold KK100)
- Scissors
- Craft knife
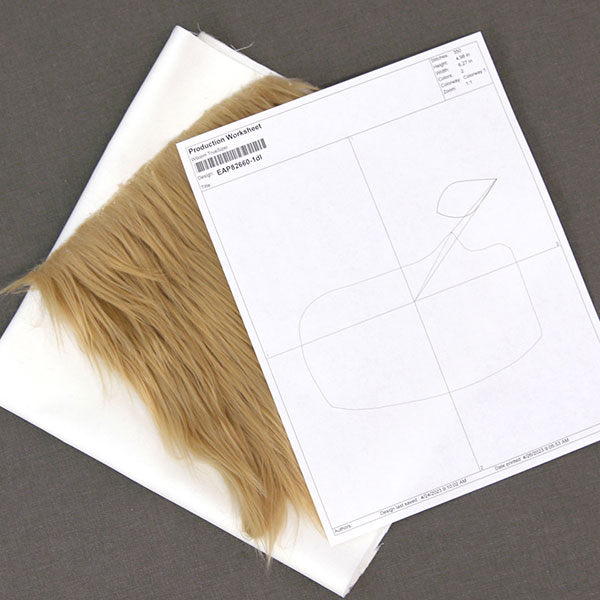
When you download the fuzzy applique design you will find multiple files. One is an embroidery file. The others are dieline files marked with the letters "DL". Dielines are used to cut the fabric to the correct size and shape. Open and print each dieline file using embroidery software. If you are new to working with dielines, or do not have embroidery software, take a look at our helpful video on using dielines.
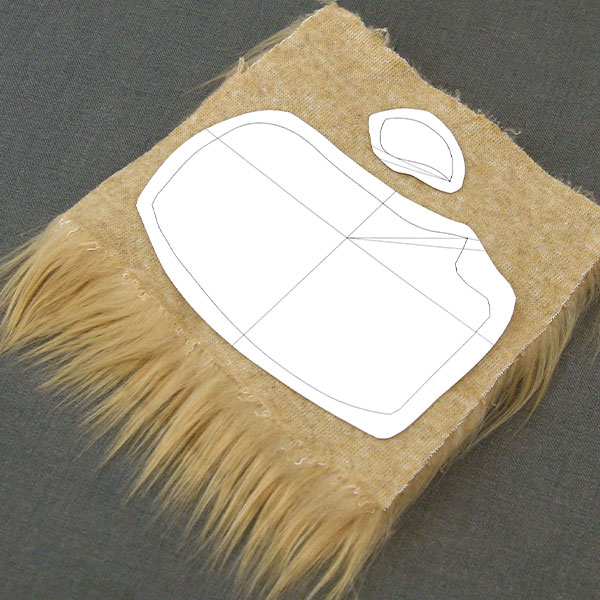
For the faux fur pieces, spray the back side of your printed dielines with temporary spray adhesive and smooth them onto the wrong side of the faux fur.

With a craft knife, carefully cut the faux fur out along the dieline, only cutting through the backing fabric. Do not cut the actual fur. Using a craft knife rather than scissors will help keep the fur from becoming blunt and choppy.
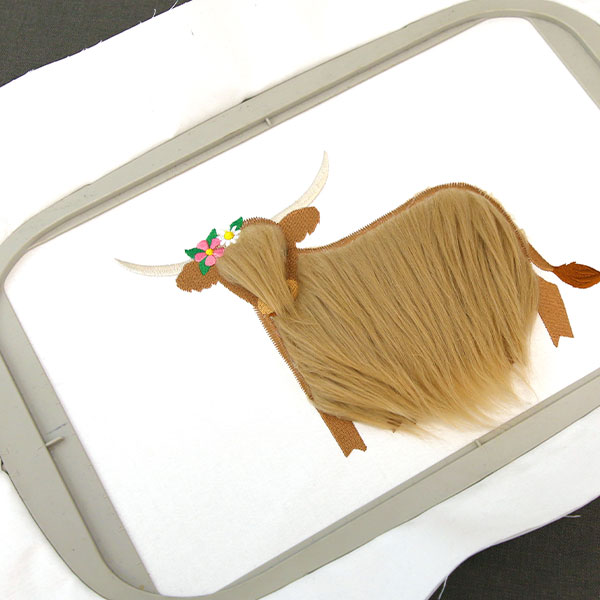
Keep in mind the direction of the fur when cutting out the fabric pieces. In this demonstration the faux fur points downward.

Spray the wrong side of your chosen fabric with temporary spray adhesive and smooth it on top of a piece of cutaway stabilizer.
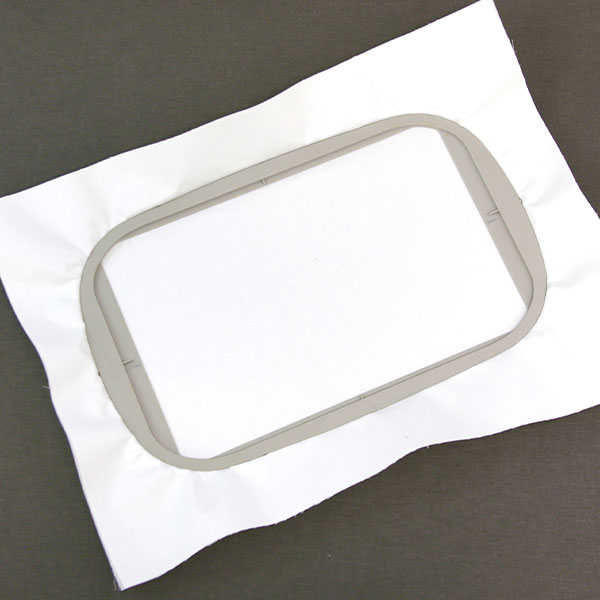
Hoop the fabric and cutaway stabilizer together.

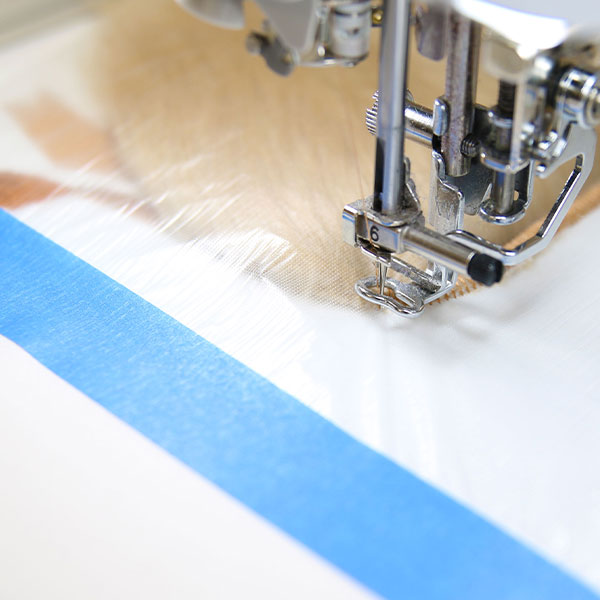
Attach the hoop onto the machine and load the embroidery file (not the dieline files). Follow the color change sheet to sew out all steps before the dieline step.
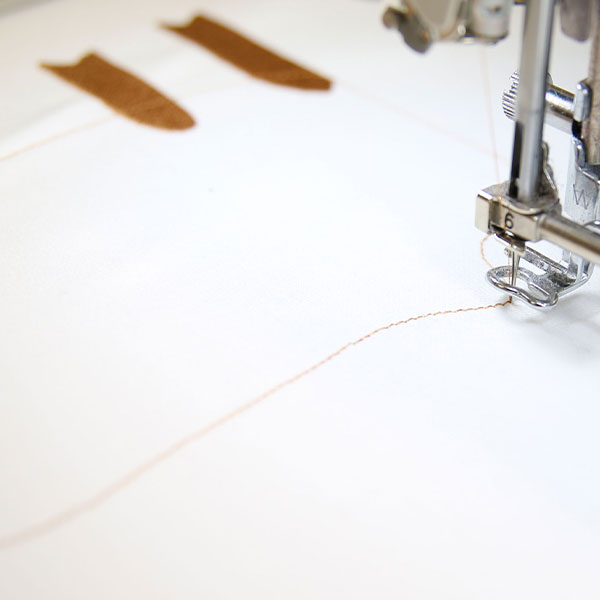
Then embrodier the dieline (or outline stitch). This marks the area on the fabric where the your cut out applique piece will be placed.
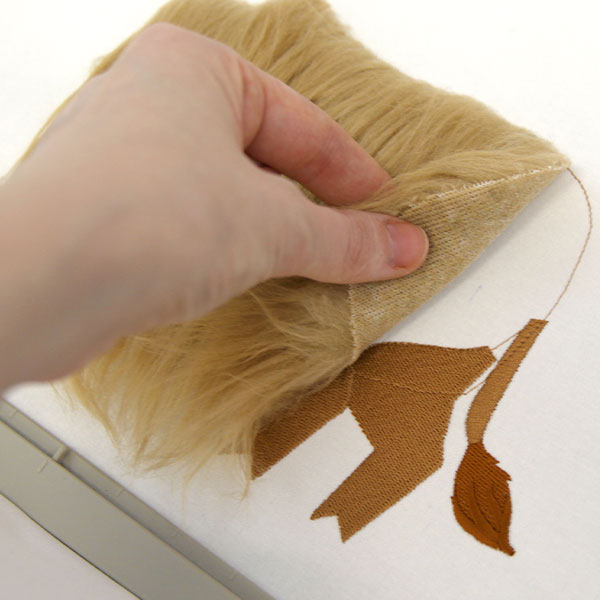
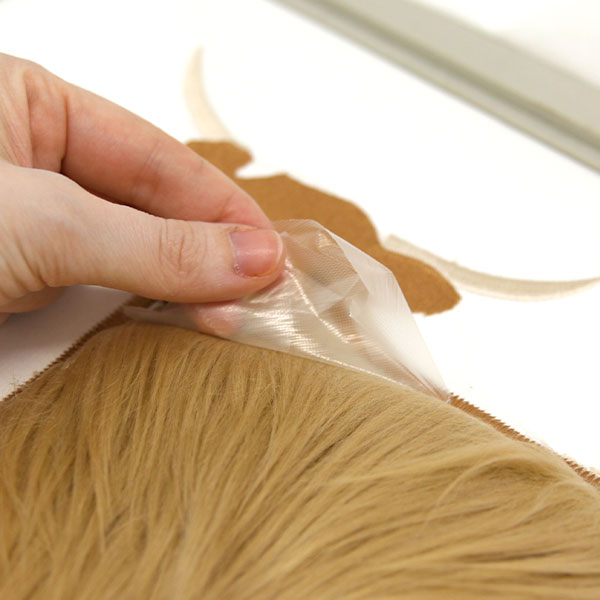
After the dieline has sewn, remove the hoop from the machine but do not unhoop the fabric and stabilizer. Spray the wrong side of the applique with temporary spray adhesive. Place the faux fur within the dieline.
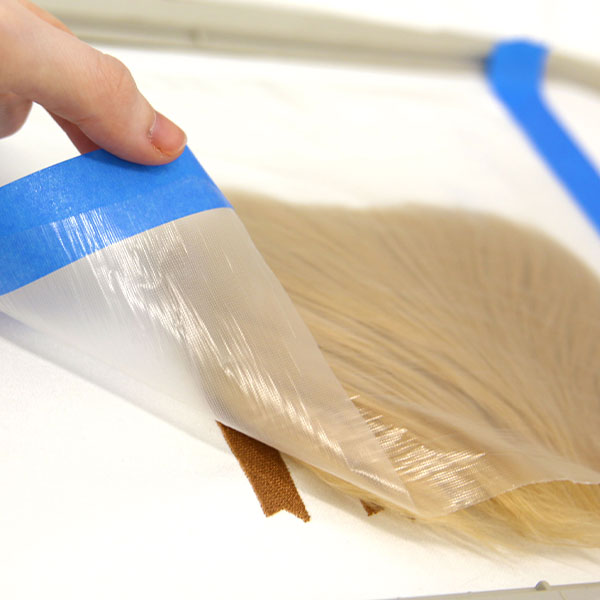
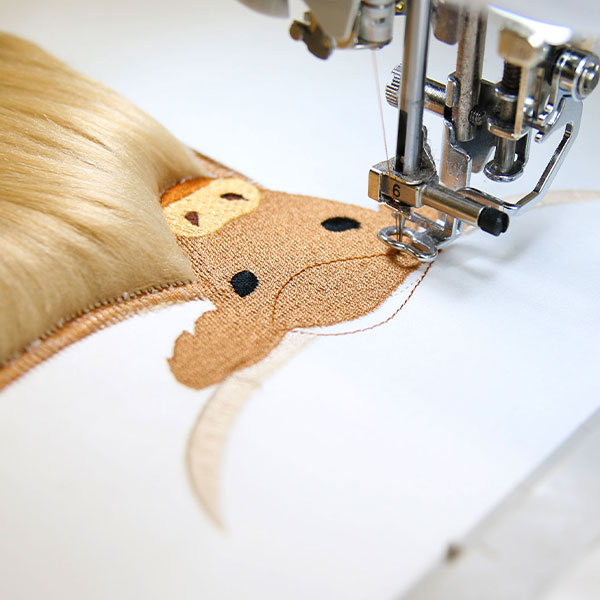
Once the applique piece is set within the dieline, smooth the fur inward, away from the edges toward the center of the piece. Then take a water soluble stabilizer like Vilene, and tape it over the fur piece. this will keep the embroidery foot from getting tangled in the fur.
Place the hoop back onto the machine and embroider the tackdown stit h for the previously placed fabric piece. A tackdown holds the fabric piece in place for the remainder of the design.
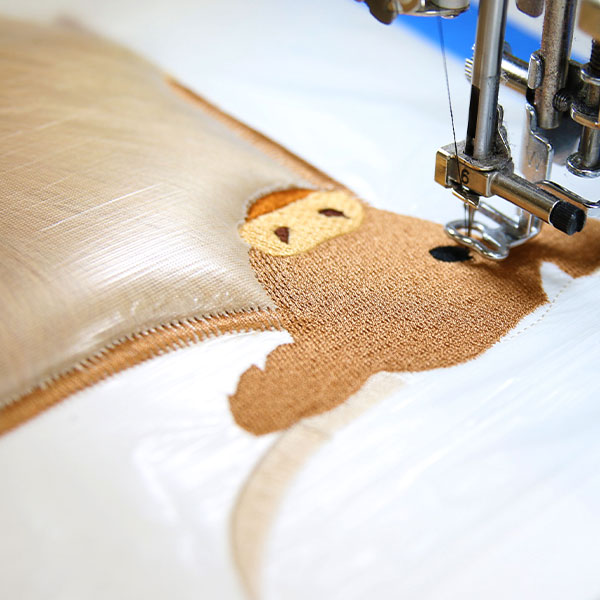
If there are any details that sew out on top of the fur, sew them out. Follow the color change sheet, and stop before any other step that says it's a dieline.
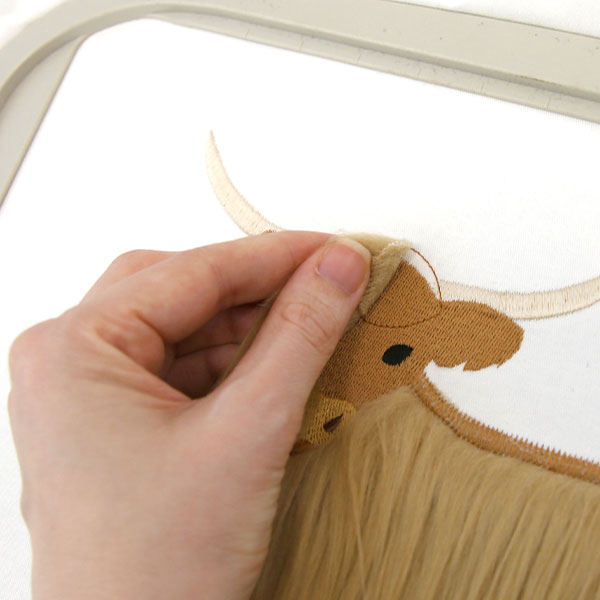
When the tackdowns and inner details have sewn, remove the water-soluble stabilizer from on top of the applique pieces.
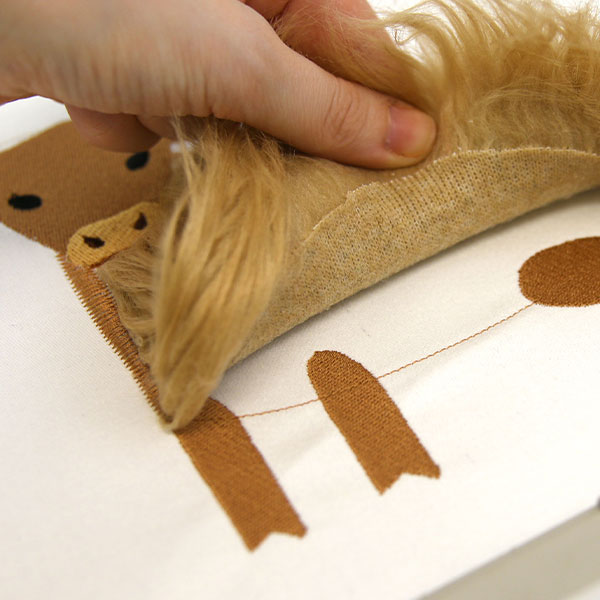
In some designs the tackdown step will intentionally leave openings along one side of the fur. In this design, the opening is left along the bottom, so the fur remains free, and looks more like fur.
Follow the color change sheet and sew out the next dieline.
Repeat to remove the hoop from the machine, spray the wrong side of the next applique piece, and then place it inside the sewn dieline.
Some designs will use a second piece of faux fur. If that is the case, cover the area with another piece of water soluble stabilizer to prevent the embroidery foot from getting tangled.
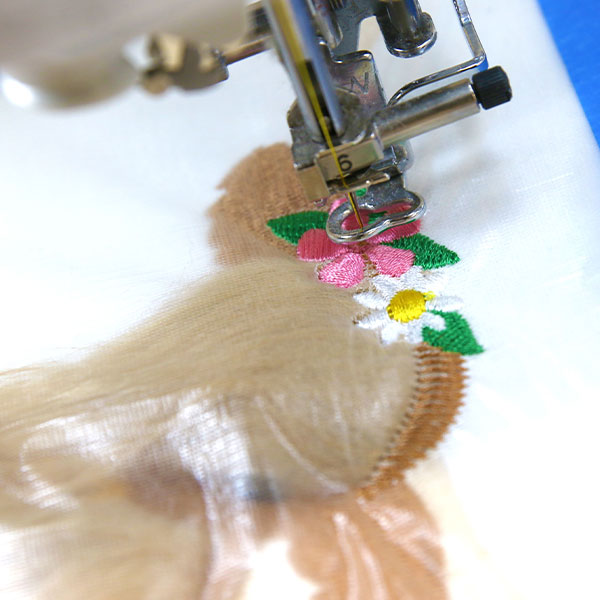
Follow the color change sheet and finish the final steps.
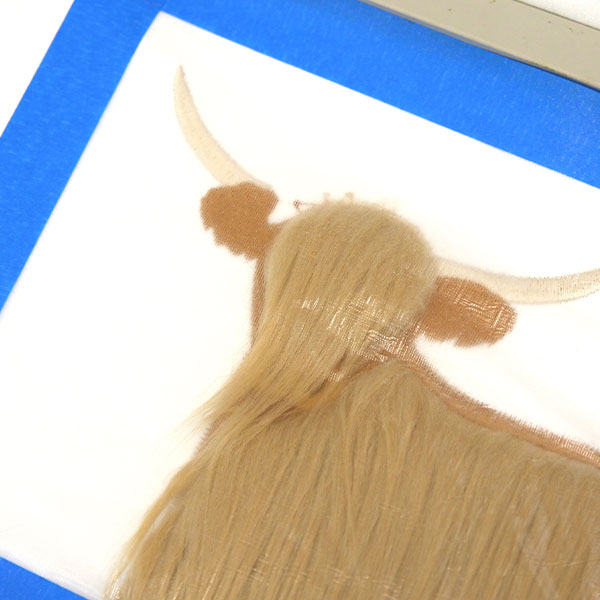
Once the design has finished embroidering, remove the hoop from the machine and unhoop the fabric. If needed, remove any remaining water soluble stabilizer by following the manufacturer's instructions.
If desired, use a pair of small scissors, holding them vertically to the design. Use the very tip or point of the scissors to trim the faux fur. Point cutting can help blend the edges of your cuts, helping to keep them from leaving blunt lines.


