FREE Snowman with $5 order PLUS Double Reward Points! Click the deals tab for details.❄️
 FREE Snowman with $5 order PLUS Double Reward Points! Click the deals tab for details.
Everything's coming up roses! This specially digitized design is created to hold together all on its own, like freestanding lace -- but with the full color and detail of a regular embroidery design. Follow the steps below to let your own embroidered flower blossom. If you like this design, you'll love the freestanding tulip and daffodil too!
Supplies
Project Needs & Notes:
- Water-soluble stabilizer (such as Vilene or Sulky Ultra Solvy)
- Hand sewing needle or glue
- 12 gauge floral wire
- Wire cutter
- Needle nose pliers
- Green floral tape
- Hot glue gun
Designs featured in this tutorial include:
- X13996, Freestanding Rose in 3D (In-the-Hoop)
Finished flower size (without stem):
1 3/4" tall x 2 3/4" wide
Special notes:
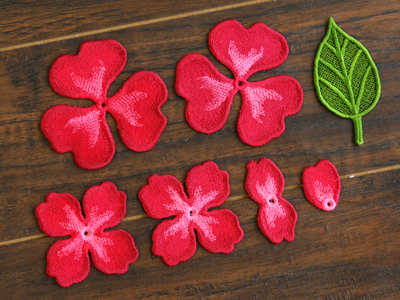
To make a full rose embroider 2 of the file "a", 2 of the file "b", and just 1 of files "c", "d", and "e".
You can use your fingers to shape the petals. Simply bend and shape the petals while they are damp, and they will hold their shape when they dry. Once the flower is finished you can spray it with a water spray bottle to make it damp.
Designs Used
Freestanding embroidery designs have been specially digitized for water-soluble stabilizer. After the stabilizer is removed, beautiful embroidery remains behind.
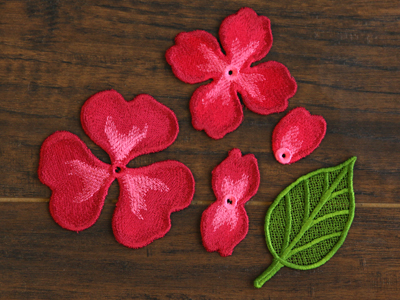
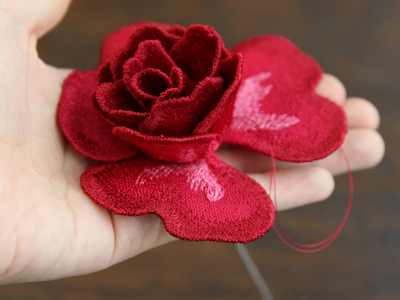
When you download the design, you will find a total of 5 files. File "a" is the biggest petal piece, and file "b" is the smaller one. Files "c" and "d" are the two pieces that make the center of the 3D rose, and file "e" is the leaf.
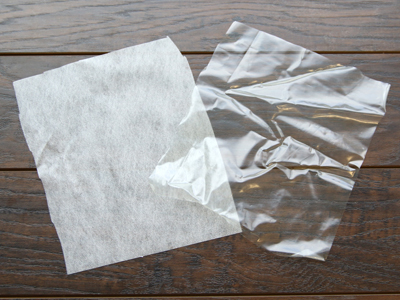
There are a couple of different kinds of water-soluble stabilizer. One is clear and plastic, and that brand is Sulky Ultra Solvy. The other is soft and fibrous, called Vilene. Both will work very well. Vilene is used in this demonstration.
Use a size 11 or 75/11 sharp sewing needle. A sharp sewing needle has a smaller, finer point than an embroidery needle. That means it will make smaller holes in the stabilizer.
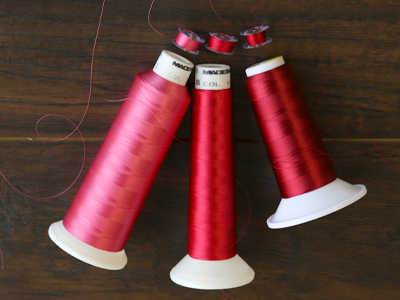
As the embroidered rose pieces will be seen from both sides, wind a bobbin to match every thread color used in the design.
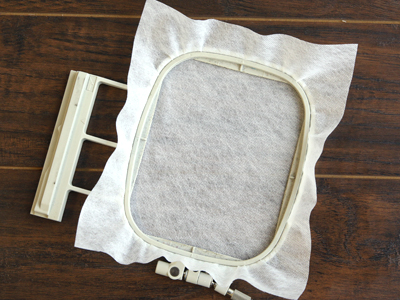
Hoop the stabilizer firmly. Make sure it is nice and tight with no wrinkles.
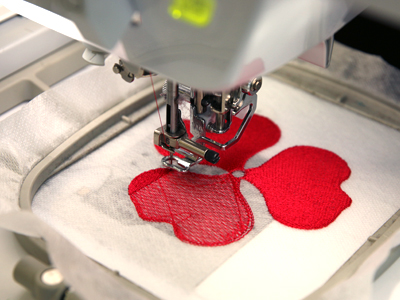
Attach the hoop to the machine and load file "a". Follow the color change sheet, and embroider the first color of the design.

After the first color is finished embroidering, change the bobbin out to match the next thread color.
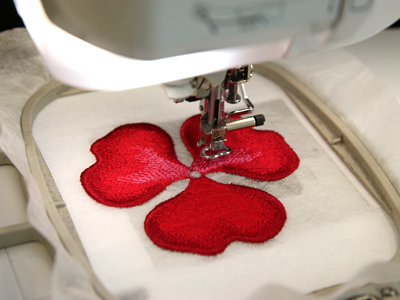
Continue to embroider the design. Watch the color change sheet carefully, and make sure to match the bobbin color to every thread color used in the embroidery.
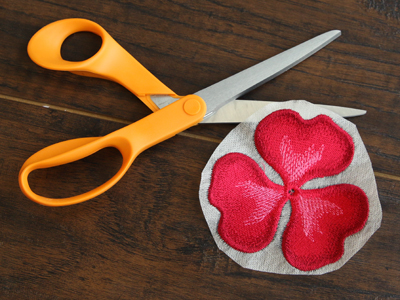
After embroidering, trim away the excess stabilizer.

The stabilizer's packaging should give instructions for removing the excess. For Vilene, soak the embroidered pieces for a few moments.
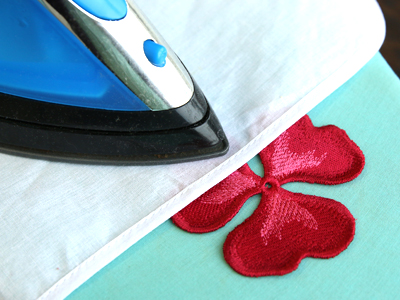
Allow the piece to air dry, and then press it with a pressing cloth on top.
Repeat the steps above to embroider the rest of the pieces. To make a complete rose, make sure to embroider two copies of the petal pieces "a" and "b".
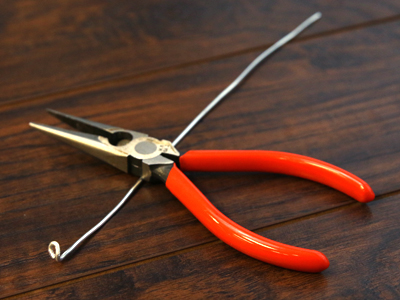
Cut the wire to 10" long and curl the end with a needle nose pliers.

Take the single petal piece (piece "d"), and slide it onto the wire. Make sure the curled end of the wire is resting on the wrong side of the embroidery.
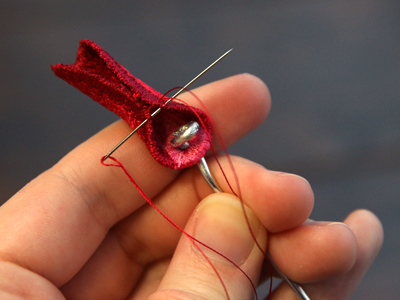
Fold the single petal in half with wrong sides together. Using a hand sewing needle, sew the two opposite sides together where they meet about 1/2" from the bottom edge.
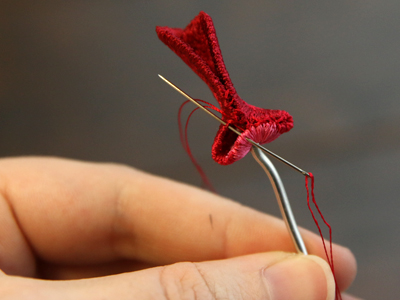
Fold up the bottom of the petal until it touches where the sides are sewn together. With the curled end of the wire hidden inside the petal, sew the edges together to hold the fold in place. This will be the center of the rose.
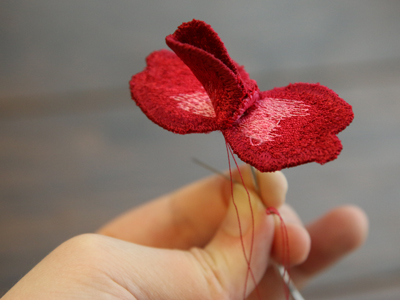
Next, slide the double petal piece (piece "c") onto the wire with the wrong side of the embroidery touching the single petal piece. Make sure the hand sewn seam of the single petal is lined up with the center of either double petal. Hand stitch the two pieces together around the base where the wire runs through them. Sewing them together will prevent the pieces from spinning or falling off the wire.
Fold the two petals up around the center piece. Overlap them slightly, and use a hand sewing needle and thread to hand tack them together where they overlap.
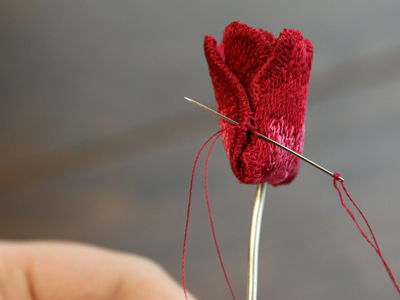
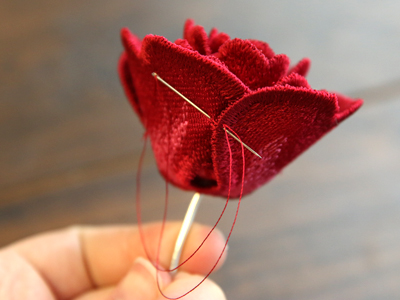
Now add the first of the four petal pieces (piece "b") onto the wire with the wrong side of the embroidery facing the other petals. Hand sew it onto the previous petal piece to hold it in place on the wire.
Fold up two opposite petals, shaping them with your fingers to give them a slight curve.
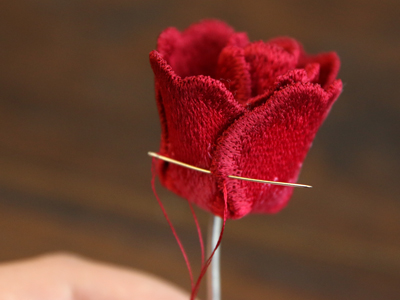
Then fold the other two petals up over them. Make sure the pieces overlap slightly, and sew the four petals together only where they overlap.
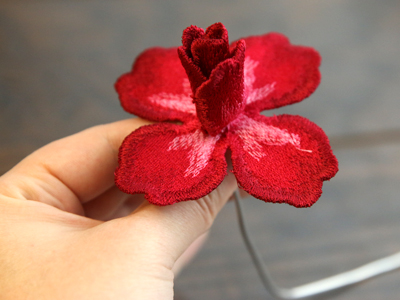
Repeat to add the second four petal piece ("c"). Make sure the wrong side is facing the other petals, and that the piece is sewn onto the others before positioning the petals. These petals should overlap slightly less than the last set.
Now add the first of the three petal trios onto the wire (piece "a"). Make sure the wrong side is facing the other petals, and hand sew it to the last piece around where the wire goes through them.
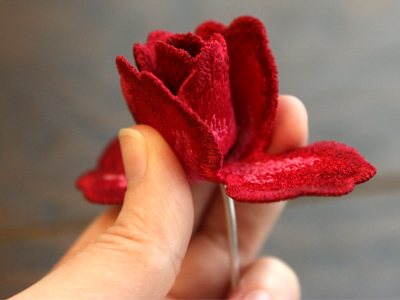
Then mold the petals with your fingers until they are slightly curved. Fold them up, overlap them as desired, and hand stitch them together where they overlap.
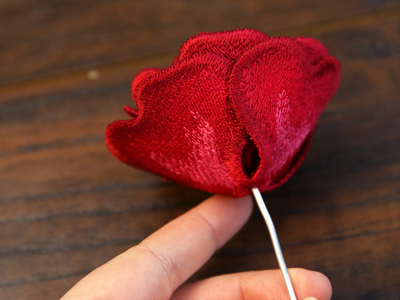
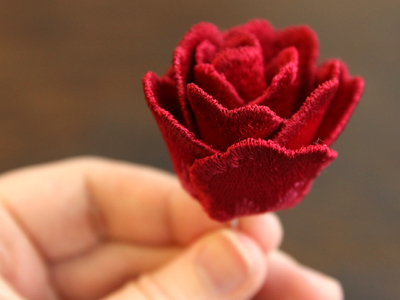
Repeat to add the final trio petal piece ("a"). This time the petals should just barely overlap at all.
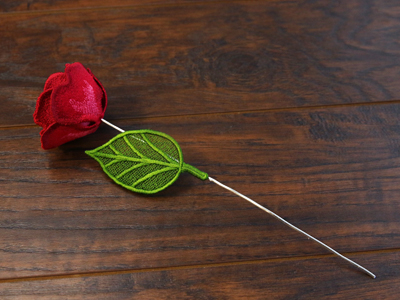
Once the flower is completed, position the lace leaf on the wire as desired. Use a hot glue gun to glue the stem in place, and allow the glue to dry completely before continuing.
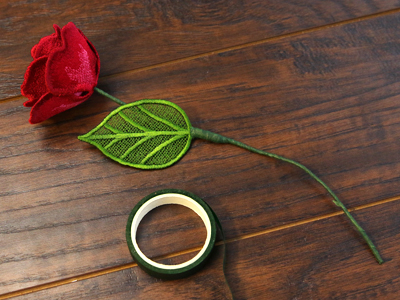
Finally, wrap the wire in floral tape to finish off the stem. Wrap over glued end of the leaf as well to reinforce it onto the wire.


