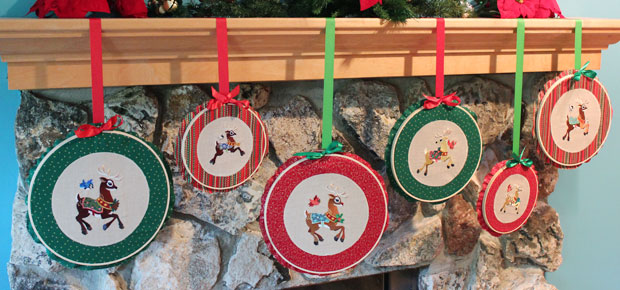
Deck the halls with machine embroidery framed in hand embroidery hoops! This project adds a fa-la-la-festive flair to your home.
The steps below demonstrate how to make this merry addition to your Christmas decor. Hang the hoops on your mantel, along a banister, on a door, or on an open space of wall -- the options are endless!
Supplies
Project Needs & Notes
- Hand embroidery hoops (12", 10", and 8" diameter hoops were used in this example)
- 1/2 yard print quilter's cotton
- 1/3 yard linen
- 1/3 yard felt for back
- Medium-weight (2.5 ounce) cutaway stabilizer
- Temporary spray adhesive (like Gunold KK100)
- Air-erase pen for marking
- Double-sided fusible web
- 1" wide ribbon (for hanger)
- 1/2" wide ribbon (for decorative bow)
- Round object like a bowl or plastic cover for tracing
(should be 2" smaller in diameter than the hand embroidery hoop size)
- Fabric glue
- Pinking shears
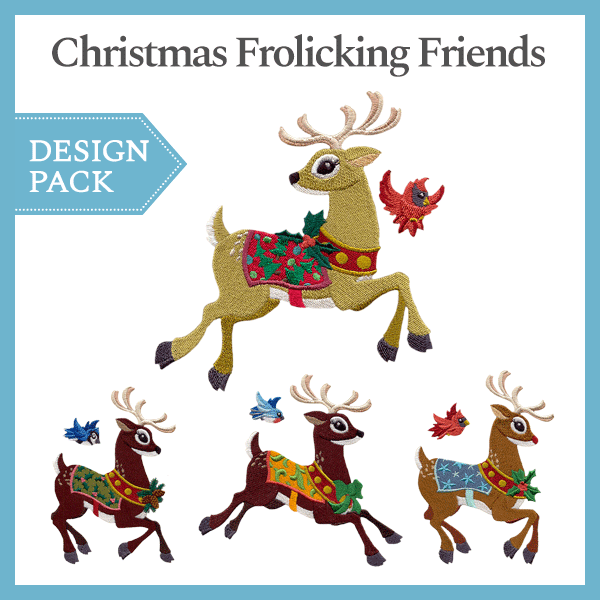
Designs featured in this tutorial are from the Christmas Frolicking Friends Design Packs. Different sizes of designs were used in the different sizes of hoops.
The 12" diameter hoops feature X9042, the 5.83" x 6.28" design pack.
The 10" diameter hoops feature X9043, the 4.72" x 5.10" design pack.
The 8" diameter hoops feature X9044, the 3.73" x 3.83" design pack.
Use larger or smaller sizes to match your preference and decor, and find an excellent variety of festive designs in the Christmas category here.
Designs Used
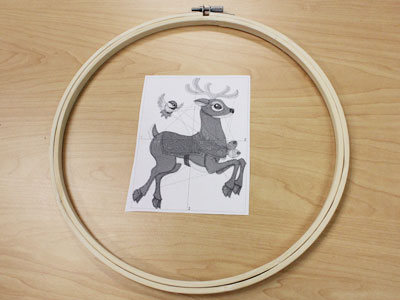
Choose the size hand embroidery hoop you wish to use, then make sure your design fits well inside.
A template is a printout of the design, and it's an excellent tool for determining size.
Print a template of the design using embroidery software. If you do not have embroidery software that makes templates, Wilcom's TrueSizer is a free program to use.
To get an idea of size, place the design template inside the hand embroidery hoop. The edges of the design should be at least 2" from the hand embroidery hoop.
Next, plan where the design will be embroidered on the linen fabric.
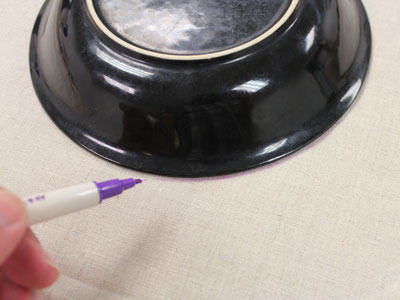
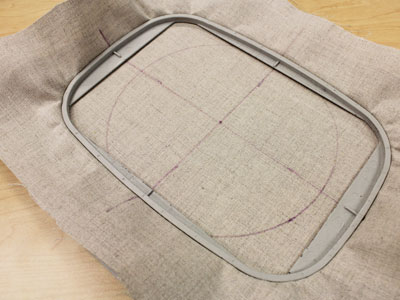
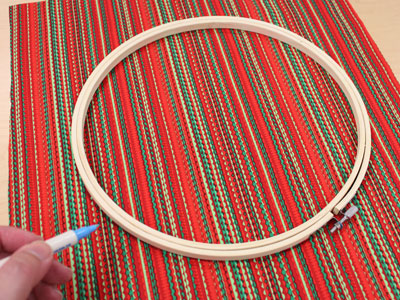
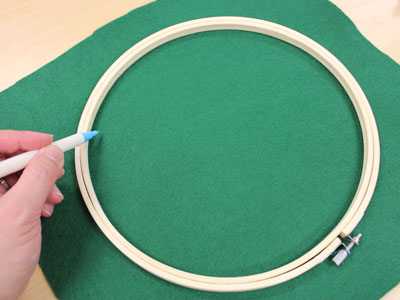
Use an air-erase pen to draw a circle on the linen. The circle should be 2" smaller than the hand embroidery hoop.
You may find that a bowl or plastic lid is the right size to trace.
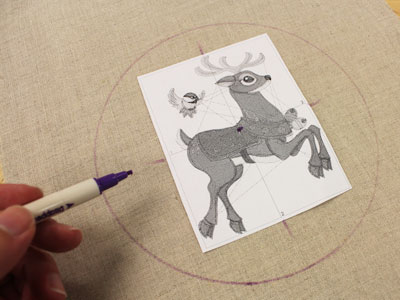
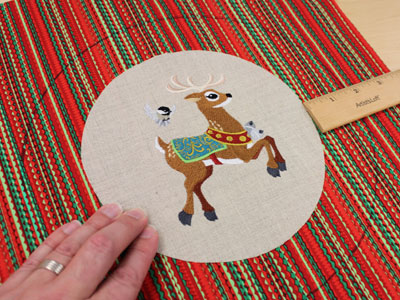
Center the template inside the shape. Mark the center point and the horizontal and vertical axis lines.
Remove the template and draw lines connecting the marks.
Spray a piece of medium-weight cutaway stabilizer with temporary adhesive. Smooth the fabric on top.
Hoop the fabric and stabilizer together, aligning the marks on the fabric with the marks on the hoop.
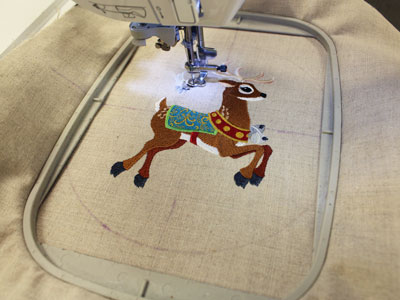
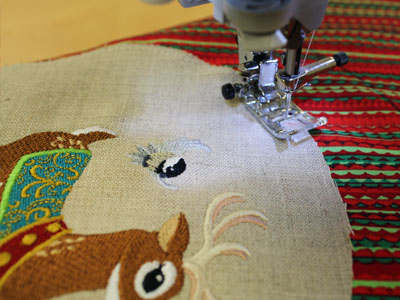
Attach the hoop to the machine and load the design.
Move the hoop so that the needle is directly over the center point.
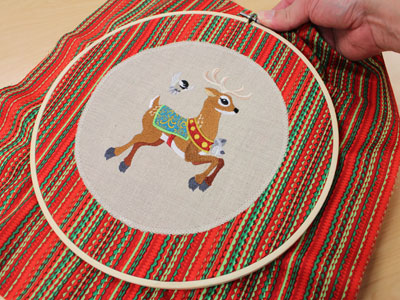
Embroider the design.
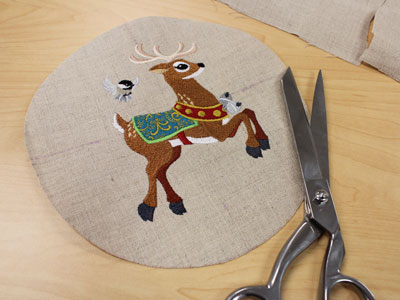
After embroidering, trim the stabilizer away from the back.
Cut out the shape.
Cut a piece of print cotton fabric that is at least 2" larger than the hand embroidery hoop.
Place the fabric flat with the right side facing up.
Position the hand embroidery hoop in the center of the fabric. Trace the outer edge of the hoop.
Add fusible web to the back of the embroidered piece.
Center the embroidered piece inside the traced shape.
Smooth into place.
Zigzag stitch around the entire outer edge of the embroidered piece.
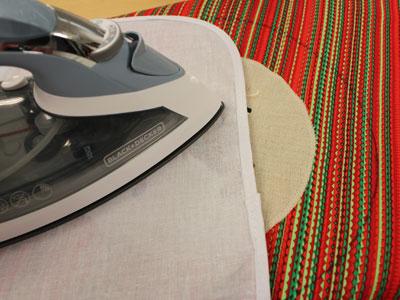
Following the directions on the fusible web packaging, press the fabric with an iron to activate the adhesive.
Use a pressing cloth on top of the fabric to prevent scorching of the embroidery.
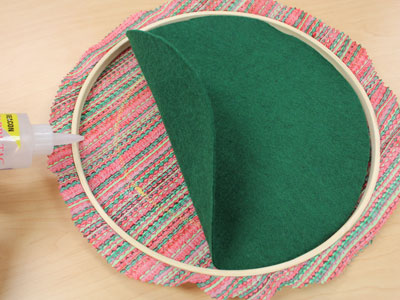
Prepare the back by placing the hand embroidery hoop on top of the felt and tracing the inside of the hoop.
Cut out the shape and set aside.
Now add the fabric to the hand embroidery hoop
Place the outer hand embroidery hoop on the fabric, aligning it over the circle shape. Position the screw at the top.
Add the inner hoop to the back. Press in place.
Tighten the hand screw to secure the fabric. If necessary, gently pull the fabric tight.
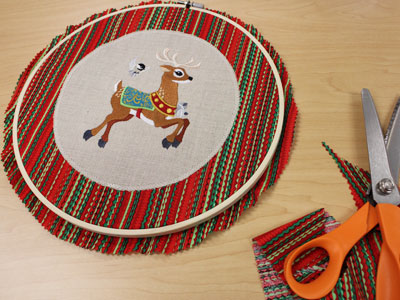
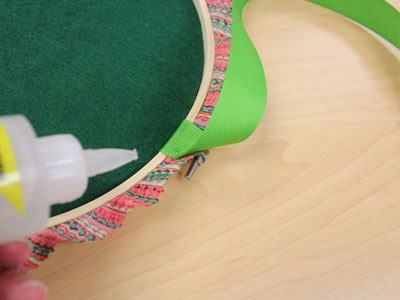
Using pinking shears, trim the fabric around the edge of the hoop leaving about 1/2" excess.
To add the back, flip the hoop over to the wrong side.
Add drops of fabric glue to the back of the fabric inside the hoop. Press the felt back in place.
After the back has been added, it's time to add the ribbon hanger.
Cut the desired length of the 1" wide ribbon. Tuck one end of the ribbon under the felt back right behind the hand screw.
Add drops of fabric glue to the back edge of the hoop and press the ribbon in place.
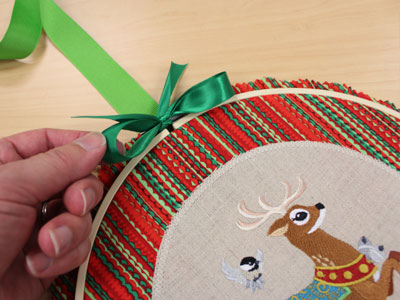
Flip the hoop back over to the front and tie a bow around the hand screw using 1/2" wide ribbon.
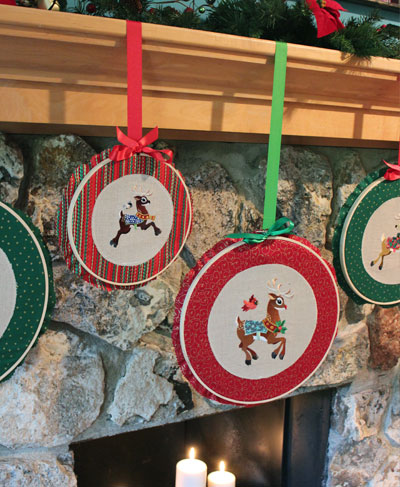
Repeat this process to create as many hoops as you like to fill your space.
In this example, six hoops of varying sizes are displayed at different heights. It results in an engaging and eye-catching holiday display.


