FREE Snowman with $5 order PLUS Double Reward Points! Click the deals tab for details.❄️
 FREE Snowman with $5 order PLUS Double Reward Points! Click the deals tab for details.
Transform a bucket into a beautiful garden tote!
I can't wait to get out into my garden. But living here in the north country, I have to wait until Jack Frost succumbs to the summer sun before I can start digging in the dirt.
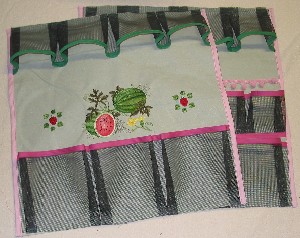
In the meantime, I've made myself a beauty of a bucket organizer so that when the time comes, I can grab the bucket and go! All my hand tools, garden stakes, seed packets, and bulbs will fit snugly in the pockets, while containers of fertilizer fit perfectly inside.
Supplies
Supplies needed:
-
5-gallon bucket
-
2/3 yard of 60" wide canvas or duck fabric
-
1/4 yard of print fabric
-
3 packages of extra-wide double-fold bias tape
-
5/8 yard of single-fold bias tape
-
1 1/2 yards of sturdy cording or strapping
-
Fiberglass screen fabric-- 24" by 7' roll
-
5/8 yard of trim
Embroidery designs from Embroidery Library:
Designs Used
Instructions:
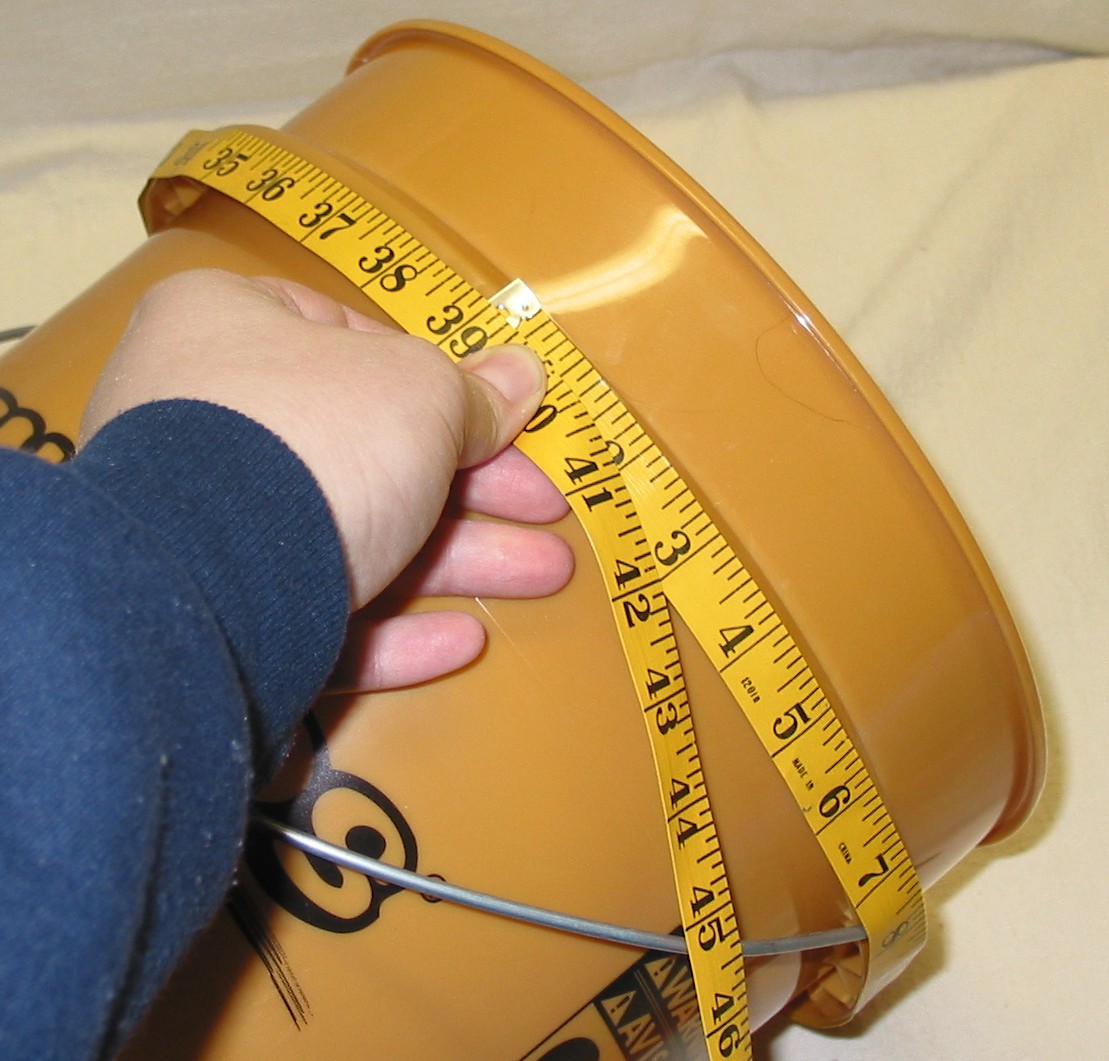
Measure your bucket. Make note of the distance around the largest part of the bucket, and the height. My bucket's measurements are:
-
Circumference 39"
-
Height 14"
Your bucket should have a channel around the top. This is where the organizer will be tied to the bucket so it stays in place even when carrying weight in its pockets.
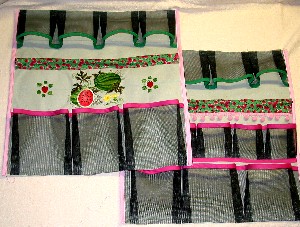
From the canvas fabric, cut out two rectangles using the bucket measurements. The width of the rectangle should be half the circumference measurement, and the height of the rectangles should be the bucket height plus 6".
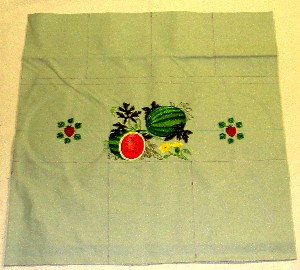
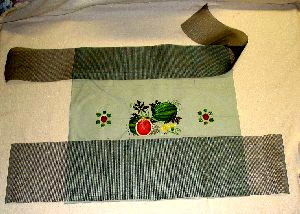
On one rectangle, measure down 10 1/2" from the top. Make a horizontal line across the width of the rectangle. Place the watermelon design in the center of the line, and place one raspberry design on each side of the large design.
Hoop and sew out the embroidery designs. Measure and mark lines that are 1/2" up from the top of the watermelon embroidery and again 2" from the top of the embroidery. Extend the marked lines to the right and left edges of the fabric. These are placement markings for the strap casing. Next, mark out the rectangles that will be pockets. The pockets at the top are 5" deep, including the seam allowance, and there will be four pockets in that set. At the bottom of the rectangle the pockets are 7" deep, including the seam allowances. I made three pockets in the bottom set.
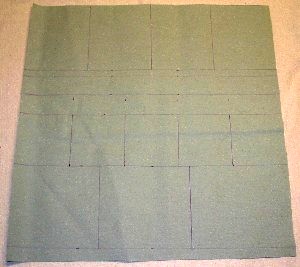
On the other fabric rectangle you will be marking 3 rows of pockets and a line for the trim. The top row is identical to the top row on the first fabric rectangle. Then mark a line 1/2" below the marked pockets. Measure down 1 1/2" and make another horizontal line to mark the placement for the strap casing. Now, measure down another 1 1/2" and make another line. This line will be the top of another row of pockets. This set is 4" deep and has 5 divisions. Directly below the 4" row of pockets mark a 6 1/2" row of pockets with 3 divisions.
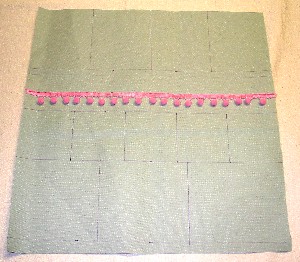
This second rectangle you have marked is the back piece. Stitch the trim along the line that is 1 1/2" above the 4-inch deep pocket markings.
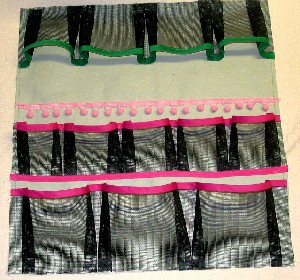
From the screen fabric, cut out strips for each set of pockets. Strips should be the same height as the pocket measurements. The widths will vary according to how many pockets there are in each set. Here is where you have to do a little math.
For each pocket in the set there are 2 pleats, and for each pleat you add 2" to the width of the screen strip. So you will take the width of the canvas rectangle and add 4" times the number of pockets, to find the length to cut each strip.
For example: My canvas rectangle is 18" wide and the bottom set of pockets is 6" tall and with 3 pocket sections. The strip for the bottom set of pockets will be 6" high by 30" wide (18"+ 4"+ 4"+ 4"=30"). Cut strips for each set of pockets using this formula and taking into account the number of pockets in each set.
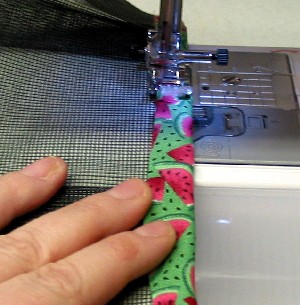
On one long side of each screen strip, stitch double-fold bias tape over the cut edge.
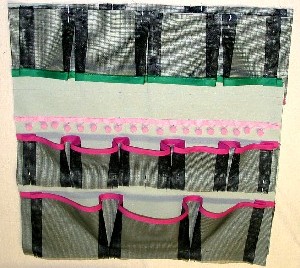
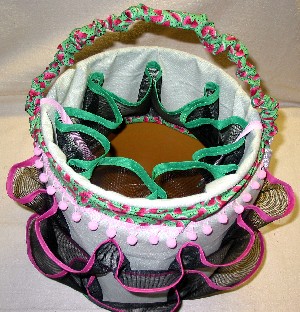
Match up the bottom center of each strip with the bottom center of its marked set of pockets. Working out from the center of each set, create a 3/4" pleat at each side of each pocket dividing mark and one pleat 1/2" from the edge of the canvas fabric. Pin the pleats to hold them in place. Make sure that the net fabric comes all the way to the edge of the canvas, so that when you bind the edges of the canvas, the net will be caught in the binding.
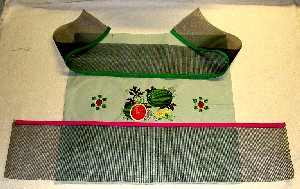
Note: The top set of pockets on each canvas rectangle is inverted, so that when they are folded over and placed inside the bucket, they will be right side up.
Use a straight stitch to sew around the four edges of each canvas rectangle and the bottom of the center pocket of the back piece. Remove the pins. Sew the piece of single-fold bias tape to the bottom edge of the center back pockets so that the tape covers the cut edges of the screen, and secures the bottom of the pockets.
Stitch along each pocket dividing line to create the dividers for all the individual pockets. Make sure that the edges of the pleats don't get caught in the stitches.
Sew double-fold bias tape around the sides of each canvas rectangle.
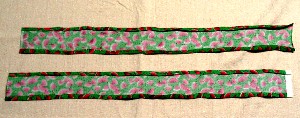
From the coordinating print fabric, cut one 3-inch wide strip and three 2-inch wide strips from the width of the fabric.
Prepare the 2" strips by cutting them in half (for approximately 22") and then folding over 1/4" on each long side. Press the folds to give them a good crease. The prepared strips will look like really wide bias tape, but the fabric is not cut on the bias
Use 2 of the strips to create the casings. Trim the strips to length and put a narrow hem on each short end. Sew the strips to the canvas with the edges meeting the lines that you marked for the casing on each canvas piece. On the back piece, the casing lines are the ones that are directly above the trim. The casings should meet when the canvas front and back are placed side by side.
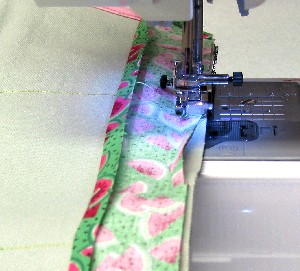
Now you will use the remaining 4 fabric strips to bind the top and bottom edges of the canvas pieces. On the back of the canvas, sew the strip to the canvas, with the right side of the strip to the wrong side of the canvas. Stitch in the crease of the strip to secure each strip to the canvas.
To create finished ends, fold the strip over itself at each edge of the canvas before stitching it down.
Flip the fabric strip to the front of the canvas and stitch at the folded long edge of the strip to finish the decorative binding.
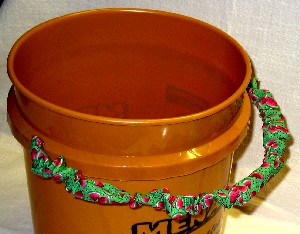
The 3-inch wide strip will be used to create a covering for the bucket handle.
Hem the short ends of the strip and then fold the strip so that the long sides meet with the right sides together. Use a 1/4" seam allowance to stitch together the long side. Turn the sewn tube right side out.
Carefully pull out one side of the bucket handle and feed the wire handle through the fabric tube. Replace the wire handle, and distribute the folds of fabric evenly on the bucket handle.
Feed the cording or strapping through both of the fabric casings on the canvas front and back pieces.
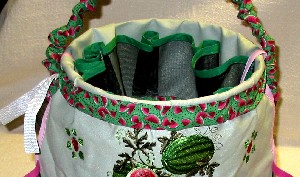
With the handle of the bucket down and out of the way, wrap the organizer around the bucket, making sure that the cording/strapping settles in the groove of the bucket. Tie the cording/strapping tightly around the bucket. Flip the top pockets of the organizer inside the bucket. Bring the bucket handle up.
My garden organizer is ready to go. I can just see it filled with a treasure trove of seeds and bulbs and other things that help make things grow.
Now I can pull out those catalogs and plan a trip to the nursery to see what new flowers and vegetables I want to grow this year!


