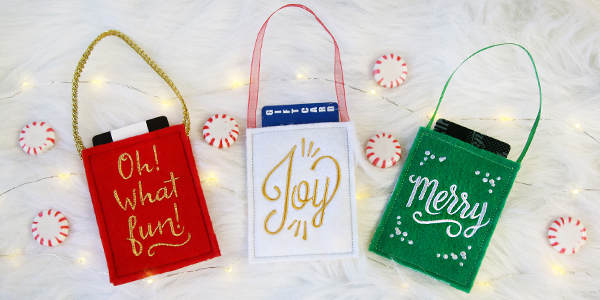
Make gift giving even more special with wrapping you've crafted yourself! These little bags, perfectly sized to hold a gift card, candies, or other small gifts, stitch up quickly and easily in-the-hoop. Just the thing to make holiday presents a little brighter!
Supplies
Project Needs & Notes:
- Small pieces of felt or UltraSuede
- Tear-away stabilizer
- Temporary spray adhesive (Gunold KK100)
- 1/8" to 1/4" wide ribbon
- Masking tape
The design featured in this tutorial is:
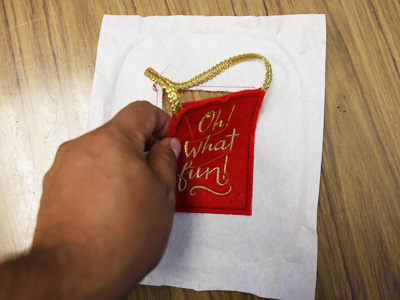
X13707, Gift Card Bag - Oh What Fun! (In-the-Hoop)
Designs Used

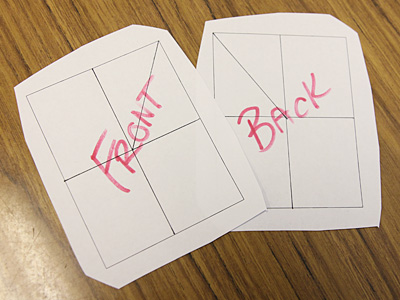
This in-the-hoop design has three files. One is the full embroidery file. The other two are dieline files marked with the letters DL. Dielines are used to cut the fabric to the right shape and size.
Open the dielines files with embroidery software and print them. If you do not have embroidery software, Wilcom's TrueSizer is a free program to use.
Spray the back of each printed dieline with a small amount of temporary spray adhesive, and smooth them onto the felt or ultrasuede fabric. Cut out the shapes.
Now that the fabric pieces are cut to the proper shape and size, it's time to embroider the design.
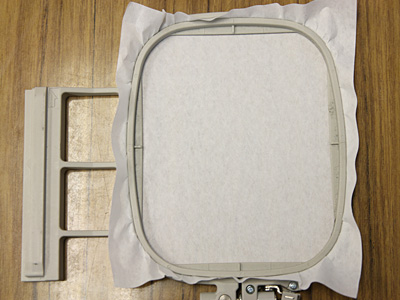
Hoop a piece of tear-away stabilizer. Madeira E-Zee Tear 1.5 oz. or Floriani Tearaway Medium are good choices. Those brands are more fibrous, less paper-like, and will tear more cleanly.
Attach the hoop to the machine and load the full embroidery design (not the dieline files).
Use a size 11 or 75/11 sharp sewing needle, rather than an embroidery needle. A sharp sewing needle has a smaller, finer point than an embroidery needle, so that will make smaller perforations in the stabilizer.
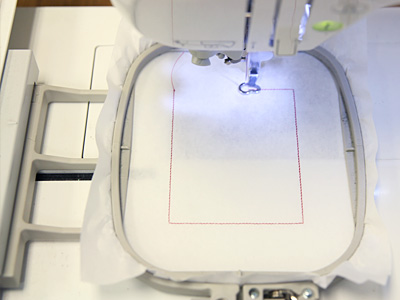
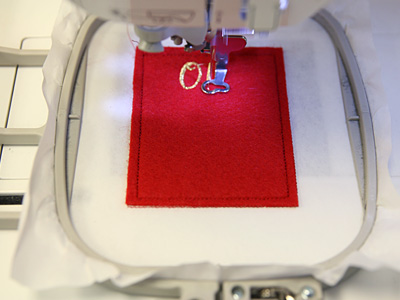
Embroider the design. The first thing to embroider will be a dieline or outline. This marks the area on the stabilizer for the front fabric piece.
Remove the hoop from the machine, but do not unhoop the stabilizer.
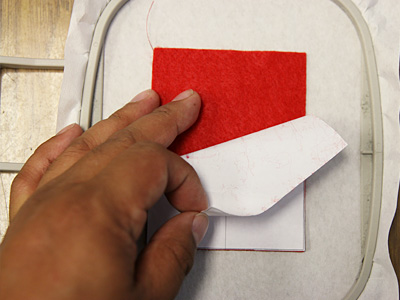
Spray the back side of the front fabric piece with a small amount of temporary adhesive. Place the fabric right inside the sewn outline. Remove the paper dieline.
Attach the hoop back onto the machine and continue with the design.
A tack down will sew next. This holds the front fabric in place for the remainder of the design. Then all of the inside elements will be embroidered.
On the color change sheet, look for the note that says "back piece tack down". When you get to this section, stop the machine and remove the hoop from the machine but do not unhoop the stabilizer.
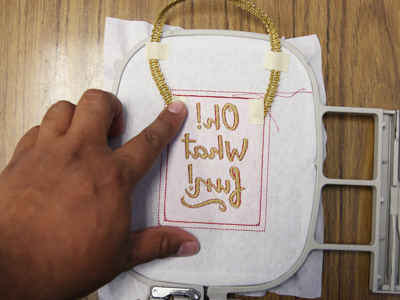
Next cut a piece of ribbon 6-9" long. Tape one end of ribbon to each top corner of the bag, so that the ribbon ends will be secured by the tack down stitch. To ensure that the ribbon will lay flat and won't be caught in the stitch, tape the loose areas to the back of the stabilizer, making sure the ribbon lies flat.
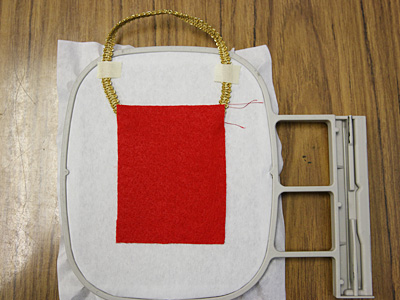
Lightly spray along the edges of the back fabric piece.
Place the fabric piece within the sewn rectangle on the back of the hoop, covering the ends of the ribbon.
Since both sides of the bag's final tack down stitch will be seen, wind a bobbin with the same thread used in the needle.
Place the hoop back on the machine and embroider the back piece tack down.
Once the embroidery is finished, remove the hoop from the machine. Unhoop the stabilizer, and carefully tear it away.


