You'll be the belle of the masquerade ball with this glittery and glamorous lace mask! This mask is made by starting with a simple plastic eye mask. We will show you how to embroider the lace, add luxurious and fun fabrics to the mask, and how to place the lace on top to create an elegant disguise.
Supplies
Supplies needed:
**Plastic craft mask with elastic band
**Water-soluble stabilizer
**Fabric of choice (enough to cover the front surface of the mask)
**Permanent spray adhesive
**Paper towels
**Hot glue gun
**Feathers
**Beaded trim
**Small scissors
Designs Used:
Lace Butterfly Mask--Adult
Lace Butterfly Mask--Teen
Lace Butterfly Mask--Child
To determine which size mask you need, measure the distance between the pupils of the wearer's eyes. Compare those measurements to these sizes:
Adult: 2 3/4" ** Teen 2 1/2" ** Child: 2 1/4"
Special Project Notes:
You can use either 40 weight rayon thread or 30 � 35 weight cotton thread.
I use Coats and Clark 30 and 35 weight cotton thread. It's labeled as Mercerized ELS Cotton for Machine Quilting & Crafts; Machine Quilting; or All Purpose. I find Coats and Clark cotton thread at JoAnn's. I've also used Madeira Cotona, which is a 30 weight cotton thread.
I use the 30 - 35 weight cotton thread both in the bobbin (I wind my own bobbins) and in the top (needle).
A note about water-soluble stabilizers and needles:
There are many, many different brands of water-soluble stabilizer available. Some are thin and light, some are fibrous, and some are thick and heavy. It can be confusing to pick the right one for your lace project.
We've digitized and stitched thousands of freestanding lace designs, and have consistently excellent results with Sulky Ultra Solvy (the heavy weight water-soluble stabilizer by Sulky) and Vilene, a fibrous water-soluble stabilizer. We order Vilene from www.pointetopointe.com.
Use a sharp needle (as opposed to an embroidery needle) when embroidering onto water-soluble stabilizer - especially if using the "plastic-looking" kind (such as Sulky Ultra Solvy). An embroidery needle has a larger point, which makes larger holes in the water-soluble stabilizer, leading to tearing and misalignment.
Designs Used
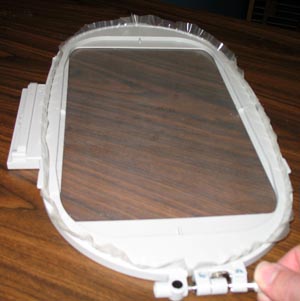
First, embroider the lace mask design. Hoop one piece of heavy weight water-soluble stabilizer (WSS).
We used Sulky Ultra Solvy. Kenny tested different brands of WSS to see which works best. To see how different brands hold up when used with freestanding lace, click here.
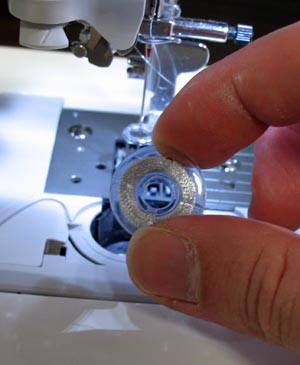
Because freestanding lace is two-sided, the bobbin thread should match the top thread. Wind a bobbin with the same thread that you'll be using in the needle.
To give the mask extra interest, and lots of sparkle, we chose to embroider the lace with metallic thread. Metallic thread is thinner than 40 weight thread, therefore, you may need to tighten the needle thread tension to compensate for the metallic thread.
You can also use 40 weight rayon or polyester thread, or 30-35 weight cotton.
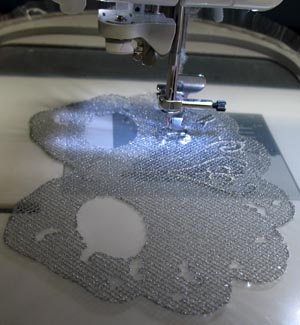
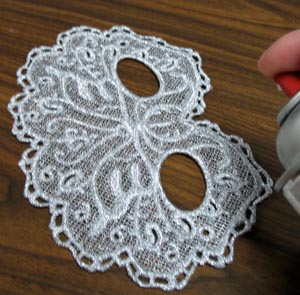
Embroider the design.

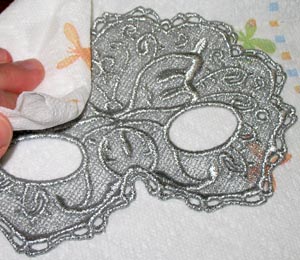
After finishing the design, unhoop the WSS and cut away the excess. Trim as close to the embroidery as possible without cutting any of the stitches.
Set the scraps of WSS aside. You can piece the larger pieces together by wetting your fingers and running them along the edges; or put scraps in a spray bottle and add water to make spray starch.
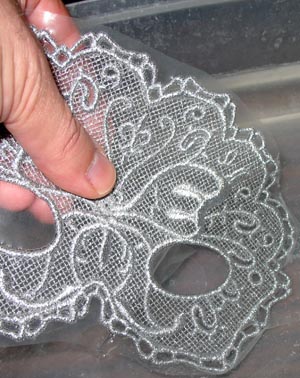
Soak the mask in hot, tap water for about 15 minutes, or until the stabilizer is removed.
Blot any excess water from the lace with a towel, and then allow to it dry.
Press the lace with an iron.

Next, add fabric to the front of the plastic mask. Plastic craft masks can be found at most craft stores -- and discount chain stores during September or October.
Cut a piece of fabric a little larger than the mask. We chose a silver, metallic stretch fabric, which looks fabulous with the metallic lace mask. Fabrics with stretch work very well for this project because they form to the contours of the plastic mask. Craft felt is another good choice.
Lay the fabric wrong side up. Spray the fabric with the permanent adhesive.
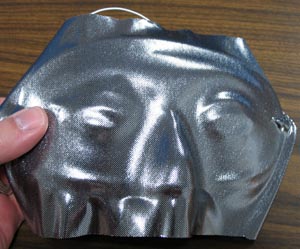
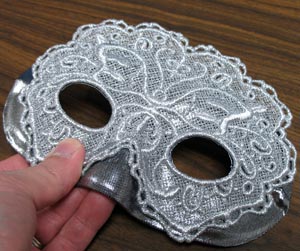
Smooth the fabric over the front of the plastic mask.
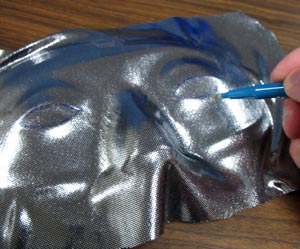
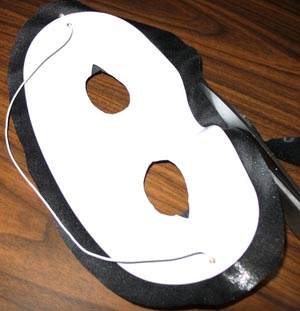
Next, working on the front of the mask, trace the outline of the existing eye holes of the plastic mask onto the fabric. The outlines will be used for positioning the lace in the next step.
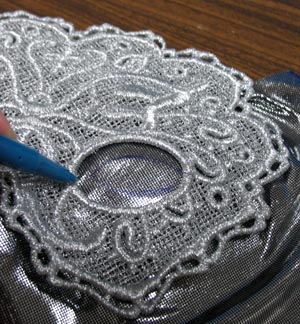
Align the eye holes of the lace mask with the outlines of the eyeholes of the plastic mask. Hold the lace mask flat to the fabric covered plastic mask and trace the eyeholes of the lace mask onto the fabric.
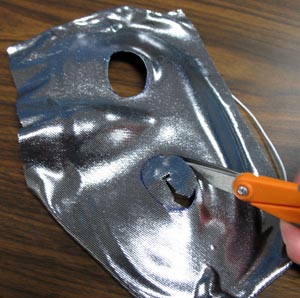
Remove the lace mask. With a small scissors, we will cut out the eyeholes that we just marked. We will be cutting through the fabric and the plastic mask to create these new eyeholes.
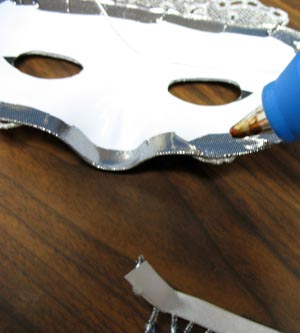
Next, cut the fabric from around the edge of the mask, leaving about 1/4 inch of excess.
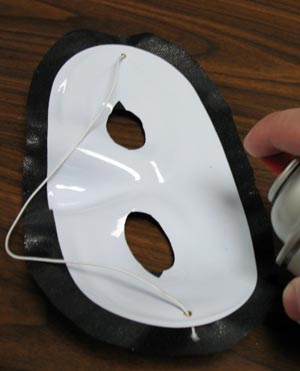
Spray the excess fabric with adhesive. Be careful to spray the fabric only, and not the inside of the mask.
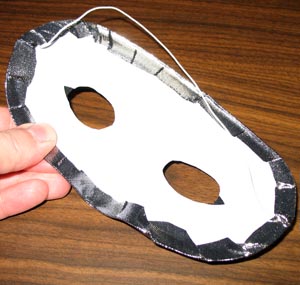
Fold the fabric to the inside of the mask, and press in place.
Next, spray the wrong side of the lace mask with adhesive. Spray on the portion of the lace that will come in contact with the fabric covered mask.
Align the eyeholes of the lace mask with the eyeholes of the fabric covered mask and press into place.
You can also add other embellishments, like beaded trim. To do that, we put a line of hot glue on the inside edge of the mask...
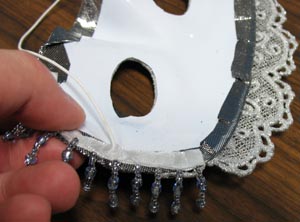
..and pressed beaded trim in place
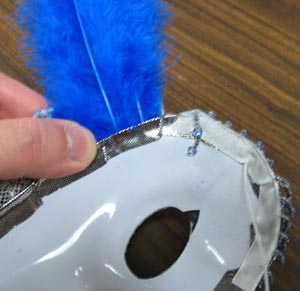
We also added feathers by adding a drop of hot glue to the end of the feather and carefully tucking it between the lace mask and the fabric.
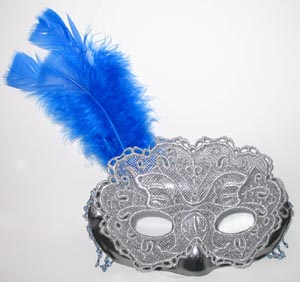
And it's as easy as that! We've completed a mask so ravishing and pleasing to the eye, it'll be hard to hide behind.


