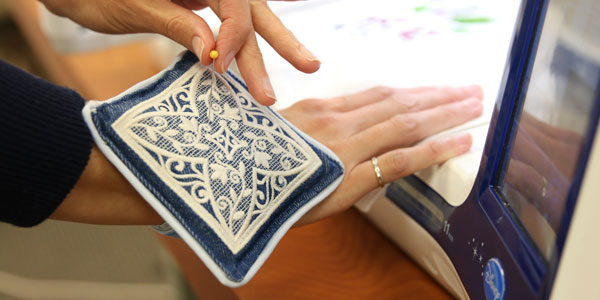
Keep pins and needles close at hand when working at your embroidery machine with this hands-free pincushion! The stylish craft room necessity straps onto your wrist, meaning it is both fashionable and functional.
Supplies
- 1/4 yard lightweight denim
- 1 sheet of 8 1/2" x 11" PVC plastic or acetate
- 10" or 1/4" yard of 1" wide velvet trim
- Fabric glue - 18" or 1/2 yard maxi piping
- 3" of 5/8" wide Velcro
- 1/2 cup of play sand
Designs Used
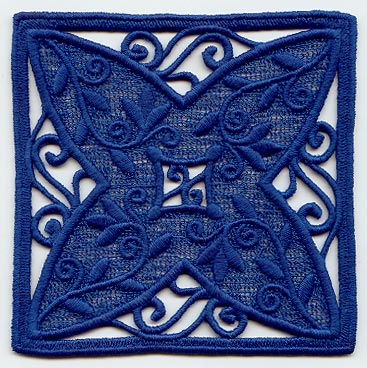
Finished Size: 4.5" x 4.5"
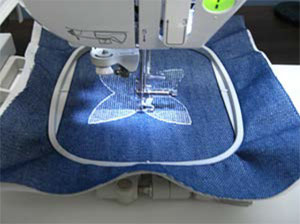
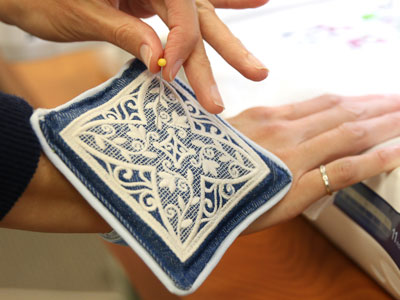
Hoop the denim with tear-away stabilizer, and embroider the design. Tear-away stabilizer is necessary so that the pins can be pushed more easily through. Use a size 11 or 75/11 sharp sewing needle rather than an embroidery needle.

After embroidering, tear the excess stabilizer away.
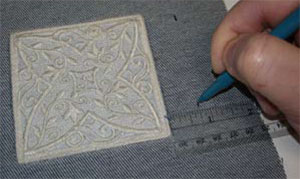
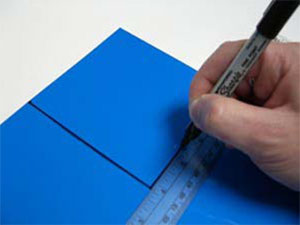
On the backside of the fabric, measure out 3/4" and make a mark. Do this twice on each side of the square.
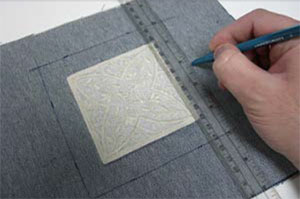
Draw lines to connect the marks.
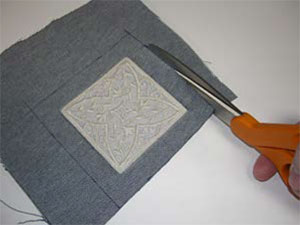
Cut along the lines.
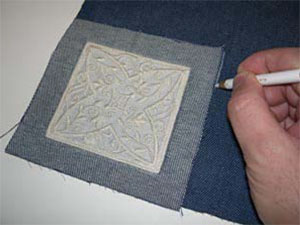
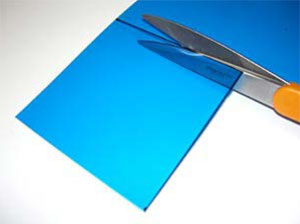
Make a back piece for the pin cushion. Lay the embroidered piece over the denim, and trace the shape.
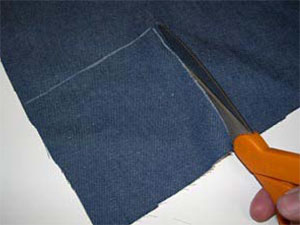
Cut, and set the back piece aside.
The plastic will be used inside the cushion to shield and protect the wrist from the pins. Measure and mark a 3 1/2" x 3 1/2" square on the plastic.
Cut the plastic and set it aside
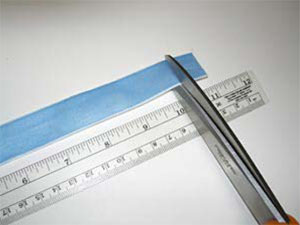
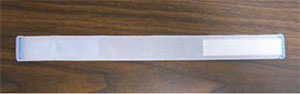
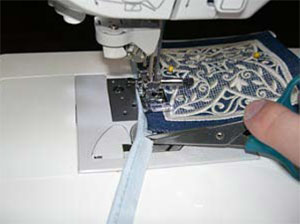
Next, the wrist band. Cut a strip of velvet trim to a 10" length.
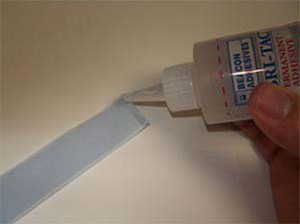
To keep the ends of the trim from unraveling, use a bit of fabric glue. Add a couple of drops of glue to each end and fold back. Hold the ends for a few seconds until the glue sets.
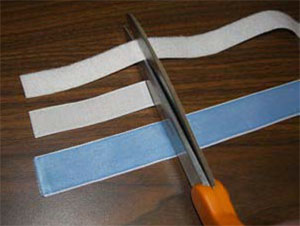
Cut a 3" strip of the hook side of the Velcro, and a 3" strip of the loop side.
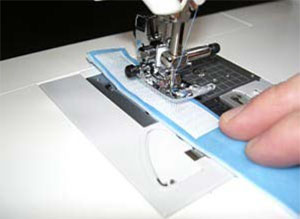
Sew the hook part to the right side of the band.
Sew the loop part to the wrong side of the band.
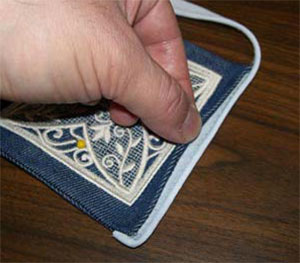
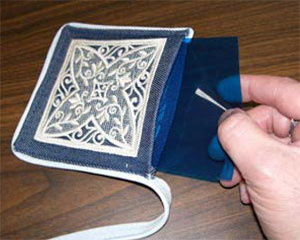
Attach the wrist band to the bottom piece of the cushion. Measure and mark the center point of the band and the center point of the denim square.
Lay the band over the bottom piece diagonally. The denim should be right side up, and the band should be wrong side up. Align the center point on the band with the center point on the denim square, and pin into place.
Sew a 3/4" box around the center points.
Sew the top and bottom pieces together. To begin, with the right sides down, press a 1/4" seam allowance all the way around the top and bottom pieces.
Trim the corners. Align the top and bottom pieces together, wrong sides together, and secure with pins.
Cut a notch in the piping about 1/4" from the end.
Bend the piping at the notch and tuck it in-between the top and bottom pieces at a corner.
Sew a 3/8" seam around three sides, one side at a time, stopping about 1" before each corner. At each corner, cut a slit in the piping. Bend and tuck the piping along the side. Sew to the corner, lift the presser foot, turn the cushion, lower the presser foot and continue around the three sides.
Insert the plastic sheet into the open side.
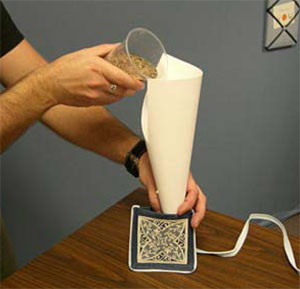
Make a funnel from a piece of paper, and add the play sand to the cushion. Keep the sand on the back of the plastic -- away from the embroidery, on the side where your wrist will be. Fill the cushion about halfway.
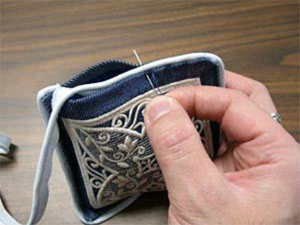
Hand sew the opening, keeping stitches small to prevent any sand from leaking out.
This stylish pin cushion is a convenient way to keep pins close at hand while sewing and embroidering. Perfect for your own craft room, or as a gift for friends or sewing groups!


