
Stitch a garden, and hang one too! Liven up your outdoor space with this colorful hanging flower garden.
Let your creativity blossom -- use your favorite colors, embroidery designs and potted flowers to bring this unique hanging flower garden to life. Constructed with outdoor fabric, it can hold either live or artificial flowers.
Read below for these free project instructions!
Supplies
Supplies Needed:
**3/4 yard solid-colored outdoor canvas (for front and back)
**1/2 yard print outdoor canvas (for plant pockets)
**1/2 yard ripstop nylon (for plant pocket lining)
**Medium-weight cutaway stabilizer
**Temporary spray adhesive
**Air-erase pen (or other marking tool)
**Extra wide double fold bias tape (for the top edges of the plant pockets)
**7/8 inch wide double fold quilt binding (for attaching pockets to the hanging)
**2 yards - 3/16 inch thick cord
**1/4 inch grommets, grommet tool, and small hammer
**Craft knife and cutting pad
**Old three-ring binder (for inner cardboard - must be 3/32 inch thick or thinner)
**Large piece of paper or tag board (for pocket pattern)
Designs used:
Summer Lovin' Jacobean Floral Spray (Small)
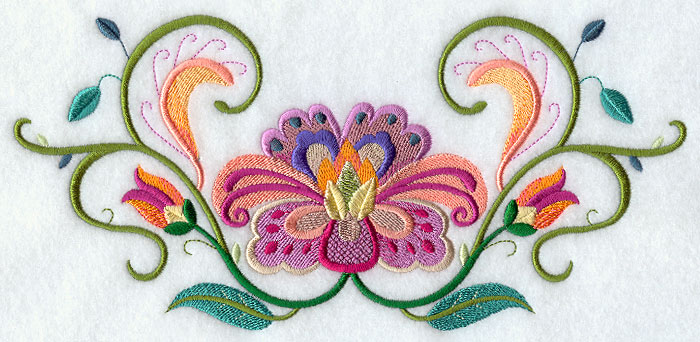
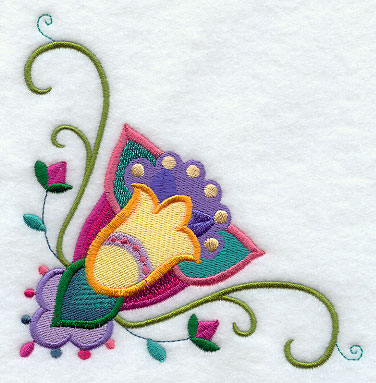
Summer Lovin' Jacobean Floral Corner (Large)
These designs are also available in the following design packs:
A Jacobean Paradise Design Pack - Large, Medium, Small
Finished Size:
25 1/2 inches wide by 28 1/2 inches high - pockets are 4 1/2 inches wide by 5 inches high by 4 1/2 inches deep
Tips for working with live plants:
If using live, potted plants in your hanging garden, do not water them while they are hanging in the fabric pockets. Instead, remove the potted plants from the pockets, water them, and let them drain. Then, add the potted plants back to the pockets.
Designs Used
To begin, we will prepare the fabric for the front of the hanging. Cut a piece of the solid-colored canvas 27 inches wide by 29 1/2 inches high.
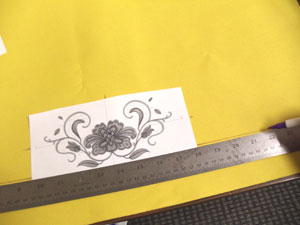
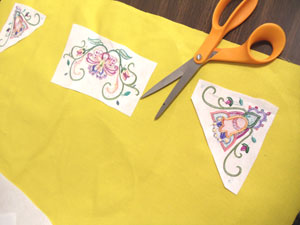
Create paper templates of the designs by printing them at full size using embroidery software. If you don't have embroidery software, you can cut a piece of paper the shape and dimensions of the design to help with placement and centering. If you'd like a recommendation for an embroidery program that can make templates, consider Embird from www.Embird.com.
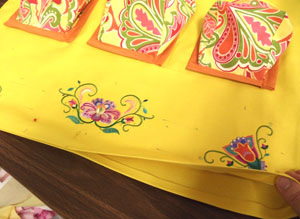
Position the designs on the canvas how you want them - we placed the designs around the outer edge of the fabric with about 2 3/4 inches of space between the outer edges of the designs and the edges of the fabric.
We also centered a design at the top and bottom of the fabric. To do this, measure the width of the fabric and divide by two. Using an air-erase pen (or other marking tool), mark the fabric, then poke a hole in the center of the template and align it with the mark. Mark the horizontal and vertical axis points as well.
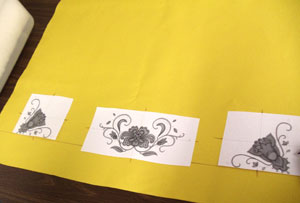
To place the designs at the corners of the fabric, draw horizontal lines out from the bottom edge of the center design. Then, place the outer designs with the bottom edges aligned with the lines you just drew, and about 2 3/4 inches from the outer edges of the fabric. Poke holes in the center of the templates and mark the fabric. Also, mark the horizontal and vertical axis points.
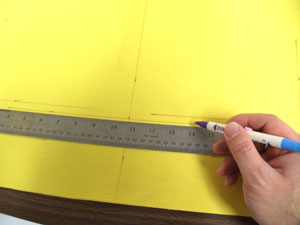
Remove the templates and draw lines to connect the axis points - these lines will be used for hooping.
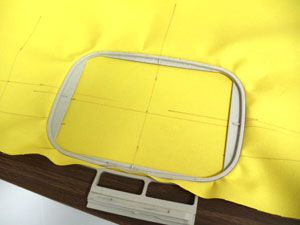
Spray a piece of medium-weight cutaway stabilizer with adhesive and smooth the fabric on top. Hoop the fabric and stabilizer together by aligning the marks on the hoop with the lines on the fabric. Attach the hoop to the machine and load the first design. Move the hoop so that the needle is directly over the center point on the fabric. Embroider the design.
When the design has finished, trim away the excess stabilizer on the back of the embroidery.
Repeat the hooping and embroidering process for each of the remaining designs.
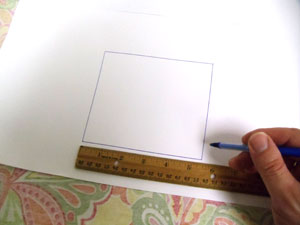
Now, we'll prepare the pocket pattern. On a large piece of paper or tag board, draw a 5 1/2 inch wide by 4 3/4 inch rectangle.
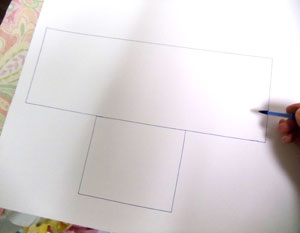
Draw 4 3/4 inch horizontal lines out from the top corners of the shape. Then, draw 5 1/2 inch vertical lines up from the ends of the lines you just drew. Connect the ends of those lines creating another rectangle shape.
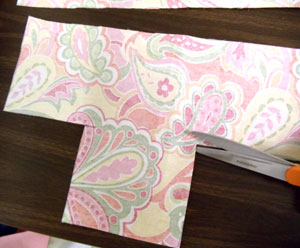
To prepare the fabric for the outer shell of the plant pockets, pin the pattern on to the print canvas. Then, trace and cut out the shape.
Using the pattern piece, cut out a total of three pieces.
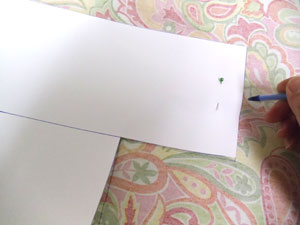
Cut 1/2 inch slits in each fabric piece where the small shape meets the large shape - the slits should be parallel to the bottom edge of the small rectangle.
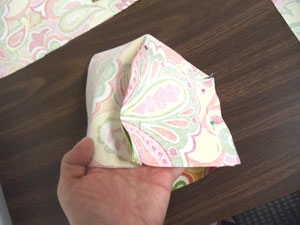
For each outer shell pocket piece, bring the side edges of the small shape together with the bottom edges of the large shape. With right sides facing, pin in place, and sew a 1/2 inch seam along the pinned edges -- start sewing at the fold and stop 3/4 inches from the outer raw edges of the fabric. Turn the fabric right side out and top stitch a 1/8 inch seam along the outer edges of both seams.
To prepare the inner linings of the plant pockets, again use the pocket pattern and follow the same steps that you did for the outer lining: prepare a total of three inner lining pieces.
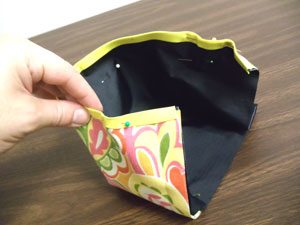
Insert the inner linings inside the outer shells with the wrong sides facing. Align the seams and outer edges and pin in place. Wrap bias tape around the top edges of the fabric, pin in place, and sew a seam along the inner edge of the tape.
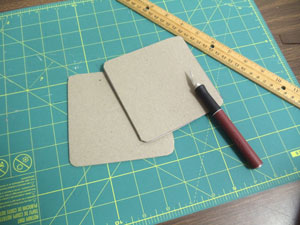
To prepare the inserts for the bottom of the pockets, remove the inner cardboard from an old three-ring binder. Using a craft knife, cut out three 4 1/2 inch by 4 1/2 inch pieces of the cardboard.
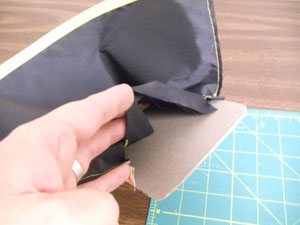
Insert the cardboard pieces inside the bottom of the pockets, between the outer shell and inner lining layers. Pin the layers together and sew a 1/8 inch seam along the side and bottom raw edges of the pockets.
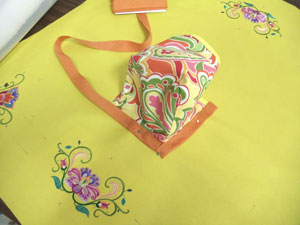
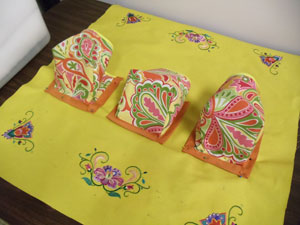
To attach the pockets, lay the embroidered front panel flat with the right side facing up. Place one of the pockets so that the bottom edge of the pocket is about 2 3/4 inches above the top edge of the bottom center design. Also, center the pocket left to right by measuring the width of the front panel and dividing by two. Pin the pocket in place and then wrap quilt binding around the side and bottom edges starting at one of the top corners. Pinch and fold the binding at the bottom corners and pin the binding in place as you go (fold the ends over 1/2 inch and press with an iron before wrapping). Then, sew the pocket in place by sewing a seam along the inside edge of the binding.
Draw horizontal lines out from the bottom edge of the center pocket. Then, align the bottoms of the remaining two pockets along this line spacing the pockets 1 1/4 inches apart from one another. Pin the pockets in place and attach them with the quilt binding, just as you did for the center pocket.
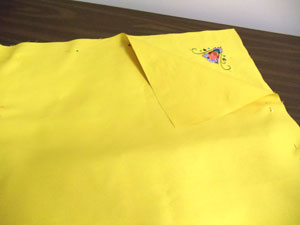
To prepare the fabric for the back, cut a piece of the canvas 27 inches wide by 29 1/2 inches high. Align the back fabric on top of the front panel (lay the pockets flat), with right sides facing. Pin in place, and sew a 1/2 inch seam along the side and top edges only - leave the bottom edge open for turning.
Turn the fabric right side out and press the seams. Turn the fabric of the opening in 1/2 inch, press, and then top stitch a 1/4 inch seam along the entire outer edge of the hanging. Also, top stitch just under and just over the pockets along the entire width of the hanging - this binds the front and back layers together and helps the pockets to hang properly.
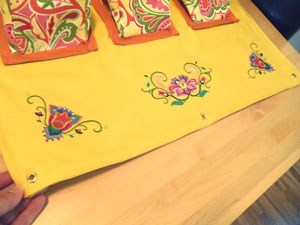
Add grommets at each corner, at the top center, and at the bottom center of the hanging. Also, add a grommet along the center of each side about one inch from the top edges of the pocket.
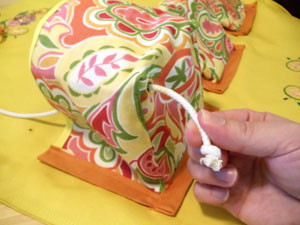
To add support to the pockets, we will add reinforcing cords held in place by more grommets. To start, add two grommets to the bottom of each pocket, at the front corners: use a craft knife to cut a hole through both layers of fabric and through the cardboard. Then, add a grommet at each hole. Thread the cord through the hole, starting inside the pocket, and tie a knot in the cord.
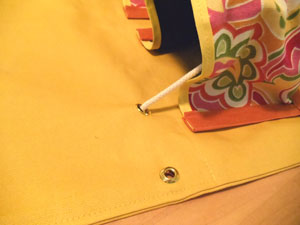
Add a grommet at the top corner of each pocket (through the two layers of the front panel) about one inch from the top corners of the pocket and about one inch in from the outer edges of the pocket.
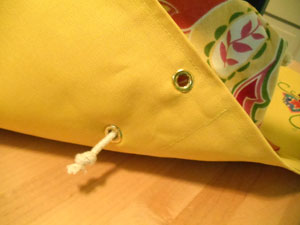
Thread the cord through the corresponding grommet (starting from front to back). Then, lift up the pocket so that the bottom is perpendicular to the front panel. Pull the cord tight and tie a knot at the back so that the cord will stay at the proper length and the pocket will hang level. We added all the grommets first and then added the cords (each pocket will have two cord supports).
Once all the cords are in place, your hanging flower garden is complete!
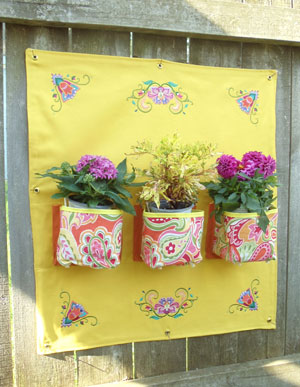
Add your favorite flowers, hang, and enjoy your blooming creation!


