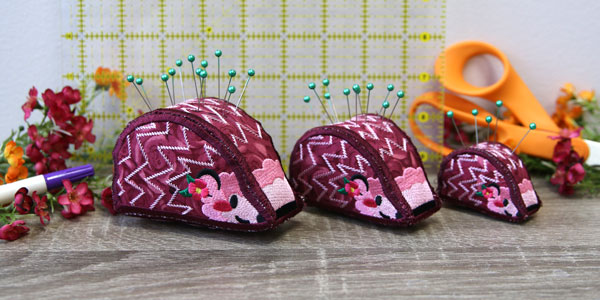
Create a too-cute hedgehog pincushion for your sewing room with adorable in-the-hoop critters! Not only are they great for keeping track of pins and needles, but they mimic the look of the hedgehogs' quills, too!
Finished Sizes:
Large: 4" long x 2 1/2" tall x 2 1/4" wide
Medium: 3 1/4" long x 2 1/4" tall x 1 3/4" wide
Small: 2 1/2" long x 1 1/2" tall x 1 1/4" wide
Supplies
- 1/4 yard quilter's cotton
- Tear-away stabilizer
- Temporary spray adhesive (such as Gunold's KK100)
- Polyester fiberfill
- Needle for hand sewing
Designs Used
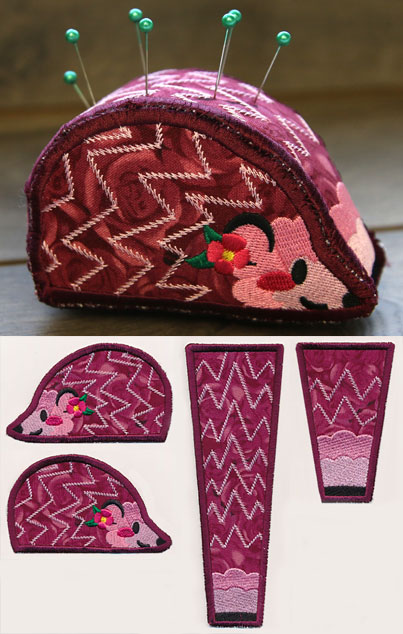

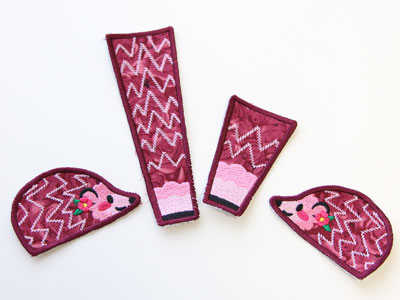
Each pincushion design has four files. Four are the embroidery files and the other four are dieline files. The dieline files are marked with the letters DL. Dielines are used to cut the fabric to the right shape and size.
Open and print each dieline file using embroidery software. If you do not have embroidery software, take a look at our helpful video on using dielines without software. We also recommend Wilcom's Hatch software which comes in different levels depending on what you'd like to use the software for. Hatch Organizer works well to view your designs, print dielines and templates, change design colors, and create basic design layouts. (This is an affiliate link, learn more about affiliate links here)
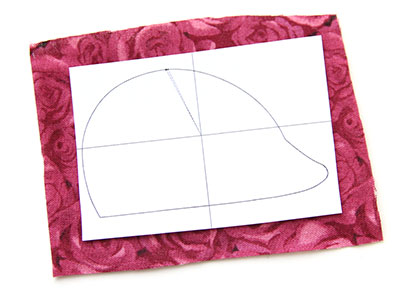
First prepare the fabric piece for the first side of the hedgehog. Cut around the first paper dieline (labeled with an "a"), and spray the back of it with temporary spray adhesive. Smooth it onto the quilter's cotton.

Cut out the shape. Repeat the above steps to prepare the fabric pieces for the other three pieces.

Hoop a piece of tear-away stabilizer. Madeira E-Zee Tear 1.5 oz. or Floriani Tearaway Medium are good choices. Those brands are more fibrous, less paper-like, and will tear more cleanly.
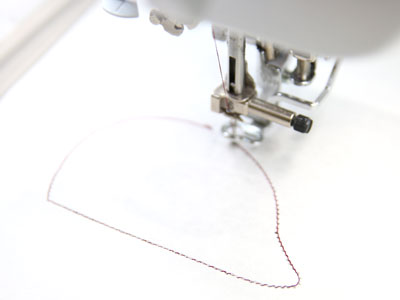
Attach the hoop to the machine and load the full embroidery file "a" (not the dieline files). Use a size 11 or 75/11 sharp sewing needle, rather than an embroidery needle. A sharp sewing needle has a smaller, finer point than an embroidery needle, so that will make smaller perforations in the stabilizer. Embroider the design. The first thing to embroider will be a dieline, or outline stitch. This marks the area on the stabilizer where we'll place the fabric piece.
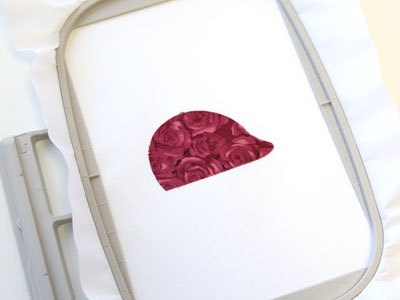
Remove the hoop from the machine, but do not unhoop the stabilizer. Spray the back of the fabric piece with a temporary adhesive, and place it right inside the sewn dieline.

Attach the hoop back onto the machine and continue embroidering the design. A tack down stitch will sew next. This binds the fabric in place for the remainder of the design. Once the fabric is stitched in place, all of the inner elements will sew.
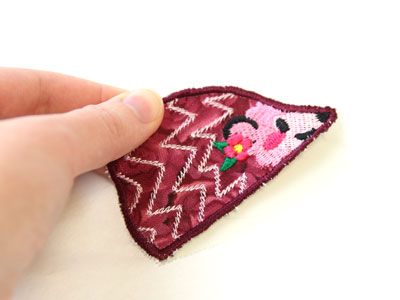
Once the embroidery is finished, unhoop the stabilizer and gently tear it away from the edges. Make sure to leave the tear-away stabilizer on the back of the fabric piece as this will add structure to the hedgehog pincushion.
Repeat the previous steps to embroider the other three pieces of the hedgehog (b, c, & d). When finished, tear away the excess stabilizer.
To assemble the pincushion, match up the short end of the two long pieces. Hand sew them together using the same thread used to embroider the border.
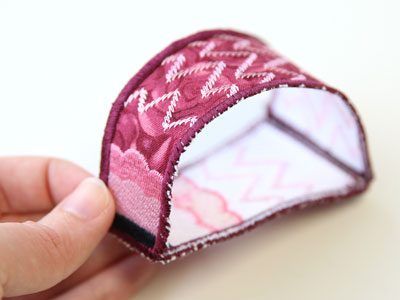
Then, match up the opposite ends of the two long pieces. Hand sew those together as well, making a loop out of the two pieces.
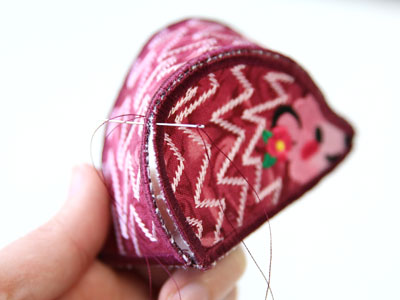
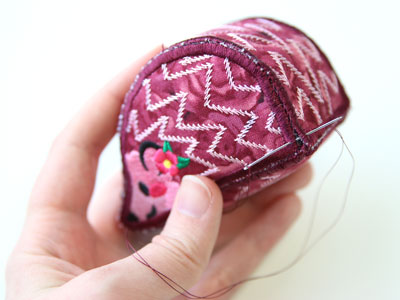
Hand sew the first side of the hedgehog to the side pieces, making sure to match up the back corner first. Start hand sewing at the back corner, and sew the straight side before sewing around the curve. This will make it easier to sew and line up.
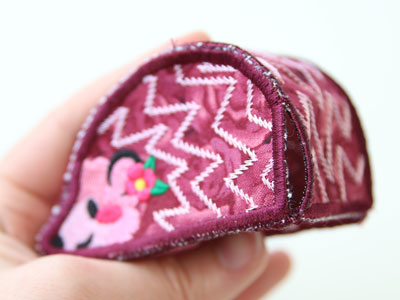
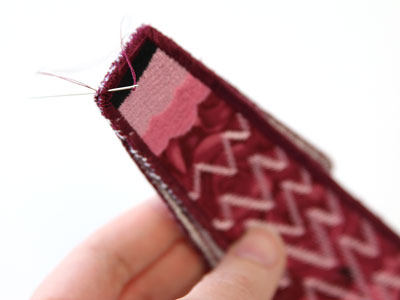
Attach the opposite side, starting with the back corner once again. Make sure to leave a small hole open for stuffing.
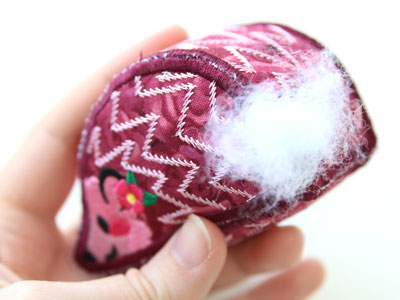
Fill the pincushion with polyester fiberfill through the opening.
Sew the opening closed to finish.


