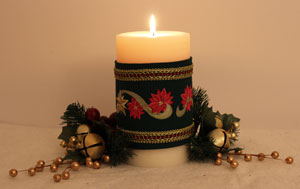
Light up your holidays with an embroidered candle wrap!
Candles are a special part of the holiday season. Make yours even more personal by decorating them with an embroidered wrap, embellished with a design of your choosing.
Read on for free project instructions!
Supplies
Supplies Needed:
**Candle (mine measures 7" high by 4" in diameter)
**3/8 yard fabric (I used heavy linen)
**Temporary spray adhesive
**Air-erase pen
**Medium weight cutaway stabilizer
**3/4 yard decorative trim (mine is 5/8" wide)
**One drawstring cord stop
**5" length cord (mine is 1/8" thick)
**One 1" button and needle and thread
**Tape measure
**Fabric glue
Special Project Notes:
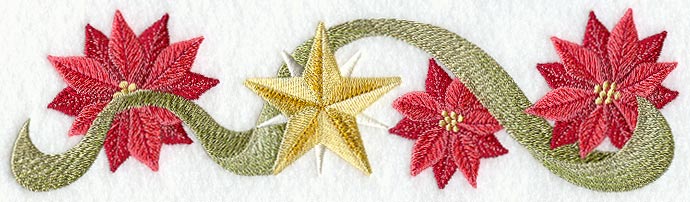
In this project I used the Poinsettia and Star Border design from the Merry Little Christmas Design Pack. The Damask Poinsettia Border design and the Pine Bough and Cone Border design would work as well. Or check out all our Christmas border designs and Chanukah border designs, and choose one you like. Make sure to match the design size with your project needs.
You may use a regular flame candle or a flameless battery operated candle for this project. I found my pillar candle at Target.
A Note About Safe Burning:
As a safety precaution, when the candle begins to burn down, remove the wrap. The handy button and loop closure makes it easy to replace the candle and reuse the wrap.
Designs Used
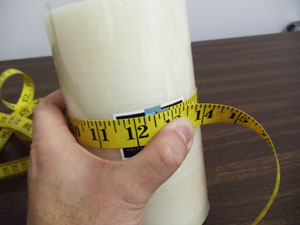
Using a tape measure, measure the circumference of the candle around the middle (mine measures 12 1/2").
Take this measurement and add one inch for seam allowance. This is the width of the front panel fabric (so, I added one inch to 12 1/2" which is 13 1/2").
Decide what design or designs you want to embroider. I am embroidering a border design twice across the wrap. To calculate how to fit the design or designs on the wrap, take the width of the design or total width of the designs (add 1/2" in between each of the designs, if repeating them) and compare it to the width of the front panel fabric.
There needs to be at least a total of 2" of excess space between the ends of the designs and the side edges of the fabric (one inch on each side).
Decide how tall you want the wrap to be. This determines the height of the front panel fabric. There should be at least 1 3/4" of excess space from the top and bottom edges of the design you plan to embroider. So there should be a total of at least 3 1/2" of total excess space added to the height of the design.
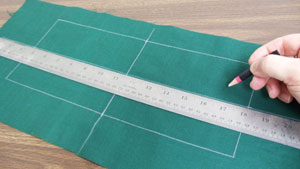
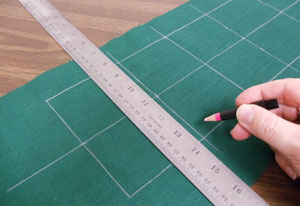
The design I am embroidering is about 2" high, so the height of my front panel fabric is 5 1/2" high. Using an air-erase pen or other marking tool, draw a rectangle on the fabric (I am using heavy linen) by using your dimensions. I drew my shape at 13 1/2" wide by 5 1/2" high.
Leave a couple of inches of excess fabric around the shape. Measure and mark the center of each side by measuring and dividing by two. Draw lines connecting the marks; the marks will be used for hooping.
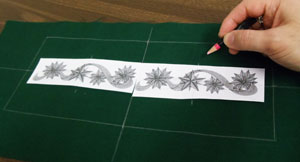
Create a paper template of the design or designs by printing them at full size using embroidery software. Poke holes in the center of the template or templates and align them with the horizontal line on the fabric.
If repeating designs, space the designs about 1/2" apart. If embroidering one design, align the center point of the template with the center point on the fabric.
For all designs, make sure there is at least one inch of space between the outer edges of the designs and the side edges of the fabric. Mark the vertical axis points and remove the templates.
Draw lines connecting the marks.
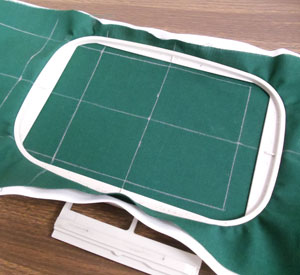
Spray a piece of medium weight cutaway stabilizer with temporary adhesive and smooth the fabric on top. Hoop the first design by hooping the fabric and stabilizer together by aligning the marks on the hoop with the lines on the fabric.
Attach the hoop to the machine and load the first design. Move the hoop so that the needle is directly over the center point on the fabric. Embroider the design.
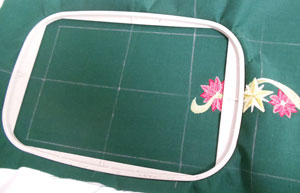
If you are embroidering more than one design, when the first design has finished, re-hoop the fabric over the next center point. The first design will be hooped and this is okay; the design will not be damaged.
Attach the hoop to the machine, align the needle over the center point, and embroider the design. Repeat the hooping and embroidering process for each design.
When all the designs have finished, trim away the excess stabilizer on the backside of the embroidery.
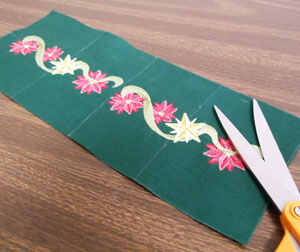
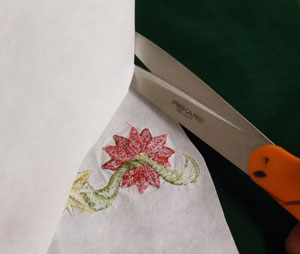
Cut out the shape.
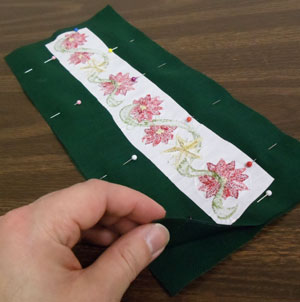
To prepare the fabric for the back of the wrap, lay the embroidered front panel on top of the fabric, right sides together, pin in place, and cut out the shape.
Sew a 1/2" seam around the top, bottom, and one of the side edges. Leave one of the side edges open for turning.
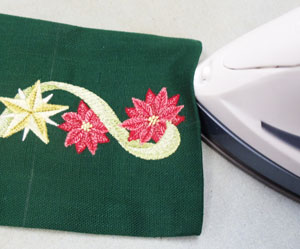
Turn the fabric right side out, press the seams with an iron, turn the fabric of the opening in 1/2" and press.

To prepare the loop for the button closure, cut a 5" length of 1/8" cord. Form a loop, tape the ends of the loop together, and insert the loop in the center of the open side with the loop end extending out 3/4".
Pin in place and top stitch a 1/8" seam around the entire outer edge of the fabric. Sew back and forth over the loop to secure it in place.
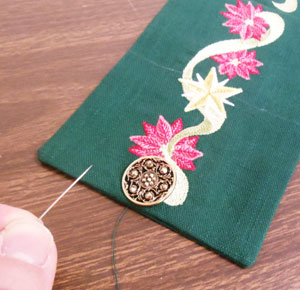
With needle and thread, sew a 1" button on the center of the opposite side of the wrap. Attach the button about 1/2" in from the outer edge of the fabric.
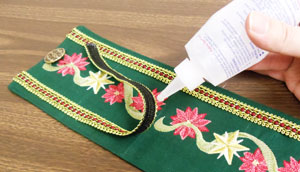
To add the decorative trim, cut two strips of the trim to the width of the wrap leaving about 1/2" of excess at each end.
Attach the trim by adding drops of fabric glue to the backside of the trim and pressing it in place along the wrap. I added my trim about 1/4" from the top and bottom edge of the fabric.
Wrap the ends of the trim around the side edges and press them in place.
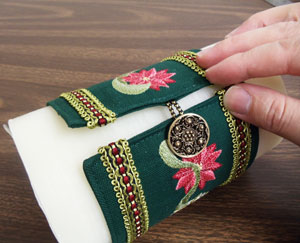
Now your candle wrap is complete! Wrap it around the candle and secure it in place by inserting the button through the loop.
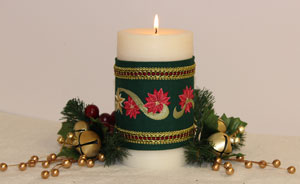
Give your holidays a warm glow by making a candle wrap embroidered with a beautiful seasonal design.
Ideal for decorating your home, or for giving someone a bright and personal gift for the holidays!


