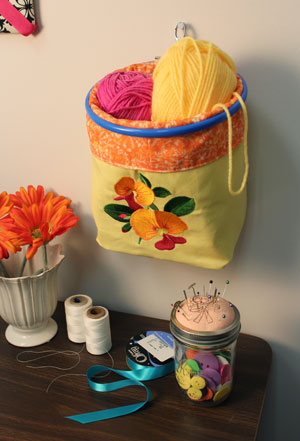
This helpful catchall organizer is perfect for the craft room or the laundry room! Add an embroidery design, and it becomes a nice addition to the room's decor as well. The embroidery hoop around the opening makes it sturdy, and adds a cute crafty touch.
Hang it on the wall or just place it next to a sewing machine, and put the supplies you need at hand inside. In the laundry room, hang it next to the washer and place fabric softener or dryer sheets in it. It can also hold plastic bags, too!
Read on for instructions to make a helpful hoop-it-up organizer!
Supplies
Supplies Needed:
**7" hand embroidery hoop
**1/2 yard sturdy fabric (for outer shell -- I used lightweight canvas)
**1/2 yard fabric (for inner lining -- I used chenille)
**1/8 yard print cotton fabric (for cuff)
**1/2 yard medium weight fusible interfacing
**Medium weight cutaway stabilizer
**Temporary spray adhesive
**Air-erase pen
Supplies Needed continued:
**Small metal or plastic ring (for hanger -- I used a swivel clasp)
**Needle and thread for some hand sewing
**Tape measure
Special Project Notes:
Finished Size: 7 1/2" wide by 8 1/2" high by 4" deep (at the bottom)
Designs Used:
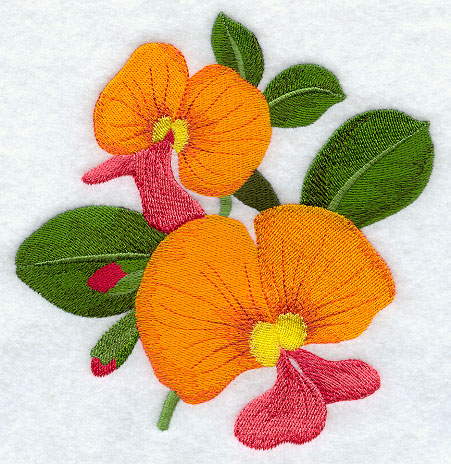
I used the small size of the Flame Pea design. Any designs from the Australian Wildflowers Design Pack or the Beauty in Bloom Design Pack would also be sweet on this organizer. Crafty Collectible designs would also be a great choice.
Designs Used
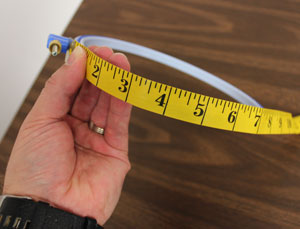
First, measure the circumference of the hoop. I am using a 7" hoop which measures 23 1/2" around.
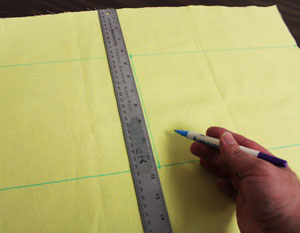
Next, take that measurement and add one inch for seam allowance (mine is 23 1/2" so 23 1/2" plus one inch equals 24 1/2"). This will be the width of the outer shell fabric. Using that measurement, cut a piece of the fabric (I used lightweight canvas) the determined width by 15 1/2" high.
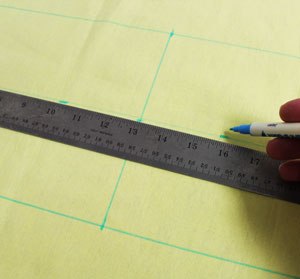
Using an air-erase pen or other marking tool, measure and mark 4" down from each top corner along each side edge. Also, measure and mark 4" up from each bottom corner along each side edge. Draw horizontal lines across the fabric connecting the lines.
The lines represent where the fabric will be folded later on. The area in between the lines will be the embroidered area. Measure and mark the center of each horizontal line by measuring and dividing by two. Draw a line connecting the marks.
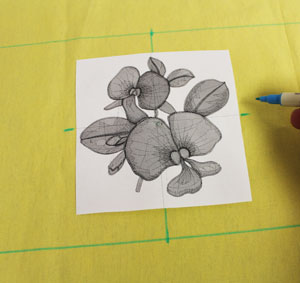
Create a paper template of the design by printing it at full size using embroidery software. Poke a hole in the center of the template and align it with the vertical line on the fabric. Center the design top to bottom by measuring equal distances between the outer edges of the design and the horizontal lines. Mark the horizontal axis points and remove the template.
Draw a line connecting the horizontal axis points
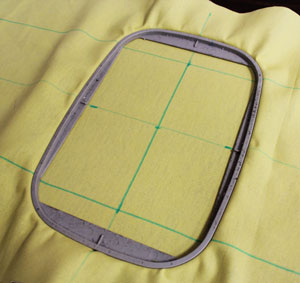
Spray a piece of medium weight cutaway stabilizer with temporary adhesive and smooth the fabric on top. Hoop the fabric and stabilizer together by aligning the marks on the hoop with the lines on the fabric. Attach the hoop to the machine and load the design. Move the hoop so that the needle is directly over the center point on the fabric. Embroider the design.
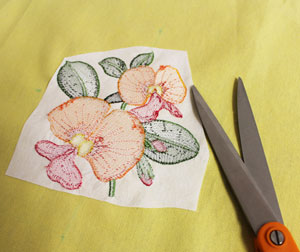
When the design has finished, trim away the excess stabilizer on the backside of the embroidery.
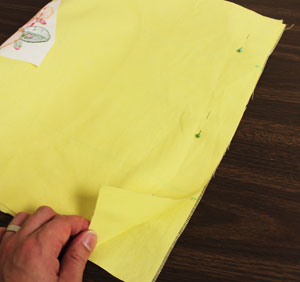
Fold the fabric widthwise (short ends aligned), right sides together, pin in place, and sew a 1/2" seam along the pinned edge only.
Pin the fabric along the bottom edge and sew a 1/2" seam.
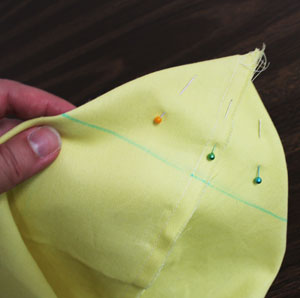
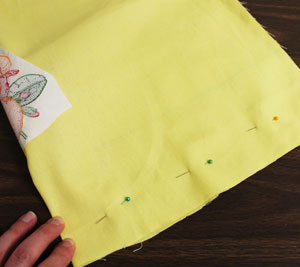
Bring the bottom edge up to meet the side edges (align the seams on one side and fold the opposite side to match). Pin in place and then measure and mark in 3 1/2" starting at the outer point of the folds. Draw a line perpendicular from the bottom seam at these marks. Sew a seam along each line you just drew.

Trim off the fabric at each fold leaving about 1/2" of excess. Turn the outer shell right side out.
To prepare the fabric for the inner lining, cut a piece of fabric (I used chenille) to 24 1/2" wide by 12" high. To help the organizer keep its shape, lay the fabric on top of the fusible interfacing (wrong side of the fabric on top of the fusible side of the interfacing).
Cut out the shape and iron the interfacing onto the fabric (follow the manufacturer's instructions on the interfacing packaging). To prepare the fabric for the cuff, cut a piece of print cotton fabric to 24 1/2" wide by 4" high.
Align the cuff fabric along the top edge of the inner lining fabric, right sides together, pin in place, and sew a 1/2" seam along the top edge only. Press the back seam open with an iron.
Assemble the inner lining/cuff section just as you did the outer shell. Insert the outer shell inside the inner lining/cuff section, right sides together, and align the seams and the top edges.
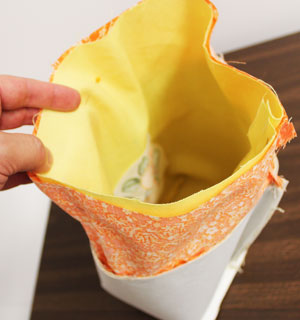
Pin in place and sew a 1/4" seam along the top edge leaving about 3" open at the back for turning. Turn the fabric right side out and insert the inner lining inside the outer shell. Turn the fabric of the opening in 1/4" and press. Also, press the top seam. Sew a 1/8" seam along the entire top edge of the fabric.
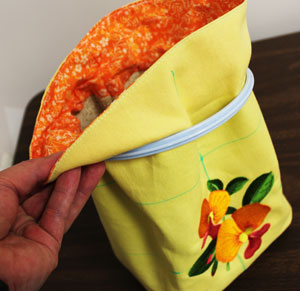
To add the hand embroidery hoop, slide the inner hoop over the top edge of the organizer.
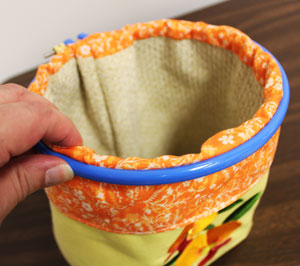
Fold the top edge of the organizer over the top of the hoop about 2 1/4". Add the outer hoop over the fabric at the top edge, align it with the inner hoop, and tighten the hand screw about half way. Adjust the fabric around the top edge and fully tighten the hand screw.
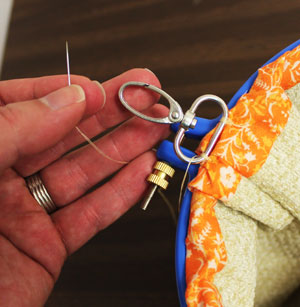
To add the hanger, using needle and thread, hand-sew a small metal or plastic ring at the top back edge of the organizer. I chose a swivel clasp for my hanger.

Put an embroidered catchall organizer anywhere you need a colorful, crafty container to keep items handy where you need them most!


