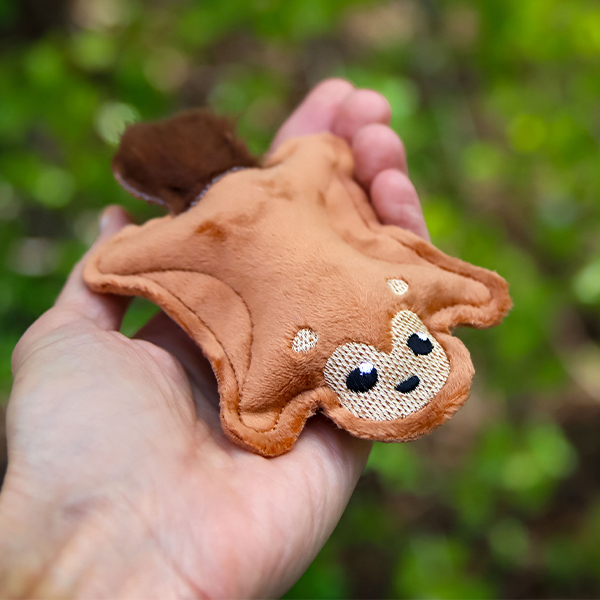
Make your own stuffed in-the-hoop flying squirrel toy! It's the perfect machine embroidery design for both kids and cats alike. Project instructions will walk you through the process of stitching and assembling this machine embroidery design in-the-hoop.
Supplies
- Small pieces of brown fabric
- Small piece of faux fur
- Tear-away stabilizer
- Polyester fiberfill
- Temporary spray adhesive (Gunold KK100)
- Water-soluble Topper (Sulky Ultra Solvy)
Tools
- Needle and thread for hand sewing
Designs Used
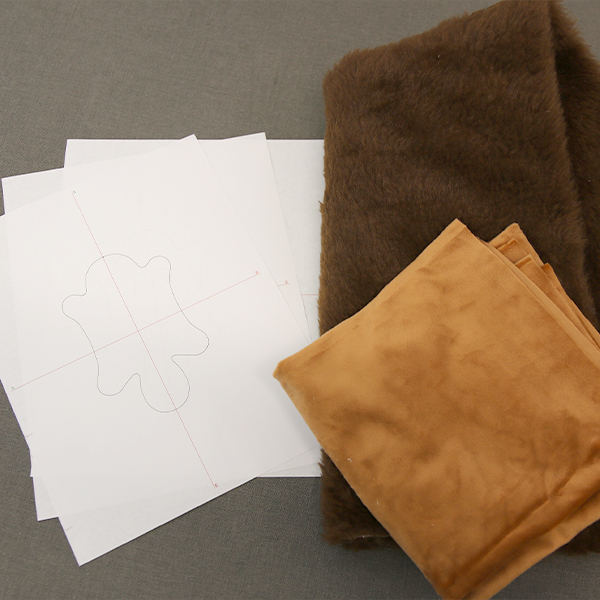
When you download the in-the-hoop flying squirrel toy design, you will find multiple files. Some are embroidery files, and the others are dieline files marked with the letters "DL". Dielines are used to cut the fabric to the correct shape and size.
Open and print each dieline file using embroidery software. If you do not have embroidery software, take a look at our helpful video on using dielines without software. We also recommend Wilcom's Hatch software which comes in different levels depending on what you'd like to use the software for. Hatch Organizer works well to view your designs, print dielines and templates, change design colors, and create basic design layouts. (this is an affiliate link - we may earn a commission off purchases made with this link)

Spray the backside of the printed dieline for the front and back of the squirrel with a small amount of temporary adhesive. Smooth that on top of a piece of fabric.
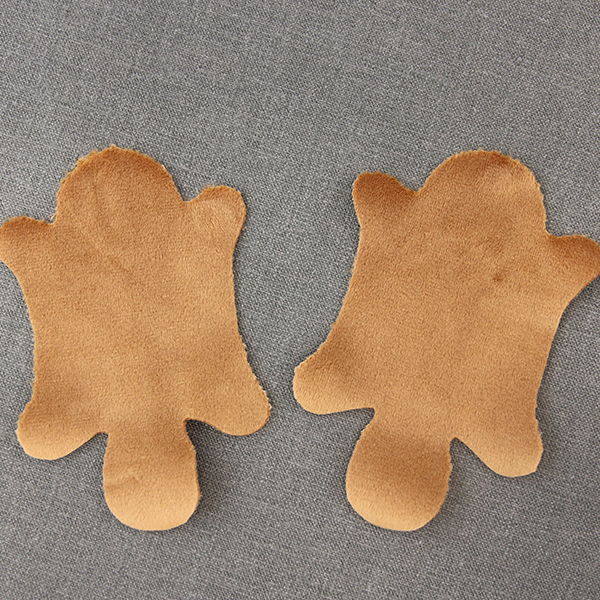
Cut out the shapes, then remove the paper dielines.

Repeat this process with the faux fur for the tail applique. Cut it out and set this piece aside for later.
Now that the fabric pieces are cut to the proper shape and size, it's time to embroider the design.
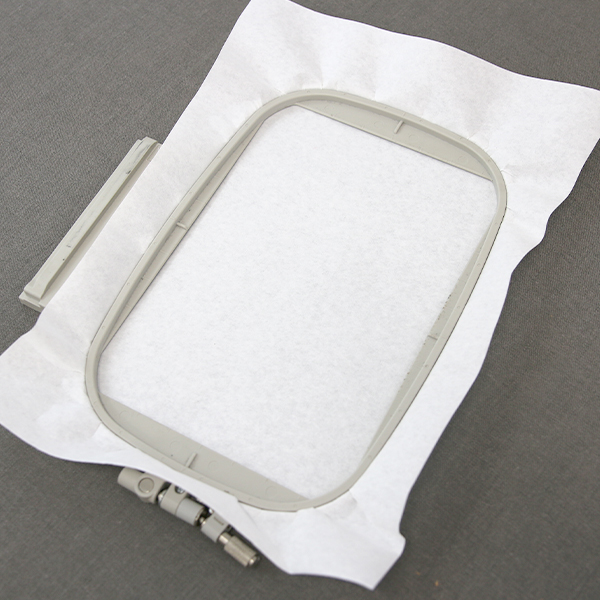
Hoop a piece of tear-away stabilizer.
Attach the hoop to the machine and load the full embroidery design (not the dieline files). Use a size 11 or 75/11 sharp sewing needle rather than an embroidery needle. A sharp sewing needle has a smaller, finer point than an embroidery needle. It will make smaller perforations in the stabilizer.
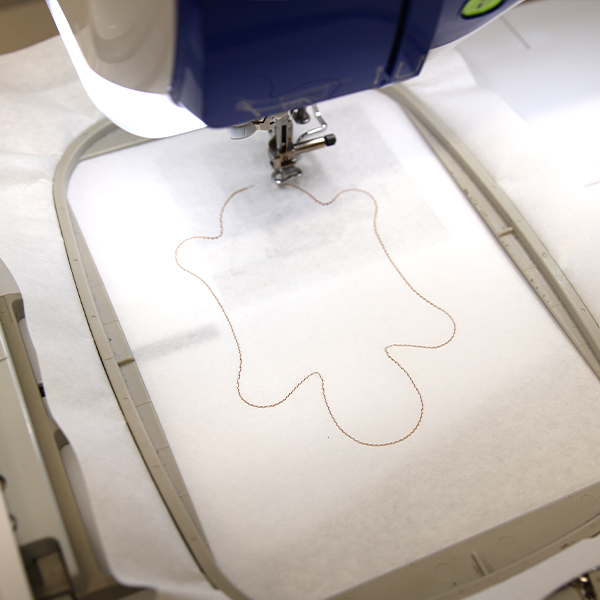
Embroider the design. The first thing to embroider will be a placement dieline or outline. This marks the area on the stabilizer for the front fabric piece.
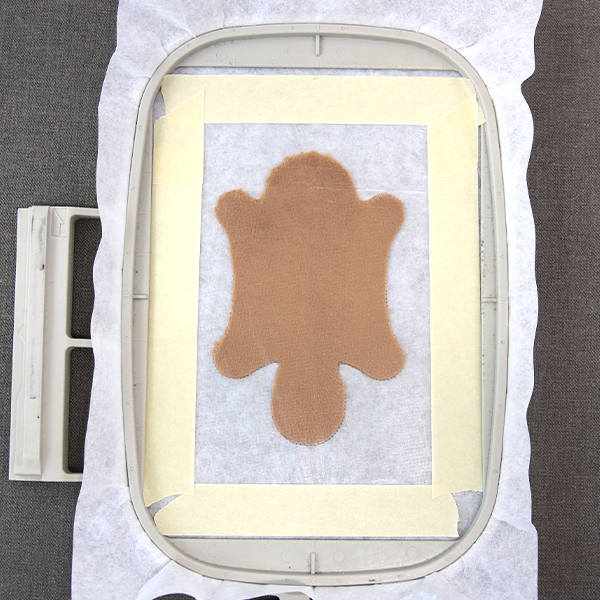
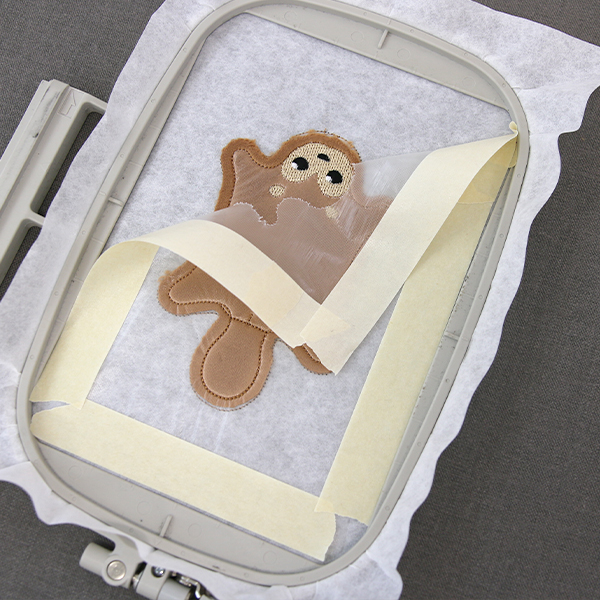
Remove the hoop from the machine, but do not unhoop the stabilizer. Spray the back of the front fabric piece with a small amount of temporary adhesive. Place the fabric inside the sewn outline. If using fuzzy or fluffy fabrics for the body of the squirrel, place a layer of water-soluble topper on top of the design, keeping it in place with tape.
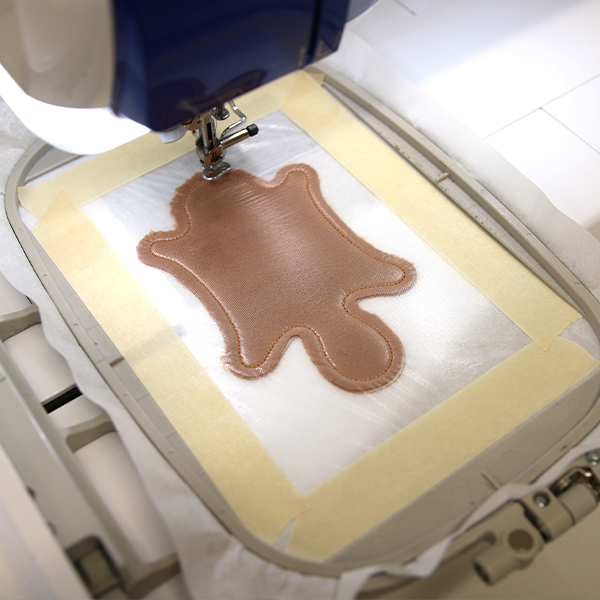
Attach the hoop back onto the machine and continue with the design. A running stitch tackdown will sew next. This holds the front fabric in place for the remainder of the design. Continue embroidering the design.
After the eye highlights stitch, embroider the tail dieline. Then carefully remove the water-soluble topper from the front of the design.
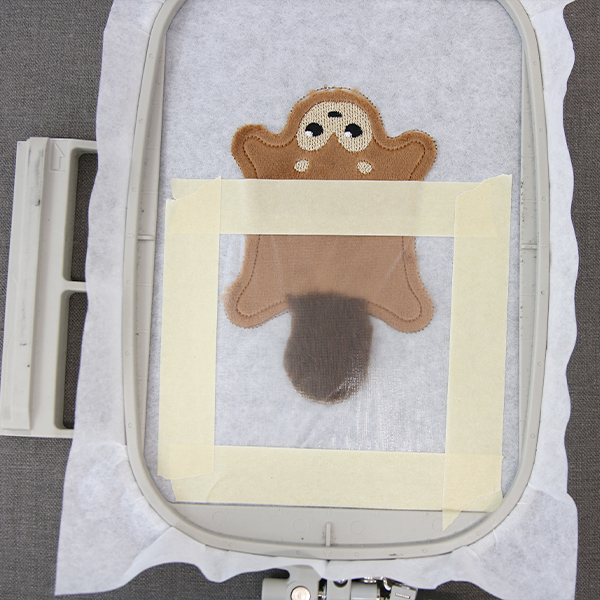
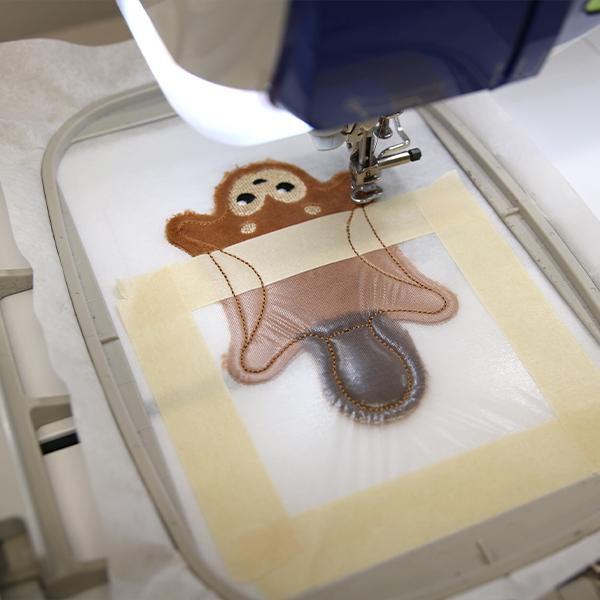
Next, spray the wrong side of the faux fur applique piece with temporary adhesive and place it on top of the front fabric piece over the sewn dieline. Place a small piece of water-soluble stabilizer topper over of the tail applique to keep the fur piece in place.

Place the hoop back onto the machine. Then embroider the tackdown for the piece to hold it in place. Stop before sewing the "back piece tackdown, wing section line" step.
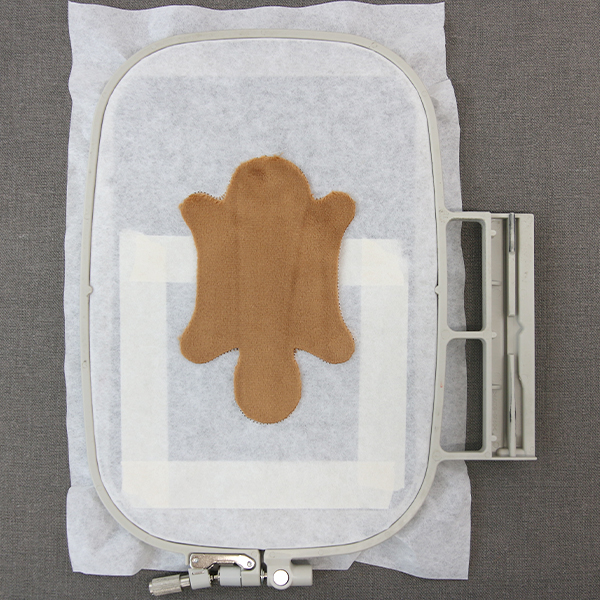
When you get to this last color change, stop the machine and remove the hoop from the machine but do not unhoop the stabilizer. Spray the backside of the back fabric piece with spray adhesive. Turn the hoop over and place the back fabric inside the shape on the backside of the embroidery.

Since both sides of the squirrel will be seen from this point on, wind a bobbin with the same thread used in the needle.
Attach the hoop back to the machine and continue embroidering the design. A tack down stitch will sew around the outer edge of the stuffie. This binds all the layers together.
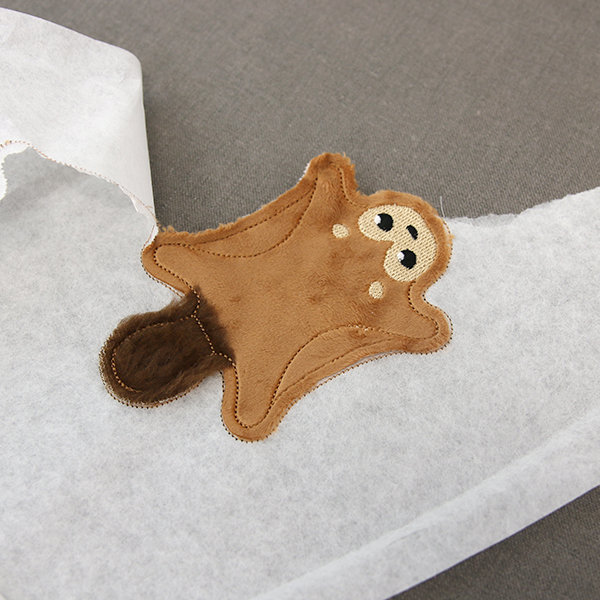
Once the embroidery is finished, remove the hoop from the machine. Unhoop the stabilizer and carefully tear it away (the dieline will be removed with the stabilizer). Tear away the water-soluble topper from the tail as well.

Then fill the toy through the head opening using polyester fiberfill. The sides of the toy are purposefully not stuffed, just the body, arms, tail, and head will be stuffed.
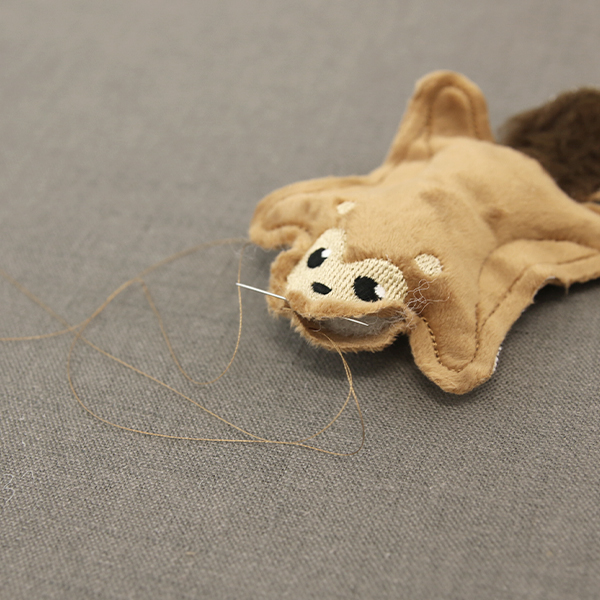
Using a needle and thread, sew the opening closed by stitching along the original tack down seam.
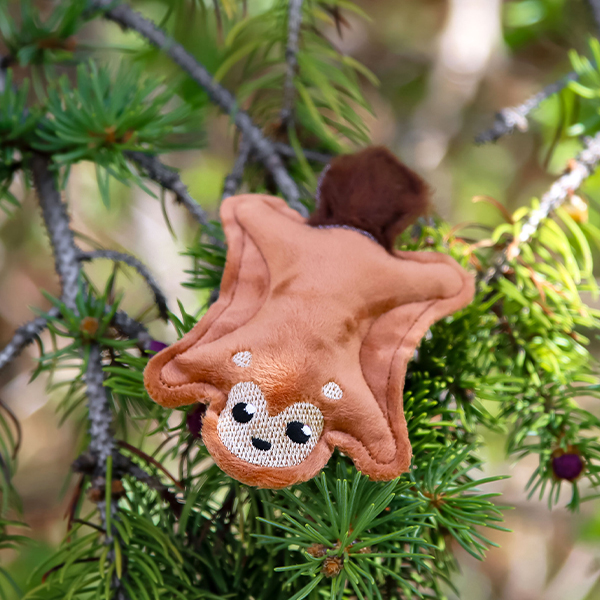
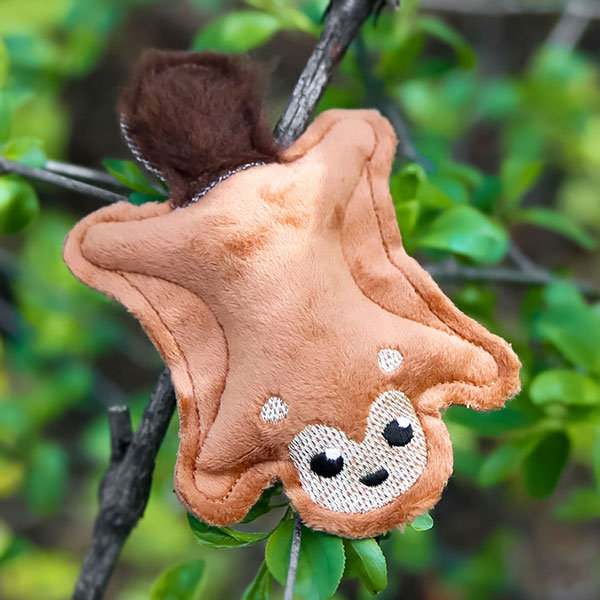
Your in-the-hoop flying squirrel is now complete! Now you can give this fluffy little friend to your cats, or you can throw it around the room and make it fly. For even more fun, try adding a piece of elastic to the mouth before stitching it closed to make this squirrel really soar.


