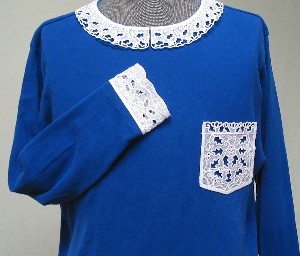
Freestanding lace elements can turn a plain garment into a gorgeous creation.
Freestanding lace collars, cuffs, and pockets are a beautiful addition to any top. Use one piece or all to make the garment extra special.
Costumers rejoice! Lace elements are wonderful for period costumes.
Supplies
Supplies needed:
A plain garment, handmade or commercially made.
Water-soluble stabilizer. (use heavy weight for freestanding lace)
Bobbins wound with the same embroidery thread that you are using in your top thread path.
Embroidery Designs from Embroidery Library:
Special Project Notes:
You can use either 40 weight rayon thread or 30 � 35 weight cotton thread.
I use Coats and Clark 30 and 35 weight cotton thread. It's labeled as Mercerized ELS Cotton for Machine Quilting & Crafts; Machine Quilting; or All Purpose. I find Coats and Clark cotton thread at JoAnn's. I've also used Madeira Cotona, which is a 30 weight cotton thread.
I use the 30 - 35 weight cotton thread both in the bobbin (I wind my own bobbins) and in the top (needle).
A note about water-soluble stabilizers and needles:
There are many, many different brands of water-soluble stabilizer available. Some are thin and light, some are fibrous, and some are thick and heavy. It can be confusing to pick the right one for your lace project.
We've digitized and stitched thousands of freestanding lace designs, and have consistently excellent results with Sulky Ultra Solvy (the heavy weight water-soluble stabilizer by Sulky) and Vilene, a fibrous water-soluble stabilizer. We order Vilene from www.pointetopointe.com.
Use a sharp needle (as opposed to an embroidery needle) when embroidering onto water-soluble stabilizer - especially if using the "plastic-looking" kind (such as Sulky Ultra Solvy). An embroidery needle has a larger point, which makes larger holes in the water-soluble stabilizer, leading to tearing and misalignment.
Designs Used
Instructions:
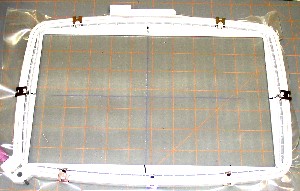
Hoop one piece of water-soluble stabilizer (WSS). When hooping the WSS, it should be taut, but not drum tight. (We used one layer of Ultra Solvy for our project and it worked very well.)
Place a bobbin, filled with the same thread as the top thread, in your bobbin case.
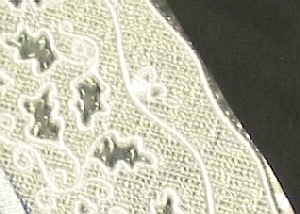
Embroider the collar, pocket, and cuff pieces right onto the WSS. No additional stabilizer is needed.
When the embroidery is finished, cut away the stabilizer close to the edge of the embroidery, and soak the embroidery in warm water to remove the WSS. Remove from the water and allow the embroidery to dry flat.
Attaching the lace elements
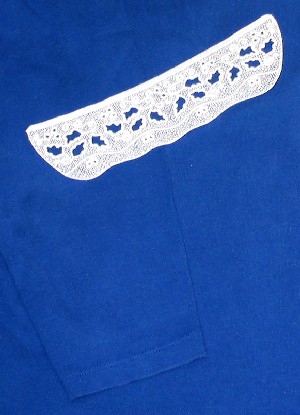
Cuffs: Open up the bottom 9 inches or so of the sleeve seam. Measure the width of the sleeve end, and ease or pleat the sleeve fabric as needed to fit the cuff to the garment. Make sure to remember to allow for seam allowances, so that you can close the sleeve again after you finish attaching the cuff. Stitch the straight edge of the cuff to the bottom edge of the sleeve.
Close the sleeve seam as far as you like, to accommodate comfortable dressing. Add a button or frog closure as desired.
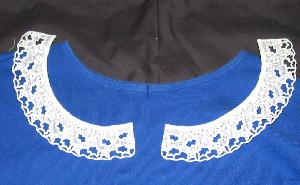
Collar: Mark the center front of the garment neckline. Starting at the center front, stitch the top edge of each lace collar piece to the top edge of the finished neckline.
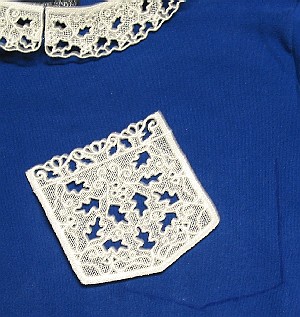
Pocket: Lay out the embroidered pocket piece where you want it on the front of the garment. Make sure that the pocket is straight with the grain of the garment's fabric. Trace around the pocket piece with an air-erase marking pen.
Bring the shirt to your machine and place the pocket back within the traced lines, and stitch to the garment along the pocket's sides and bottom.
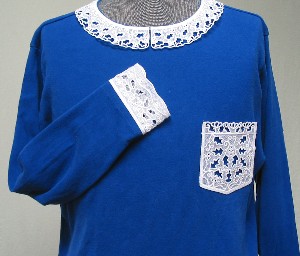
How lovely! This shirt would be perfect with a pretty skirt for a fall outing.
Sweatshirt Idea!
Make a sweatshirt cardigan and add the lace collar at the neck and place the lace pockets near the front hem. You'll get a totally different look from these same designs. Click here for directions on how to make a sweatshirt cardigan.
