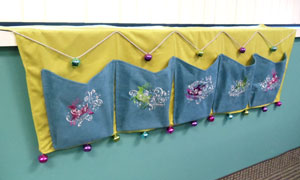
Decorate your home this holiday season with a festive mantel scarf. Use the pockets like stockings and let Santa fill them with little presents for each member of the family, or just stuff them with festive decorations.
We used the Dashing & Dazzling Reindeer designs, but you can choose any embroidery designs you like.
Read below for project instructions!
Supplies
Supplies Needed:
**1 1/2 yards fabric - 60 inches wide (for front and back of scarf - we used moleskin)
**1 1/2 yards fabric - 60 inches wide (for pockets - we used moleskin)
**Medium weight cutaway stabilizer
**Temporary spray adhesive
**Air-erase pen
**2 yards of decorative cord
**Large jingle bells (we found ours at Michael's)
**Needle and thread for some hand sewing
Designs used:
Dasher in Filigree - Small, Dancer in Filigree - Small, Prancer in Filigree - Small, Vixen in Filigree - Small, Merry Christmas Sleigh in Filigree - Small
These designs are also available in the following design packs:
A Dashing & Dazzling Reindeer Design Pack - Large
A Dashing & Dazzling Reindeer Design Pack - Small
Finished size:
58 inches wide - front hangs down 15 inches high - top that lays on mantel is 10 inches high
Project Tips:
Use heavy items to hold the mantel scarf in place or use double sided tape or tacks.
Designs Used

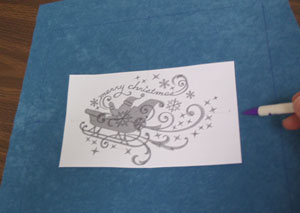
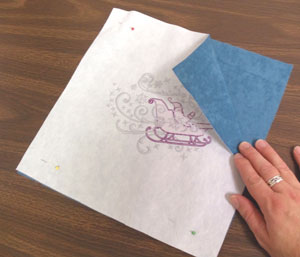
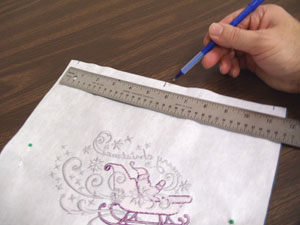
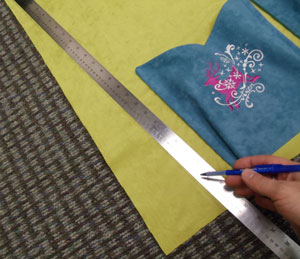
To begin, we will prepare the fabric for the pockets. Cut a piece of fabric (we used moleskin) 14 inches by 14 inches. Draw a 12 inch by 12 inch square on the fabric. Then, using an air-erase pen or other marking tool, find the center of each side of the shapes by measuring and dividing by two. Draw lines connecting the marks - where the lines meet is the exact center of the shape. Create a paper template of the design by printing it at full size using embroidery software. If you don't have embroidery software, you can cut a piece of paper the shape and dimensions of the design to help with placement and centering. Poke a hole in the center of the template and align it with the center point on the fabric. Make sure the design fits well within the shape. There should be at least three inches of space between the edges of the design and the outer edges of the shape.
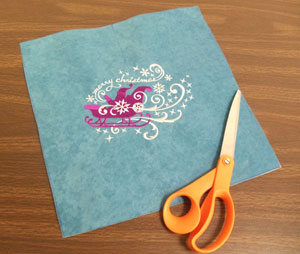
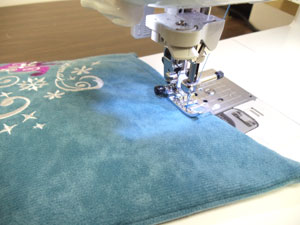
Remove the template. Spray a piece of medium weight cutaway stabilizer with temporary adhesive and smooth the fabric on top. Hoop the fabric and stabilizer together by aligning the marks on the hoop with the lines on the fabric. Attach the hoop to the machine and load the design. Move the hoop so that the needle is aligned with the center point on the fabric. Embroider the design. After the design has finished, cut out the shape. We are leaving the stabilizer on the back of the embroidery to help give the fabric more rigidity. Repeat the cutting of fabric, marking, hooping, and embroidering process for each pocket for a total of five.
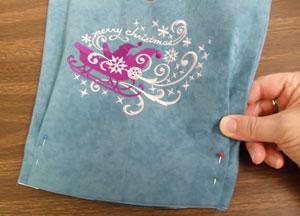
To prepare the back pocket fabric, lay the embroidered front pocket piece on top of the fabric and cut out the shape. Align the pieces together, right sides facing, and pin in place.
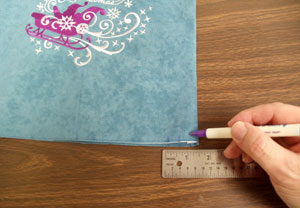
Now we will create the shape on the top of the pockets. Mark in 1/2 inch along the top edge of the pocket starting at each top corner. Then, mark the center point between these two marks by measuring and dividing by two.
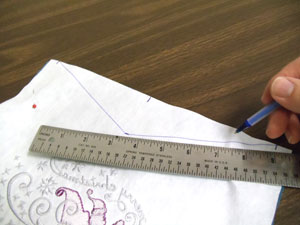
Measure down 2 inches from the mark you just made. Then, draw lines connecting the last mark and the top corner marks.
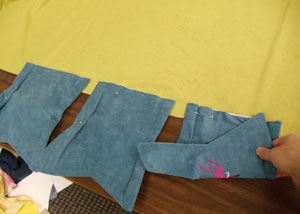
Cut out the shape along the lines you just drew.
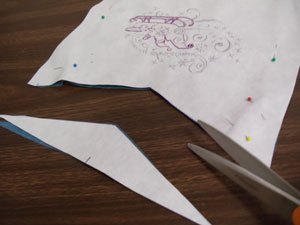
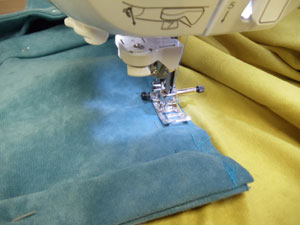
Sew a 1/2 inch seam along the top and side edges of the pocket - leave the bottom open for turning. Cut a slit at the top center "v" and trim off the top corners.
Turn the pocket right side out and press the seams (finger press or press with an iron if needed). Top stitch a 1/4 inch seam along the top edge only.
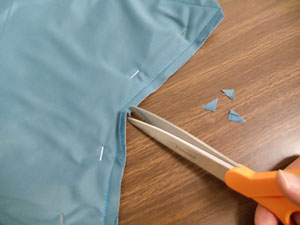
Next, we will pleat the bottom corners of the pockets. To do this, measure and mark in 3/4 inch along the bottom edge of the pocket starting at each bottom corner. Then, measure and mark in 1 1/4 inch along the bottom edge starting at each bottom corner.
Bring the two marks together at each bottom corner, creating pleats, and pin in place. Sew a 1/8 inch seam along the entire bottom edge of the pocket, tacking the pleats in place.
To create the front and top of the scarf, cut a piece of fabric 60 inches wide by 27 inches high. Lay the fabric flat and mark the center of the bottom edge of the fabric by measuring and dividing by two. Then, mark the center of the bottom of the middle pocket (on the backside) by measuring and dividing by two. Align the center mark on the pocket with the center mark on the fabric - right sides facing and with 1 1/2 inch of the pocket extending onto the front scarf fabric. Pin in place. Arrange the other pockets onto the front scarf fabric just as you did with the middle pocket. Leave one inch of space in between each pocket.
Sew a 1/2 inch seam along the bottom edge of each pocket.

Flip the pockets up and press the seams. Pin the pockets in place with the top corners touching. Sew a 1/4 inch seam along the sides of each pocket.
Next, we will shape the sides of the scarf. Measure and mark 4 inches in along the bottom edge of the fabric starting at each bottom corner. Draw a line connecting the mark with the top corner of the fabric. Trim the fabric along each line. To prepare the fabric for the back of the scarf, lay the front/pocket section on top of the fabric, right sides together, pin in place, and cut out the shape. Sew a 1/2 inch seam along the top, bottom, and sides of the scarf, leaving about 15 inches of one of the sides open for turning. Turn the scarf right side out and press the seams. Turn the fabric of the opening in 1/2 inch and pin in place. Top stitch a 1/4 inch seam along the entire outer edge of the scarf.

To add the decorative cord and jingle bells, lay the scarf flat and measure 10 inches down along each side starting at each top corner. Then, make marks in between these marks right above the point where each of the pocket points meet.
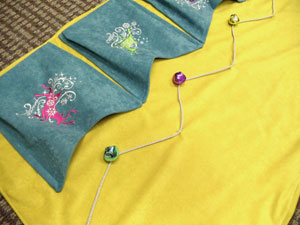
String five jingle bells onto the cord. Hand sew the first end of the cord at one of the side marks. Then, drape the cord so that the bell is about 2 inches from the top "v" of the pocket. Sew the cord in place at the first mark right above the pocket corners. Repeat this process across the scarf. When you reach the other side, wrap tape around the cord where it meets the edge of the scarf, trim the cord, and sew it in place. You can also sew jingle bells to the bottom edge of the scarf. Hand sew the bells in place at each bottom corner, in the center bottom of each pocket, and in between each pocket.
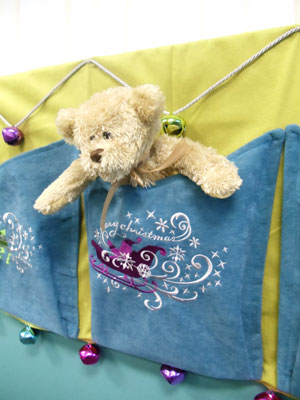
The mantel scarf is complete and ready to fill with holiday goodies and gifts!


