Dress up your table linens with napkin rings constructed completely in the hoop! Not only will these napkin rings add an elegant and festive look to your dining table, but they're also quick and easy to put together in a flash.
Supplies
Project Needs & Notes
- Small pieces of quilter's cotton
- Medium-weight (2.5 ounce) cutaway stabilizer
- Tear-away stabilizer
- Temporary spray adhesive (like Gunold KK100)
- 1/4" wide ribbon
- Masking tape
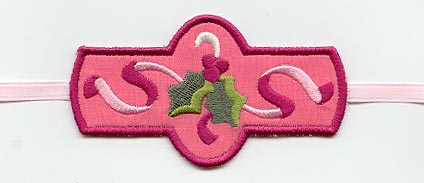
For this tutorial, I used the Merry Christmas Holly Napkin Ring (In-the-Hoop) design. The instructions in this tutorial can also be applied to Embroidery Library's other in-the-hoop napkin ring designs.
This project was featured in the following:
Gather 'Round the Table Lookbook
Designs Used
In-the-hoop napkin rings are stitched and constructed completely in the hoop, with no other sewing required.
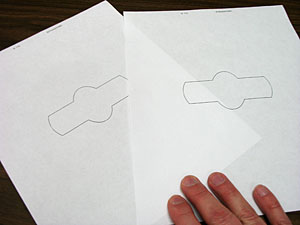
The designs come with dieline files marked with the letters DL. The dieline files are used to cut the front and back fabric pieces to the proper shape and size prior to embroidering.
Open each of the dieline files in embroidery software, and print them.
If you do not have embroidery software to print dielines, try Wilcom's TrueSizer, a free program.
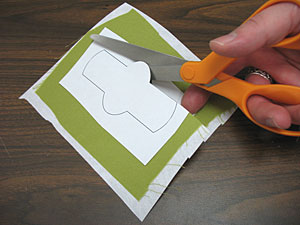
Place a piece of quilter's cotton on cutaway stabilizer, and add the printed dieline for the front to the top.
Cut out the shape.
You may use temporary spray adhesive between the layers to guard against any shifting while cutting.
Repeat for the back dieline piece, too.
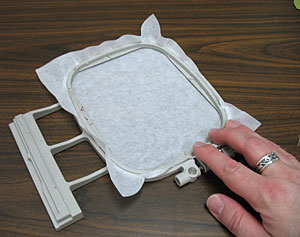
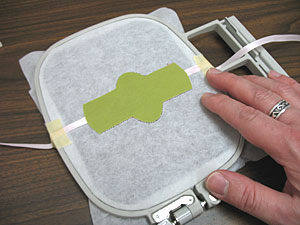
After the fabric pieces are ready, hoop a piece of tear-away stabilizer.
Attach the hoop to the machine. Load the embroidery design (the full file, not a dieline/DL file) to the machine.
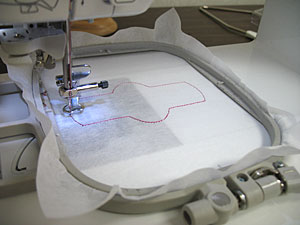
Embroider the design. Use a size 11 or 75/11 sharp sewing needle. A sharp sewing needle has a finer point than an embroidery needle, and works best with in-the-hoop designs.
Follow the color change sheet, as that shows the order of the stitching.
The first thing to sew is a dieline, or outline of the napkin ring.
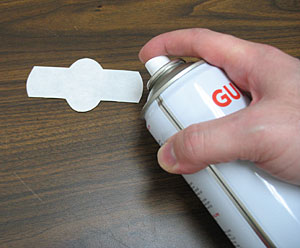
After that dieline or outline has stitched, spray the backside of the front fabric and stabilizer piece with temporary adhesive.
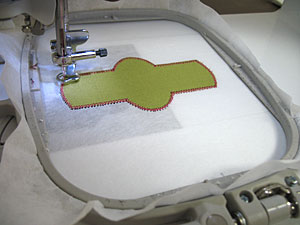
Lay the fabric inside the stitched outline.
Continue embroidering the design.
A zigzag or tack down stitch will sew next. This binds the fabric to the stabilizer for the remainder of the design.
Other elements of the design will sew. Follow along on the color change sheet.
Look for a note on the color change sheet that says "back piece tack down." When you reach this step, remove the hoop from the machine, but do not remove anything from the hoop.
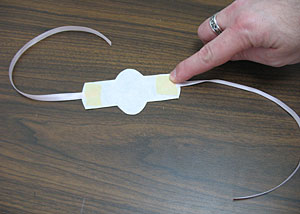
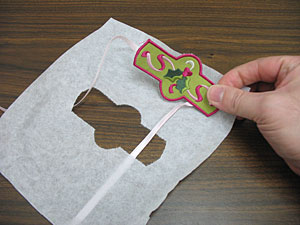
Cut two 10" strips of ribbon and tape the ends on the backside of the back fabric piece, on each side.
Spray the backside of the back fabric piece with temporary adhesive.
Place the fabric on the back of the embroidery.
Then, tape the ribbon to the outer edges of the hoop so it will not be sewn over in the next step.
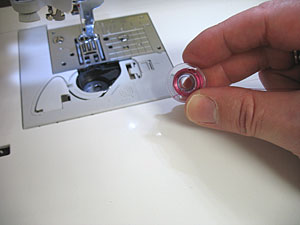
The remaining stitches are seen from both sides, so use the same color in the bobbin as the needle.
Attach the hoop to the machine and continue embroidering the design.
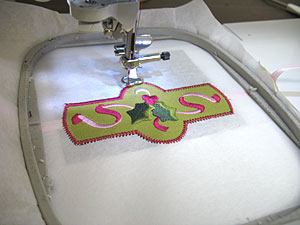
Another tack down stitch will sew -- this binds the front and back fabric pieces together.
Then, a satin stitch border will sew.
When the design has finished, remove the tape, unhoop, and gently tear away the excess stabilizer.
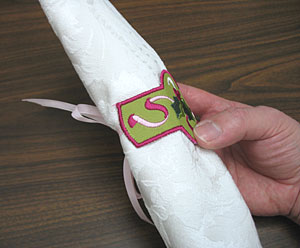
Roll up the napkin, wrap the napkin ring around it, tie the ribbon into a bow.
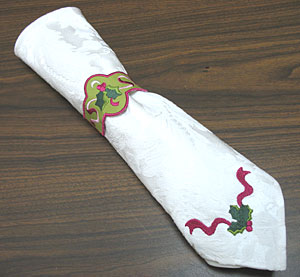
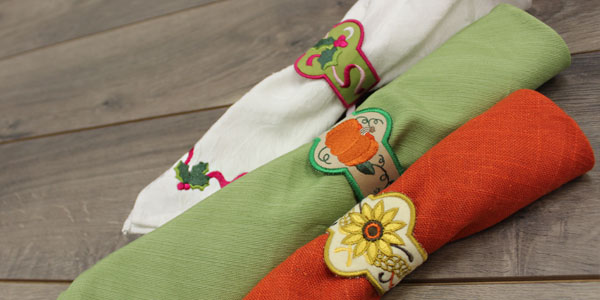
Gorgeous in-the-hoop napkin rings will add a festive look to your dining table in no time.
This napkin has also been adorned with the matching Holly Corner design.
To learn how to make and embroider your own linen napkins, click here. Or, to learn how to embroider corners, click here.
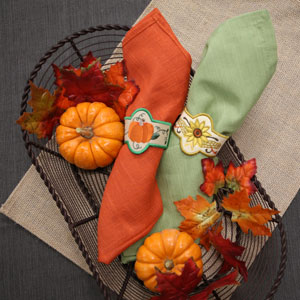
These in-the-hoop napkin rings come in a variety of shapes and sizes, perfect for any holiday or special occasion.
The designs in this example are the Pumpkin Vine Napkin Ring and the Bright Harvest Sunflower Napkin Ring.


