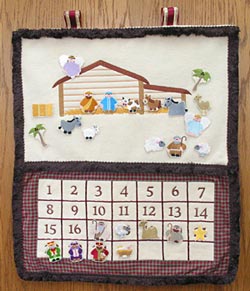
Countdown to Christmas with this charming Nativity calendar! Each day of December you can remove a character from the calendar
and place it in the stable.
There are dozens of ways for you to make a Nativity calendar. The below instructions are how we made ours, but feel free to explore different ways to count down to Christmas.
Sew out the stable, characters, and numbers. We sewed everything on felt, but you can use any fabric that you like. We chose felt because it's durable and sturdy, and will last for many years. Also, we use the hook part of Velcro to affix the characters to the calendar and stable area, and Velcro clings great to felt. You can also use a temporary fabric adhesive, such as Aleene's Tack-it-Over & Over. Looking for a place to purchase Tack-It-Over & Over? Search at www.google.com to find a variety of sources, or you might try your local Jo-Ann's.
Designs Used

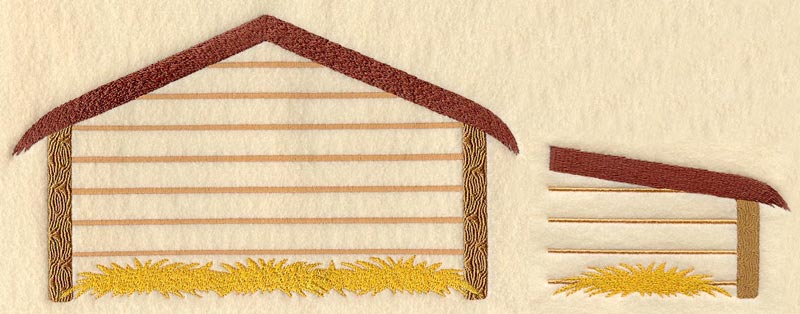
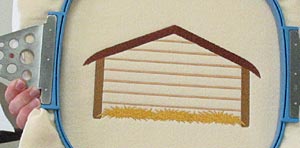
The stable consists of two parts: the main structure, and the lean-to. Sew the main structure first. Then remove the outer hoop and slide the fabric straight across. Rehoop, and load the lean-to embroidery file.
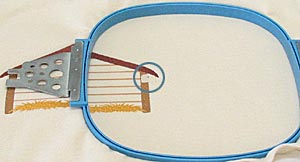
Forward to the first stitch, then move the hoop until the needle is over the common start point. For this design, the common start point is 1/4" down from the juncture where the roof meets the wall of the stable, as indicated by the blue circle. Then sew the lean-to portion of the design.
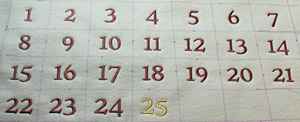
Sew the numbers 1 through 25 so that they are in 2.5 x 2.5 inch boxes.
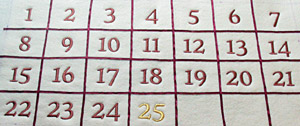
Mark the grid between the numbers and sew narrow trim over the grid marks.
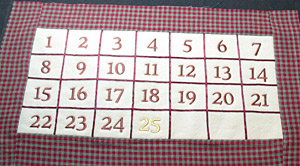
Trim the fabric for a .25" seam allowance around the perimeter. Cut strips of coordinating fabric. Two should be the width of the number grid piece, and two should be the height plus five inches. Stitch the top and bottom pieces first, then the side pieces.
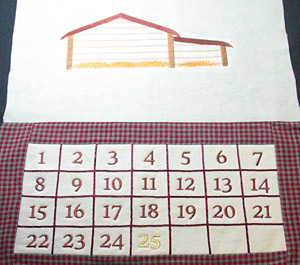
Trim the stable piece to 22" x 14". Join the stable piece to the assembled grid piece.
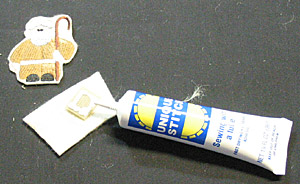
Sew the characters, and trim around them closely. Use permanent fabric adhesive to affix Velcro to the back of all the characters. Adhere only the hook part. Or, use Aleene's Tack-It-Over & Over on the backside of the pieces.

If you would like a finished back, and ribbons to hang the calendar by a dowel, then follow these steps:
Cut backing fabric the same size as the calendar. Cut 10 inches of 1/12" wide ribbon in half, and place at the top of the calendar. Put the backing over the top of the calendar, right sides together, and sew the backing to the calendar using a 1/4" seam allowance. Leave a 5" gap for turning. Turn right side out, press, and sew gap closed. Add fringe to center and outer perimeter if desired.
Place characters over each number. Each day in December, move a piece to the stable to create a beautiful Christmas scene. Enjoy!


