
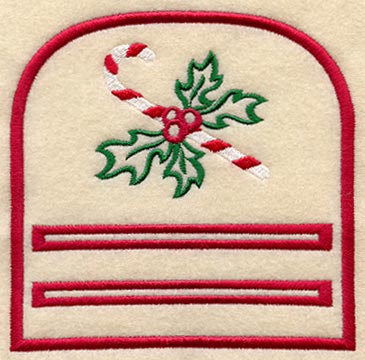
Make a list and check it twice with a quick-stitching and convenient notepad holder. This project is compatible with both spiral notepads and Post-it notepads, and sewn all in the hoop.
The instructions below will show you how to cut the fabric, embroider the design, and add magnets to the back so the holder can be easily attached to your refrigerator, file cabinet or anywhere you need to jot a note!
Note: The large size of the notepad holder has an opening that is 3 3/4" wide.
The small size of the notepad holder has an opening that is 3" wide.
Supplies
Supplies needed:
**Medium to heavy weight fabric
**Medium weight tear-away stabilizer
**Spray adhesive
**Small craft magnets
**Hot glue
**Craft knife
**Self-healing pad
**Small spiral notepad or Post-it notepad
Designs Used:
Designs Used
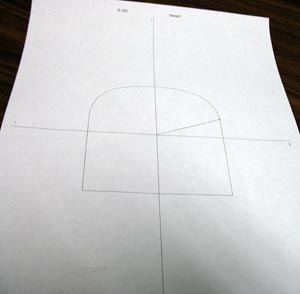
When you download a notepad design, you'll find two files. One file will begin with the letter "X" followed by 4 numbers -- that's the embroidery file. The other file will be marked with "_DL" - that is the dieline.
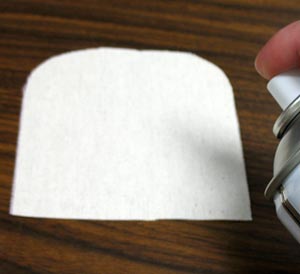
The dieline is used to cut the fabric for the front and back of the notepad holder. If you have embroidery software, open the "_DL" (dieline) file and print it at full size.
If you don't have embroidery software, or cannot print from it, then hoop a piece of paper.
Embroider the "_DL" file onto the paper.
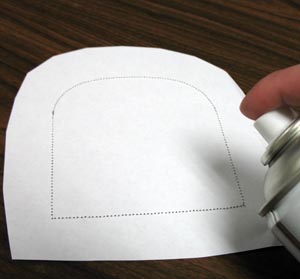
We trimmed the paper slightly to make it more manageable for the next step.
Give the back side of the paper template a quick shot of spray adhesive.
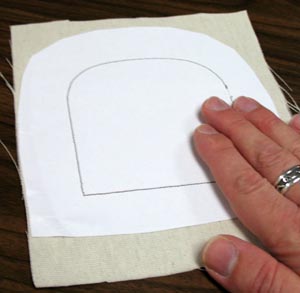
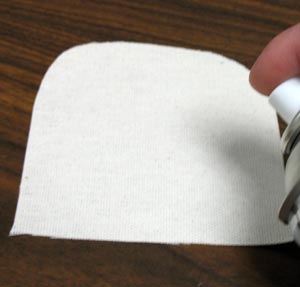
Smooth the template onto the right side of the fabric. We are using a sturdy, woven cotton fabric, which will give the holder body and support.
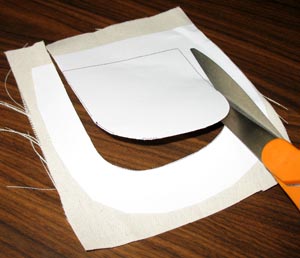
Cut out the shape. Then place the template onto another piece of fabric, and cut out another shape. One piece of fabric will be the front of the holder, and one will be the back of the holder.
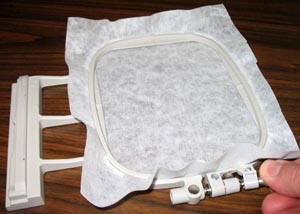
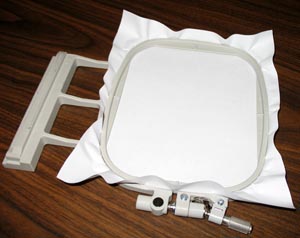
Next, hoop a piece of medium weight tear-away stabilizer
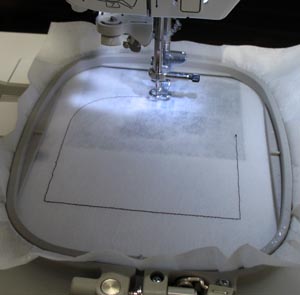
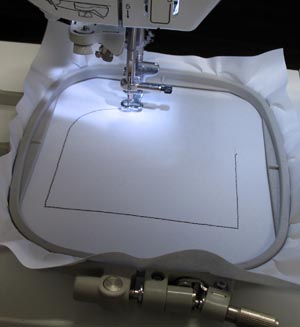
Attach the hoop to the machine, load the design (the one that begins with the letter "X" followed by 4 numbers) and begin embroidering. The first thing that will sew is another dieline. This is the shape of the front of the holder.
Spray the wrong side of the front fabric piece with adhesive.
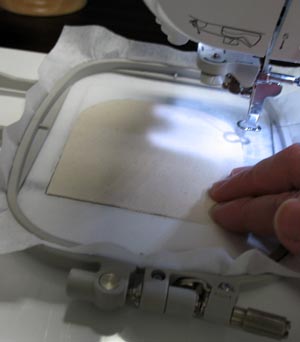
Lay the front fabric piece, right side up, inside the dieline.
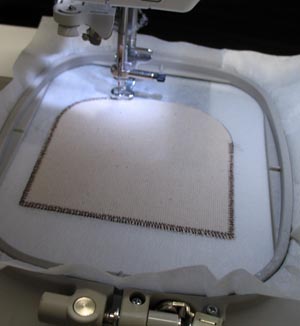
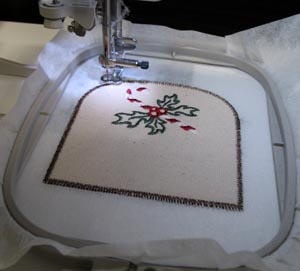
Continue sewing. A zig-zag or tack down stitch will embroider next. These stitches hold the front fabric piece in place while the other elements sew inside.
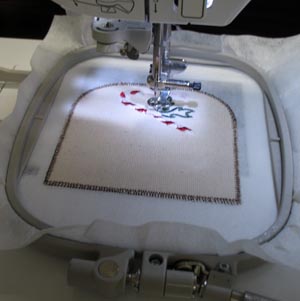
All of the inside elements will sew next.
On the color change sheet you'll see a line that says "back piece tack down". When you get to this step, remove the hoop from the machine, but do not unhoop the stabilizer.
Now add the back piece. Spray the wrong side of the back piece of fabric with a quick shot of adhesive and...
..lay the back piece of fabric inside the shape and onto the front piece.
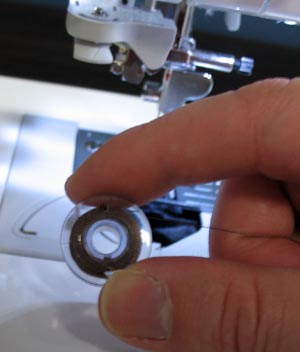
Wind a bobbin that is the same color as the tack-downs and border. The remainder of the design will be sewn with this bobbin.
Insert the bobbin, and reattach the hoop to the machine. Continue sewing. The next thing that will sew is the back piece tack down. This holds the back fabric in place while the rest of the design sews.
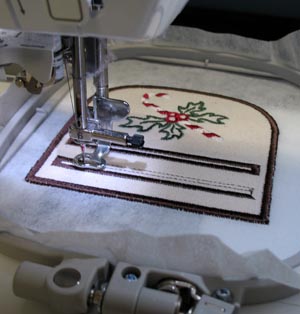
Next and finally, a border and slots for the notepad will sew.

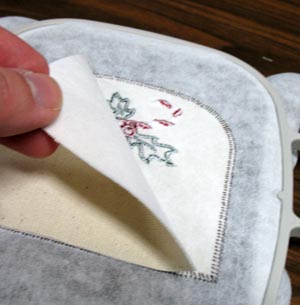
After the design has finished sewing, remove the hoop, unhoop the stabilizer and gently tear the stabilizer away.
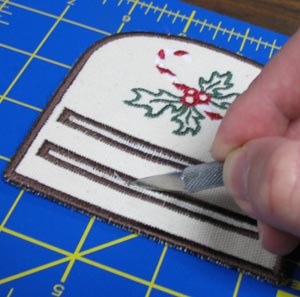
Using a craft knife, and cutting on a self-healing pad, cut both slots open. Cut all the way through the layers.

Add magnets to the top of the back of the holder. Add a drop of hot glue each magnet and...

press the magnets in place.
You can also use self-adhesive magnets for this step.
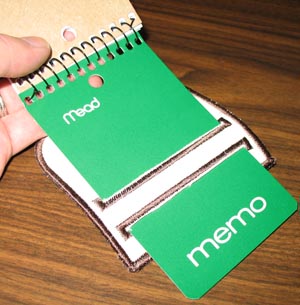
Finally, add the spiral notepad or Post-it notepad by "threading" the back of the notepad through the slots on the front side of the holder.


