FREE Snowman with $5 order PLUS Double Reward Points! Click the deals tab for details.❄️
 FREE Snowman with $5 order PLUS Double Reward Points! Click the deals tab for details.
Whip up a too-cute quilt perfect for the little ones in your life! Bright colors and fun patterns add personality and style, while peeking on-the-edge monsters are an adorable addition.
Supplies
Project Needs & Notes
- 2 1/2 yards solid-colored quilter's cotton
- 1 yard print quilter's cotton for panels (I used three different prints at 1/3 yard each)
- 1 1/3 yards print quilter's cotton for borders
- 40"x 48" piece of cotton batting
- Medium-weight (2.5 ounce) cutaway stabilizer
- Temporary spray adhesive (like Gunold KK100)
- Air-erase pen for marking
- Needle and thread
- Nylon monofilament thread
- Thin yarn or hand embroidery floss and tapestry needle (optional - for quilt ties)
For this tutorial, I used the largest sizes of the Peeking Striped Monster design, the Peeking One-Eyed Monster design, the Peeking Three-Eyed Monster design, and the Peeking Spotted Monster design. Find more of our on-the-edge designs here.
Finished Size: 37" x 44 1/2" (lap quilt or crib quilt size)
This project was featured in the following:
Christmas Gift Guide Lookbook
Designs Used
First, prepare the fabric for the embroidered panels.
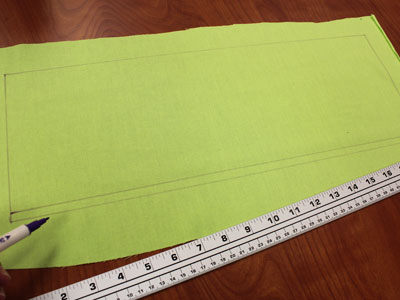
Using an air-erase pen draw an 18 1/2" x 6 1/2" rectangle on the solid-colored quilter�s cotton. Leave a couple of inches of excess fabric around the shape.
Measure and mark 1/4" up from the bottom corners on each side. Draw a line connecting the marks. This is the seam allowance for the bottom edge of the fabric.

Print the design from embroidery software to make a template. If you don't have software to make templates, use Wilcom's TrueSizer, a free program.
Trim along the bottom edge of the template right along the bottom edge of the design. Also, trim around the sides and top of the design leaving a bit around the design.
Place the template as shown on the quilter's cotton with the bottom edge of the design aligned with the line you just drew.
Center the template. Mark the center point and the horizontal and vertical axis points.
Remove the template and draw lines connecting the marks.
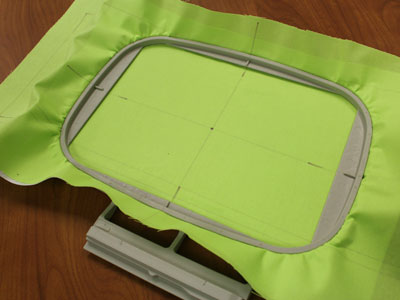
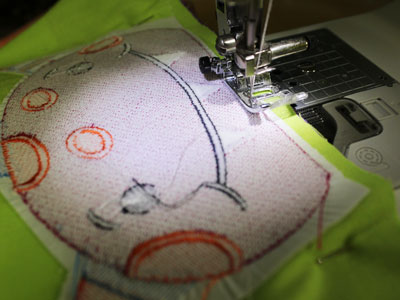
Spray a piece of medium-weight cutaway stabilizer with temporary adhesive and smooth the fabric on top.
Hoop the fabric and stabilizer together, aligning the marks on the hoop with the lines on the fabric.
Attach the hoop to the machine and load the design.
Move the hoop so that the needle is aligned with the center point on the fabric.
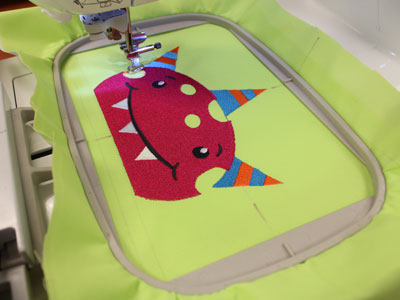
Embroider the design.
When the design has finished, trim away the excess stabilizer on the backside of the embroidery.
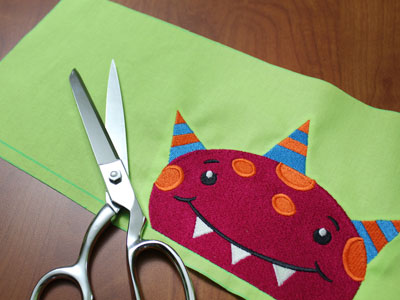
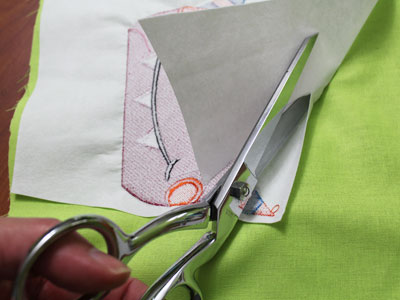
Cut out the shape using the outer lines of the shape.
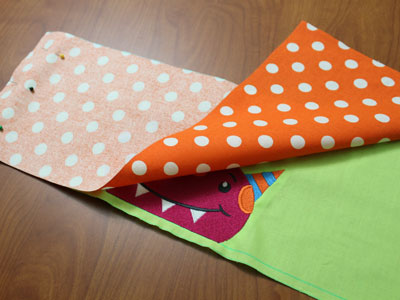
Prepare the fabric for the opposite side of the panel. Cut a piece of print quilter�s cotton to 18 1/2" x 6 1/2".
Lay the embroidered piece flat and align the print cotton on top, right sides together.
Pin in place along the left short side. Sew a 1/4" seam along the pinned edge only.
Press the back seam open with an iron.
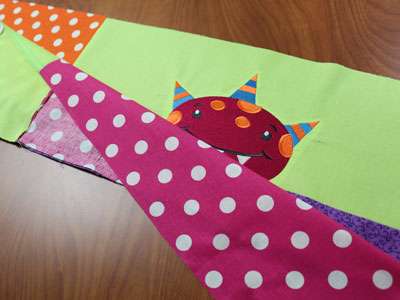
Repeat this process for a total of six assembled panels (featuring both embroidered and print fabric sections).
Alternate the print cotton fabric along the left and right sides as you go. You will need three panels with the print cotton on the left, and three panels with the print cotton on the right.
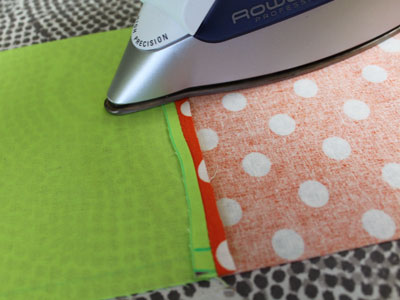
Prepare the thin horizontal border fabric for in-between the embroidered panels.
Cut five pieces of print cotton to 36 1/2" x 2 1/2".
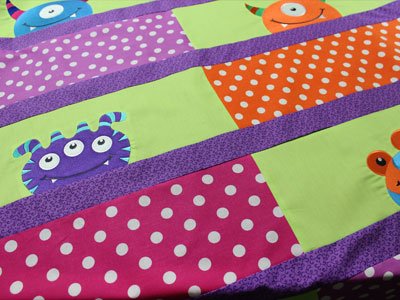
Lay the first embroidered panel flat with the right side facing up (this is the top panel).
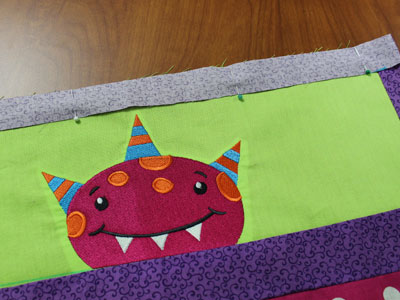
Align the thin border fabric along the bottom edge of the embroidered panel, right sides together. Pin in place.
Sew a 1/4" seam along the pinned edge -- sewing right along the bottom edge of the design.
Press the seam.
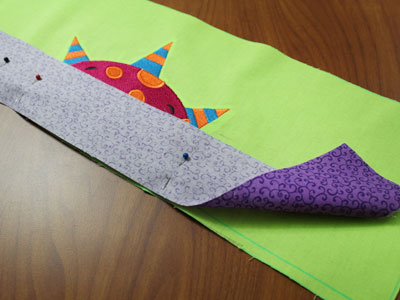
Align the second embroidered panel on top of the thin border. The top of the embroidered panel should be aligned with the bottom edge of the border.
Remember to alternate the print edge of the panels along the left and right sides as you go.
Pin in place and sew a 1/4" seam along the pinned edge.
Press the seam.
Add a thin border to the bottom edge of the second panel just as you did for the first panel.
Continue to add the embroidered panels and thin panels until they are all assembled.
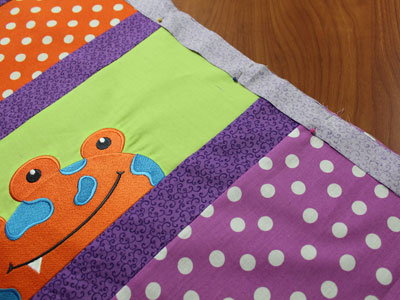
Prepare the side borders of the quilt by cutting two pieces of the print cotton to 1 1/4" x 44 1/2".
Align the border fabric along the side edges of the assembled panels, right sides together.
Pin in place, and sew a a/4" seam along the sides only.
Press the seam.
Prepare the top and bottom borders by cutting two pieces of print cotton to 38" x 1 1/4".
Align them with the top and bottom edges of the assembled panels, right sides together.
Pin in place, and sew a 1/4" seam along the pinned edges.
Press the seam.
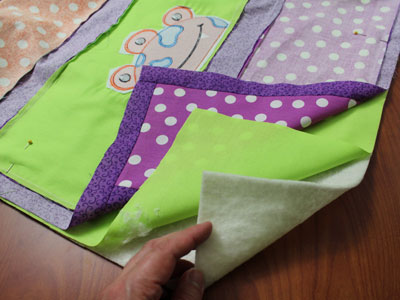
Now it's time to add the back and batting.
Lay the batting flat. Add the back fabric on top, right side facing up.
Then, add the front assembled panels on top of the back fabric, right sides together.
Pin in place, and cut around the shape of the front piece.
Sew a 1/4" seam along the outer edges of the fabric (leaving about 10� open along the bottom edge).
Turn the quilt right side out in between the front and back fabric (the batting will then be in between the front and back layers). Press the seams.
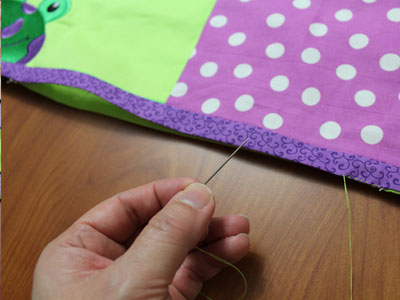
Turn the fabric of the opening in 1/4" and press.
Sew the opening closed using a needle and thread.

Quilt through all the layers by sewing along the existing seams.
Use nylon monofilament thread in the needle, and colored thread in the bobbin that matches the color of the back fabric.
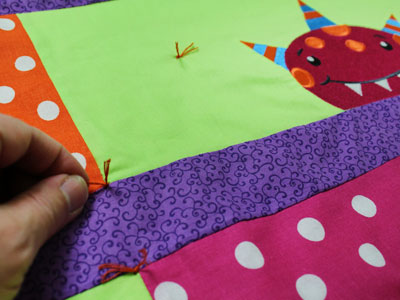
Another option is to tie the quilt.
Stitch through all the layers using a tapestry needle and hand embroidery floss, then tying the floss into a knot.
Tie at the corners of each piece and also tie a couple in the centers of each large piece.
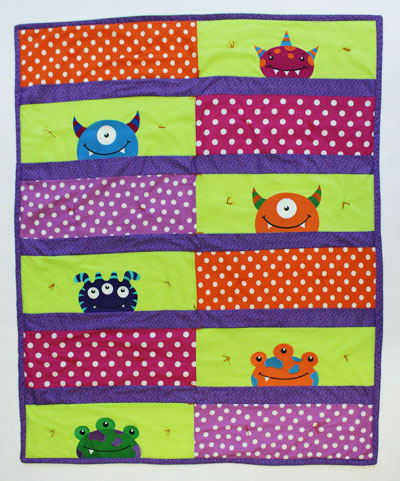
This quilt uses bright colors and peeking monster designs to add a kid-friendly look, but you can easily adapt for other themes.
Try stitching with safari-theme fabric and animal designs, underwater motifs, or even with Christmas colors and coordinating designs!
The different colored panels, patterns, and designs makes this a fun gift for kids, or a colorful addition to a nursery or children's room.


