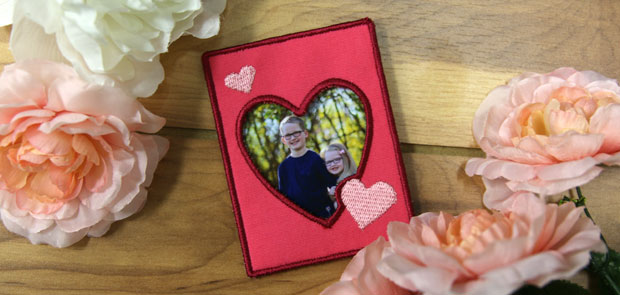
Showcase photos of your loved ones inside an embroidered photo frame! These designs are sewn entirely in the hoop, and are a wonderful addition to any home. Great for gift ideas, too!
Supplies
- 1/4 yard cotton fabric, such as lightweight canvas (for front)
- 1/4 yard medium-weight interfacing or stiff craft felt (for back)
- Medium-weight cutaway stabilizer
- Tear-away stabilizer
- Medium-weight interfacing
- Magnets
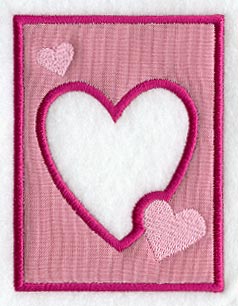
Designs Used
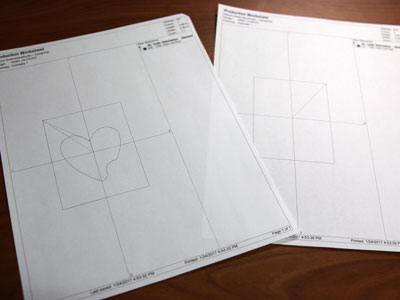
When you download an in-the-hoop photo frame design, you will find multiple files. Some are the embroidery files, and the others are dieline files marked with the letters "DL". Dielines are used to cut the fabric to the correct shape and size. Open and print each dieline file using an embroidery software. If you do not have an embroidery software, take a look at our helpful video on using dielines.
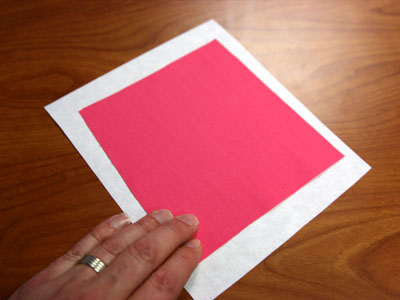
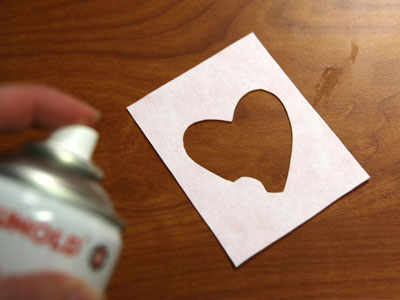
Spray a piece of cutaway stabilizer with temporary adhesive and smooth the fabric for the front of the frame on top.
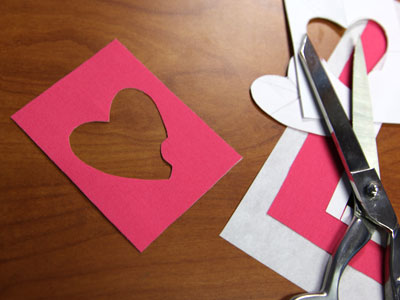
Place the printed dieline for the front of the frame on top of the fabric and stabilizer.
Cut out the frame, outside and inside.
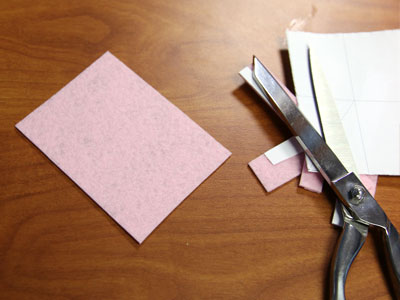
Place the printed dieline for the back piece on top of the medium-weight interfacing.
Cut out the shape.
Once all the fabric pieces are cut to the correct shape, it's time to embroider the design.
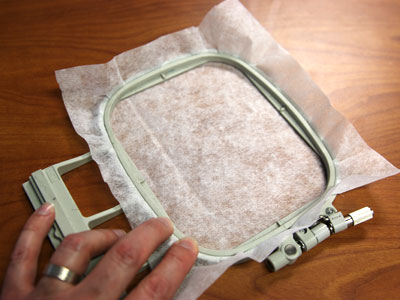
Hoop a piece of tear-away stabilizer (Madeira E-Z 1.5 oz or Floriani tear-away Medium are good choices). Those brands are more fibrous, less like paper, and will tear more cleanly.
Load the full embroidery file (not a dieline file) to your embroidery machine.
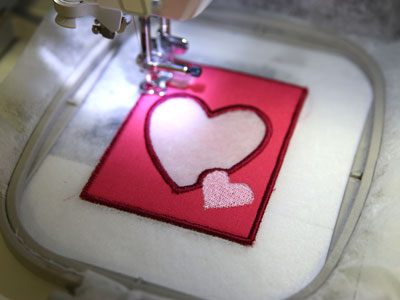
Attach the hoop, and begin embroidering the design.
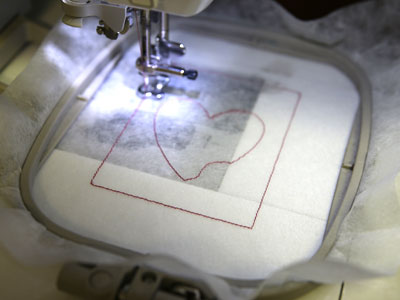
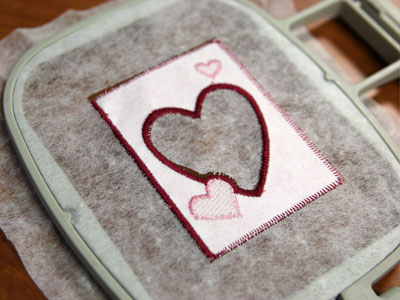
The first thing to embroider is a dieline or outline. This traces the area on the stabilizer to place the front fabric piece.
After stitching CC1, stop the machine and remove the hoop, but do not remove the stabilizer from the hoop
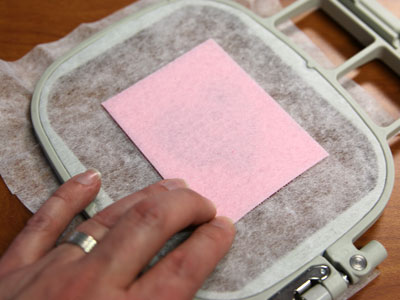
Spray the stabilizer side of the front fabric piece with temporary adhesive.
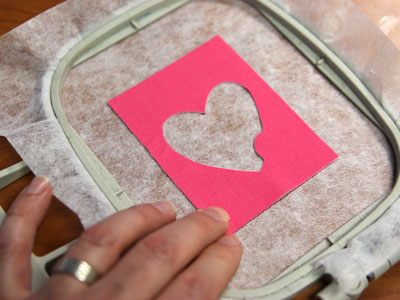
Place that right in the sewn dieline.
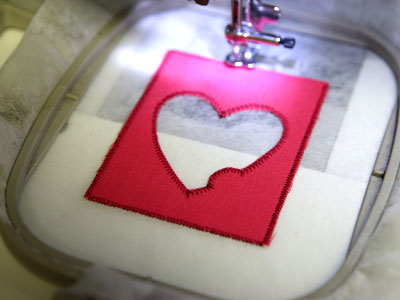
Attach the hoop to the machine and continue embroidering the design. The next thing to stitch will be a tack down stitch. This binds the fabric to the stabilizer.
Other elements of the design will sew. Continue to reference the color change sheet as you embroider.
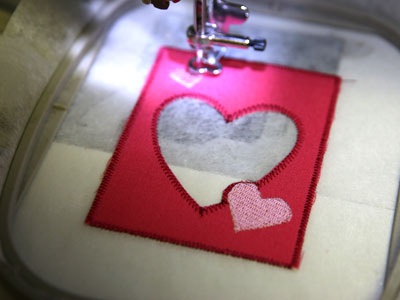
When you reach the section on the color change sheet that says "back piece tackdown," stop the machine and remove the hoop.
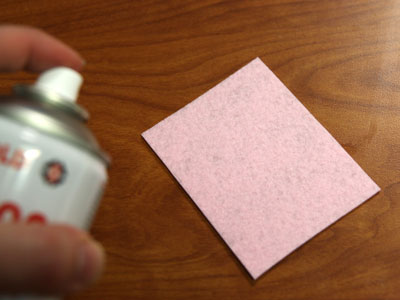
Spray a small amount of temporary adhesive on each corner of the interfacing.
Place the interfacing or stiff felt on the back of the stabilizer, right inside the shape.
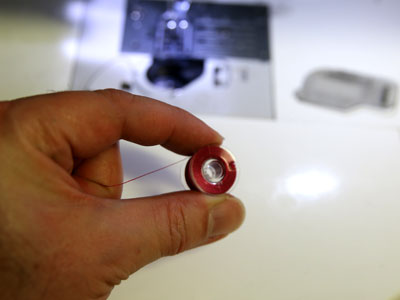
The remaining steps will be seen from both sides. Wind a bobbin with the same thread used in the top.
Attach the hoop to the machine and continue embroidering the design. A tackdown stitch binds the interfacing to the stabilizer. A satin stitch gives a smooth finish.
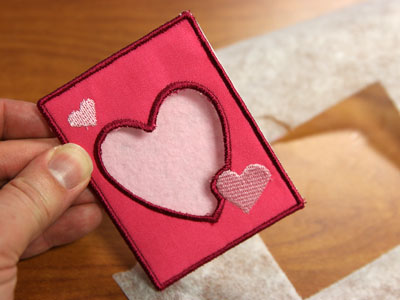
After the design is complete, unhoop the stabilizer and carefully tear it away from the frame.
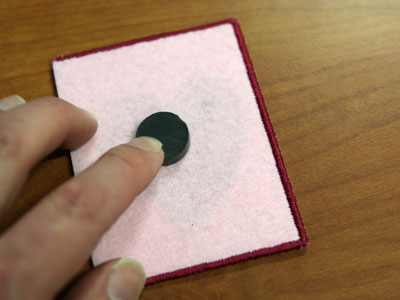
You can add magnets (self-adhesive or use button magnets with hot glue) to the back to hang it on a refrigerator, or other magnetic surface.
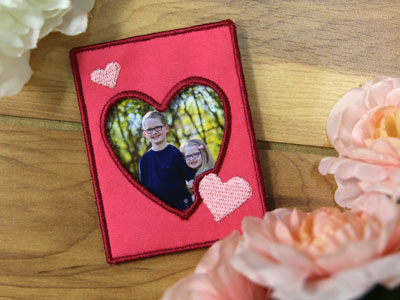
These photo frames are a sweet gift for friends and family. Simply slip a photo of loved ones inside!


