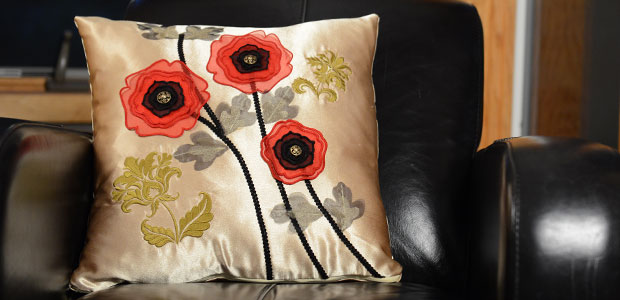
Beautiful crepe-backed satin adds a stunning, shimmering look to pillows. It's best to use small designs on crepe-backed satin to preserve beautiful draping, so this project uses 3D organza poppies to create a bold and dramatic effect.
Supplies
Project Needs & Notes
- 18" x 18" pillow form
- 3/4 yard crepe-back satin fabric
- Small pieces of organza for leaves and petals (black and red were used)
- Medium-weight (2.5 ounce) cutaway stabilizer
- Temporary spray adhesive (like Gunold KK100)
- Air-erase pen
- 18" all-purpose zipper or invisible zipper
- 1 1/2 yards decorative trim (1/4" wide)
- Hot glue and glue gun
- Needle and thread for some hand sewing
- Buttons for flower centers (3/4 and 1/2 inch buttons were used)
- Small pieces of felt for flower centers
- Heavyweight water-soluble stabilizer (like Sulky Ultra Solvy)
- Spray starch (optional)
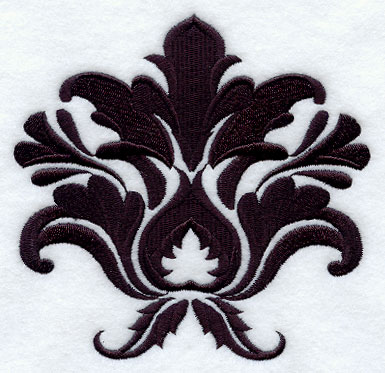
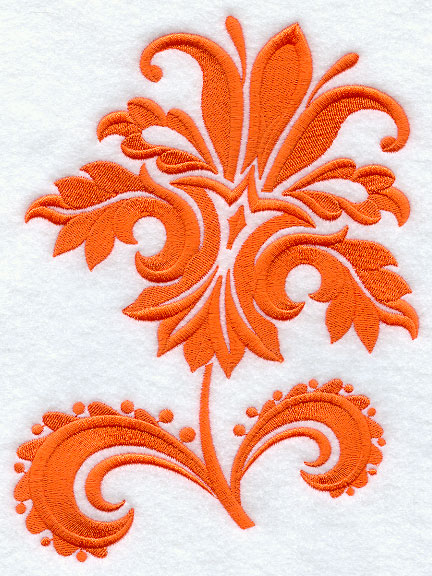
Designs feature in this tutorial are Poppy in 3D (In-the-Hoop), Debonair Damask Flower, and Dashing Damask Flower (Small). Project instructions for creating 3D poppies can be found here.
Finished Size: 18" x 18"
This project was featured in the following:
Pillow Party Lookbook
Pillow Party Trunk Show 3 Video
Designs Used
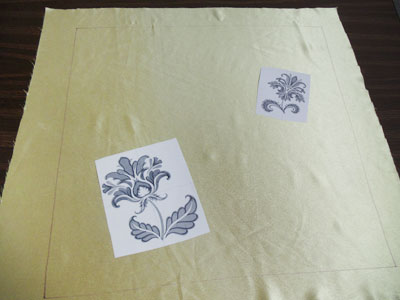
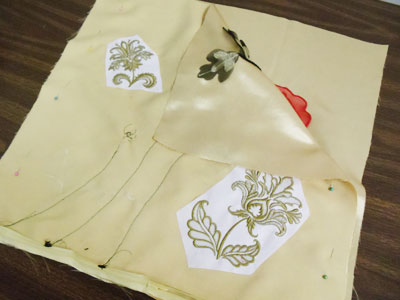
This pillow has some designs stitched directly onto the fabric, and others that are applied after stitching, so take a moment to plan where each motif will be.
Draw a 19" x 19" square on satin fabric. Templates, or printouts of designs, are excellent tools for planning where the designs will be stitched.
Print the designs from your embroidery software and arrange them on the satin. If you don't have software to print templates, try Wilcom's TrueSizer, a free program.

Make the poppies (instructions are here), then arrange them in the square.
In this example, the three flowers have their outer edges one inch from the Damask flower design templates.
Leave room under the flowers for the decorative trim, which will become stems.
Mark the center points for the organza poppies. Mark the center points and the axis lines for the Damask flowers, too.
Next, embroider the Damask flowers onto the satin.
Satin can be slippery, so using temporary adhesive between it and the stabilizer helps to prevent any shifting or slipping.
Spray the cutaway stabilizer with temporary adhesive, then smooth the satin fabric on top.
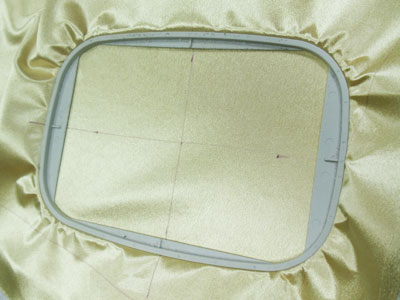
Hoop the satin and stabilizer together to stitch the first design, lining up the marks on the fabric with the marks on the hoop.
Attach the hoop to the machine and load a Damask design. Move the hoop so that the needle is directly over the center point on the fabric. Embroider the design.
After embroidering, trim away the excess stabilizer on the back of the embroidery.
Repeat to embroider the second design.
Cut out the pillow square shape.
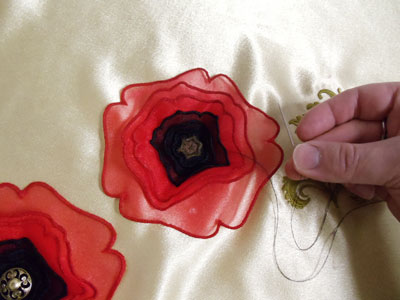
Place the top two 3D flowers onto the fabric, aligning the flower centers with the marks you made on the fabric earlier.
With needle and thread, sew the flowers in place. Stitch around the outer edge of the flower center.
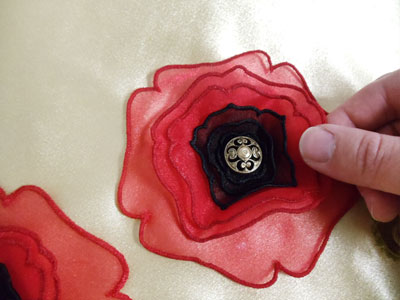
To make the flowers extra special, we sewed a decorative button in the center of each flower.
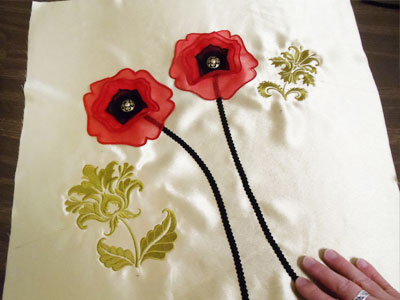
For the stems, lay the decorative trim on the fabric. Tuck one end of the trim under the flower and then trim the other end at the bottom of the fabric leaving about 1/4" of the trim extending past the outer edge.
Spray the back of the trim with adhesive and smooth it in place. Sew a seam along the center of the trim to secure it in place.
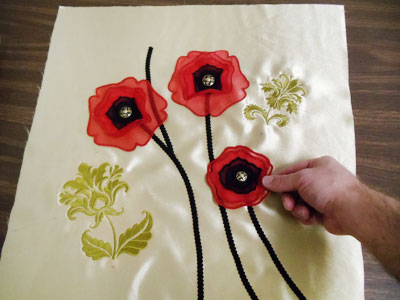
Add the bottom 3D flower and stem.
In this example, the bottom flower overlaps one of the upper flower stems.
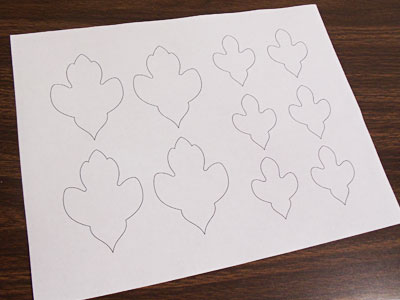
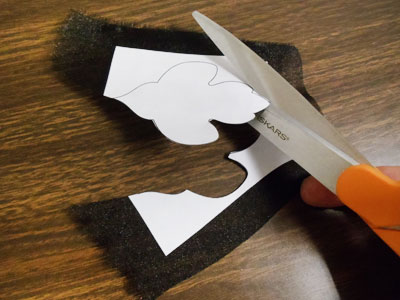
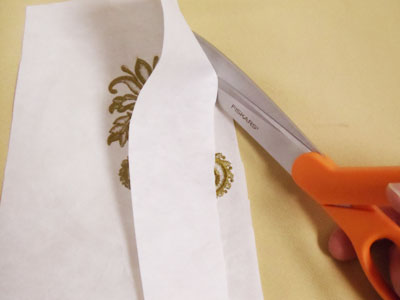
Cut out the individual pattern shapes from the paper. Then, spray the back of the pattern pieces with a bit of adhesive.
Smooth them on top of the organza fabric, and cut out the shapes.
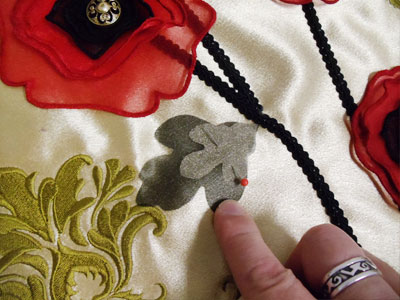
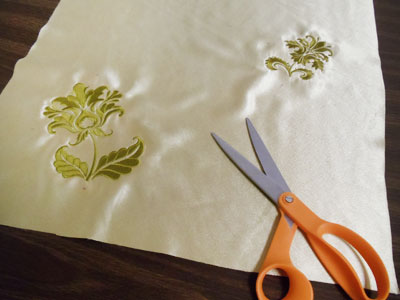
Place the leaves on the fabric as desired. In this example, a smaller leaf is layered on a larger leaf.
Pin the pieces to the fabric and then sew a seam down the center of the leaves to secure them in place.
To prepare the fabric for the back of the pillow, cut a piece of the satin fabric 19" x 19".
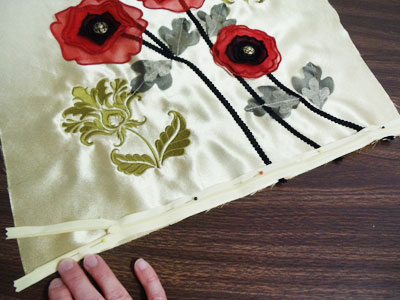
Now it's time to assemble the pillow. Lay the embroidered front piece flat with the right side facing up. Align the bottom edge of the zipper with the bottom edge of the front piece with right sides facing, and pin in place.
Sew a seam along the outer edge of the zipper, sewing as close as you can to the teeth.
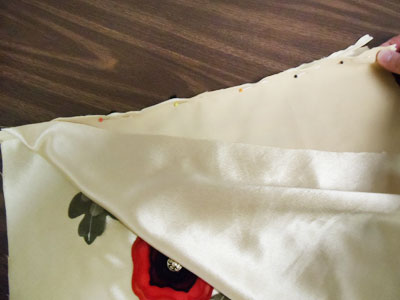
Align the back fabric piece with the front piece with right sides facing, and align the bottom edge of the back piece with the open edge of the zipper. Pin in place and sew a seam along the outer edge of the zipper sewing as close as you can to the teeth.
Unzip the zipper (at least halfway) and align the front and back fabric pieces together, with right sides facing, and pin in place. Sew a 1/2" seam along the side and top edges.
Turn the fabric right side out, and insert the pillow form.
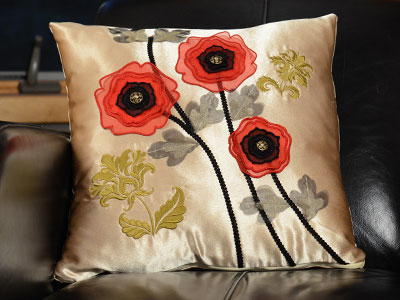
Added embellishments, such as the cording, organza leaves, and buttons, bring this blooming garden to life.


