
I have been admiring the latte quilts that everyone has been making lately, so I decided, for a little twist, to make a latte-inspired vest, with contrasting toile embroidery.
Supplies
Supplies needed:
Vest pattern, Butterick #5888 view C
1 yard each of two off- white colored prints
Yardage according to pattern specs for lining and backing fabric
Light-weight quilt batting
2 packages of piping to match your embroidery --or make your own.
3 frog closures
Embroidery Designs, French Country Toile from Embroidery Library. I used both small- and large-sized designs.
Designs Used

Instructions:
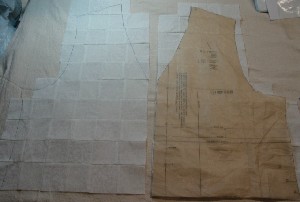
To make the base quilt, I decided on 2 1/2" squares (with the 1/4" seam allowance, they end up to be 2" finished). I cut a whole bunch of squares out of each of the perfectly squared, off-white printed fabrics. After the squares were cut out, I sewed sets of 4 together, so that the like-fabrics were opposite each other. At this point, I got out the pattern, found the 2 pattern pieces needed for the vest, and cut them out on the cutting lines for the appropriate size. The pattern pieces would become the guide for how to lay out the squares that I had just made.
With the squares made, lay them out in rows, stacking them up, until you have the size and shape needed to fit the pattern piece. Repeat the process with each of the front pieces and the back piece. Stitch all of the squares together, matching the seams to form one large base piece. Trace around the pattern piece to make your cutting line for later. You will also use the marked lines to help you place your embroidery designs exactly where you want them.
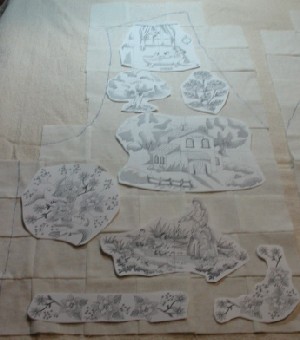
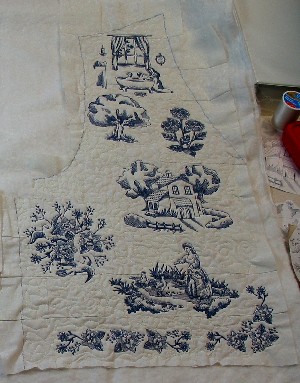
Print out full-sized templates of the toile designs, and cut them out around the perimeter of each image. On the corner design, make sure that you include the center point in the cutout. (I forgot to do that, which made it more difficult to place that design according to the center point.)
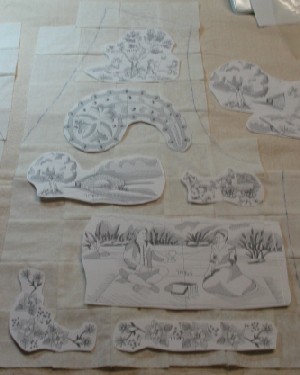
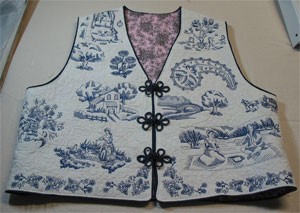
Now, place the design templates where you want them on the two front pieces. Consider how the designs relate to each other. Notice that I decided to use the large design in the foreground, and the smaller designs as background. This perspective worked out quite nicely. Don't forget to allow yourself the seam allowances at the edges of the pieces.
Once you have the designs where you want them, poke a small hole in the center of each template, and mark the design centers on your front and back pieces.
Sandwich a piece of batting between your vest pieces and a backing fabric to create a quilted piece.
Using your center markings, place and embroider each design through the 3 layers.
Often times you will find that the batting and fabrics together are stable enough to support the embroidery, so you may not need any stabilizer.

After you have finished the embroidery, machine-quilt the spaces between the embroideries.

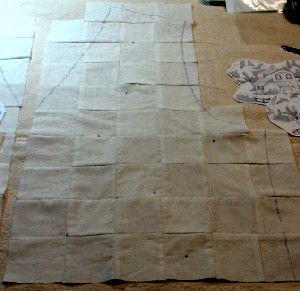
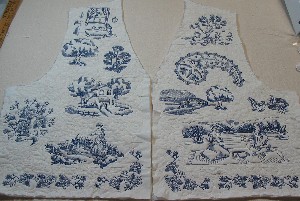
This is how the back piece turned out.
After you have finished quilting, cut out the front and back pieces along your marked cutting lines.
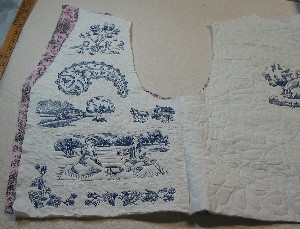
Cut out your lining pieces, which are the same as your front and back vest pieces. Join the back to the front quilted vest pieces along the side seams and repeat this for the lining front and back pieces.
Attach the piping to the edges of joined vest pieces: the entire outer edge, armholes, and the back neck.
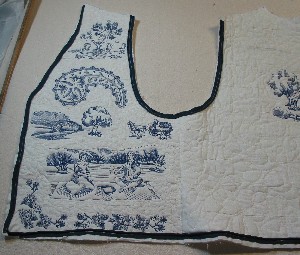
Place the lining fabric on top of the quilted pieces, with the right sides together, and attach the lining with your zipper foot along the piping. I left the back neck open, so that it would be easier to turn the garment.
Turn the vest right side out, and press. Join the shoulder seams and stitch the lining at the back neck.
Attach the frogs to the front for a closure. I think that they add a beautiful accent to the vest.
Happy sewing,
Sarah


