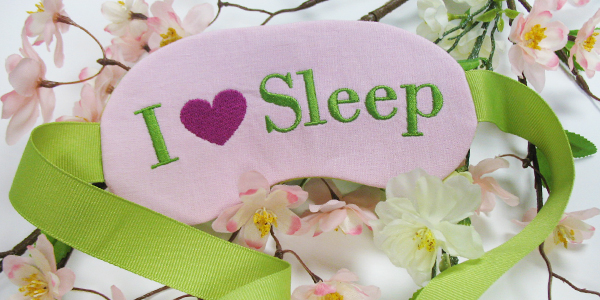
Fun and customizable sleep masks cradle you in comfort and helps filter out intruding disturbances. Read below for these free project instructions!
Supplies
Project Needs & Notes:
- One 8 inch by 5 inch piece of smooth lightweight fabric for front piece - we used linen
- Two 8 inch by 5 inch pieces of lightweight fabric for back pieces - we used polyester shantung
- Medium-weight cutaway stabilizer
- Tear-away stabilizer
- Temporary spray adhesive
- All-purpose glue stick
- Masking tape
- 48 inch (1 1/3 yards) length of 1/2 inch wide to 1 inch wide ribbon or 16 inch length of 3/8 inch wide elastic (we used soft cotton elastic)
Designs featured in this tutorial include:
- X5977, In-the-Hoop Sleep Mask Design Pack
Designs Used

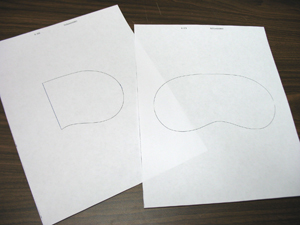
When you download an In-the-Hoop Sleeping Mask you will find three files. Two of the files are marked with "_DL" - these are the dieline files. One of these files is marked "_DLFront". This dieline will be used to cut the fabric for the front of the mask. The other file is marked as "_DLBack". This dieline will be used to cut the fabric pieces for the back of the mask. The other file is marked with an "X" followed by 4 numbers - this is the embroidery file.
If you have embroidery software, create paper templates of the dielines by printing them at full size.

If you do not have embroidery software, you may create paper templates by sewing the dielines directly onto the paper.
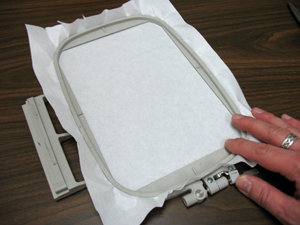
To do this, hoop a piece of paper.
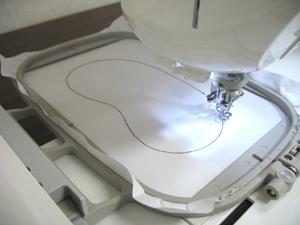
Attach the hoop to the machine, load the dieline files, and embroider them onto the paper.
Now we will prepare the fabric pieces. We will create a paper, fabric, and stabilizer "sandwich" and then cut out the shape.
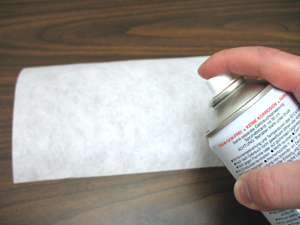
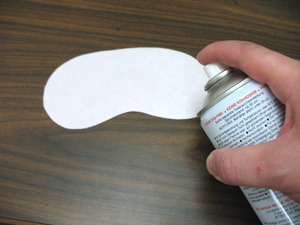
Start by spraying a piece of cutaway stabilizer with adhesive.
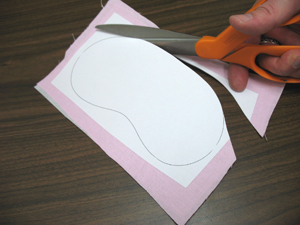
Next, smooth the front fabric (we are using linen) on top of the stabilizer, then, spray the backside of the front dieline template (marked with "_DLFront") with a quick shot of adhesive and smooth the template on top of the fabric. Cut out the shape.
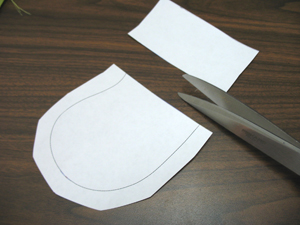
Now, cut right along the straight edge of the back piece template (marked with "_DLBack". Also, trim around the curved edges leaving about one inch of excess.
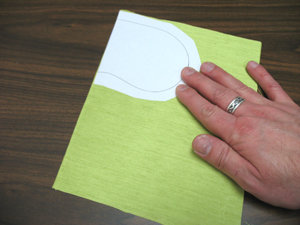
Spray the wrong side of the back piece fabric (we are using polyester shantung) fold it in half, and smooth it flat.
Then, spray the backside of the back piece template with a quick shot of adhesive and align the straight edge with the fold on the fabric.
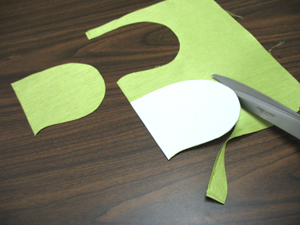
Cut out the shape.
Reposition the template and cut another shape for a total of two back pieces.
Now that all the pieces are cut and ready, it is time to embroider the mask!
Hoop a piece of tear-away stabilizer.
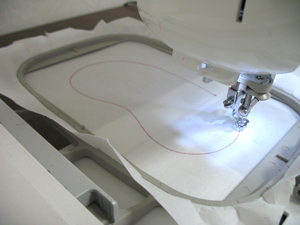
Attach the hoop to the machine and load the full embroidery design (marked with an "X" followed by 4 numbers). Embroider the design. The first thing to embroider is another dieline - this is the front fabric dieline.
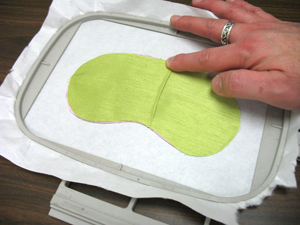
After the dieline has sewn, stop the machine and spray the backside of the front fabric piece with adhesive.
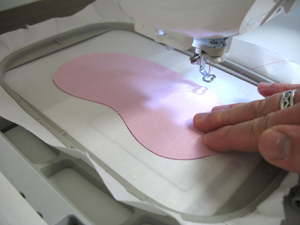
Lay the fabric piece directly inside the dieline shape.
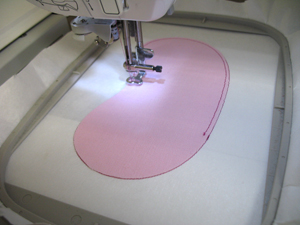
Continue embroidering the design, a tack down stitch will sew next. The tack down binds the fabric piece to the stabilizer for the remainder of the design.
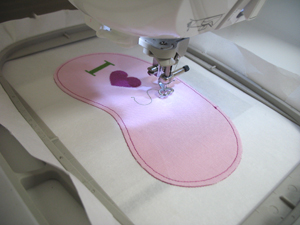
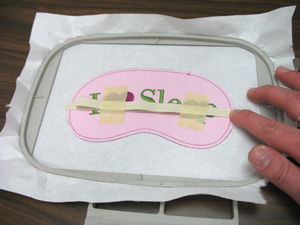
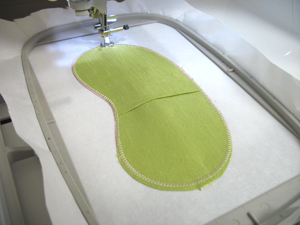
Next, all of the inside elements will sew. When you get to the step on the color change sheet that says "back piece tack down" stop the machine and remove the hoop from the machine but do not remove the stabilizer from the hoop.
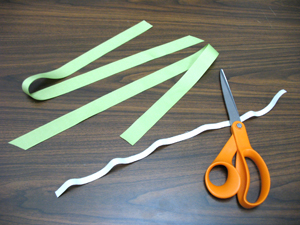
Now, decide what kind of straps you would like to use on the mask. We created straps using ribbon or elastic. For ribbon straps, cut two 18 inch lengths of ribbon. Or, for elastic straps cut a piece of elastic 15 1/2 inches long for a large size, 14 1/2 inches long for medium, and 13 1/2 inches long for a small size.
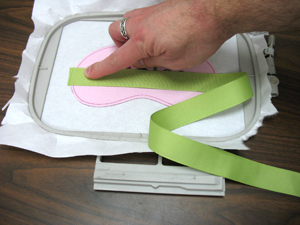
To add ribbon straps, spray one end of a piece of ribbon with adhesive and press it in place on one side of the mask (on the front side of the embroidery) with about 1/4 inch extending out past the edge of the mask fabric.

Spray the end of the remaining piece of ribbon with adhesive and press it in place on the opposite side of the mask fabric.
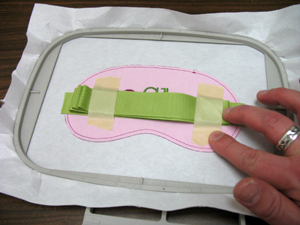
Fold the ribbon in the center of the mask and tape it flat using masking tape. Make sure the straps are as flat as possible and that they do not extend out past the front fabric tack down stitch.
To add an elastic strap, spray both ends of the elastic piece with adhesive and press the ends in place on the sides of the mask. Allow about 1/4 inch of the elastic to extend past the edges of the mask fabric. Fold the elastic into the center of the mask and tape it flat.
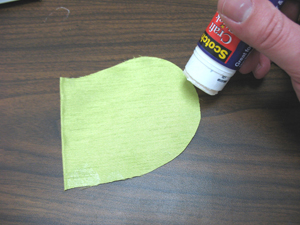
Using a glue stick, add a small amount of glue to the outer curved edges of one of the back fabric pieces but do not add glue to the straight edge.
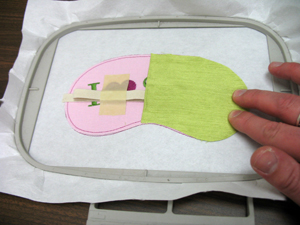
Align the back fabric piece over the top of the embroidered front fabric and straps. Press the fabric in place.
Add glue to the curved edges of the remaining back fabric piece, align it on top of the embroidered fabric piece and straps and press in place (the center of the back fabric pieces will overlap slightly).
Attach the hoop back onto the machine and continue embroidering the design. A tack down stitch will sew next and then a finishing seam.
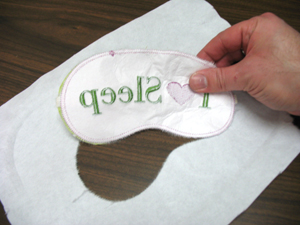
After the tack down stitches and finishing seam complete, unhoop the stabilizer and gently tear the mask away from the stabilizer.
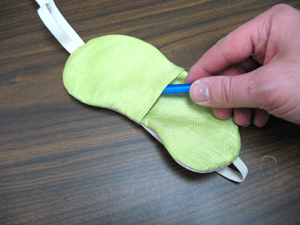
Turn the mask right side out and remove the tape from the straps. Push and shape the seams using the end of a pen.
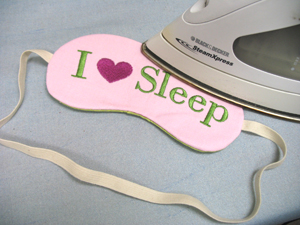
To finish the mask, use an iron to press the side seams flat.


