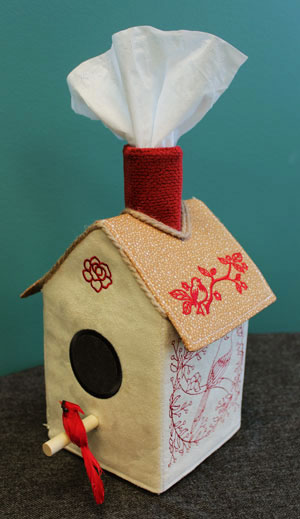
'Tis the season to have tissues at hand, and with this delightful birdhouse tissue box cover, you'll want a box of tissues in every room of the house!
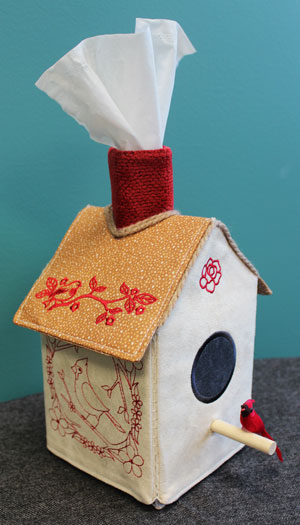
With lots of embroidery areas, and a darling birdhouse shape, this charming tissue box cover will cheer up winter days. It even has a chimney where the tissue comes out! Add a perch and a small decorative bird, and it couldn't be any cuter.
Read on for project instructions for creating your own birdhouse tissue box cover!
Supplies
Supplies Needed:
**Box of tissues (mine is 4 1/4" wide by 5" high by 4 1/4" deep)
**1/4 yard fabric (for sides of house -- I used faux suede)
**1/4 yard fabric (for roof -- I used quilter's cotton)
**Small piece of fabric for chimney (I used upholstery fabric)
**One 14" by 18" piece of medium weight stiff fusible interfacing
**Temporary spray adhesive
**Medium weight cutaway stabilizer
**Air erase pen
**Hot glue and gun or fabric glue
**Craft knife and cutting pad
**2" long piece of 1/4" wide wooden dowel (for perch)
**Yarn (for trim)
**Small decorative bird (I found mine at Michael's)
**Needle and thread (for some hand sewing)
Designs Used:
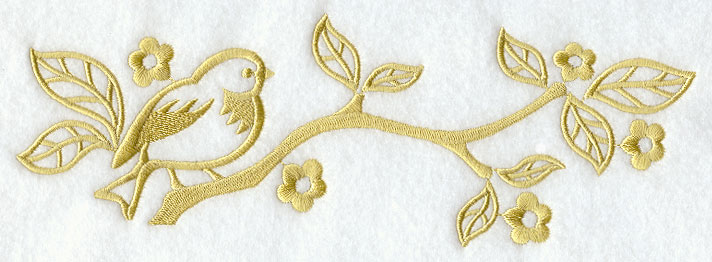
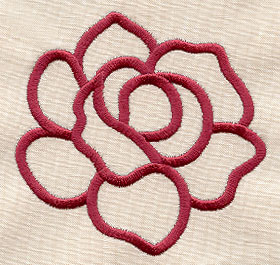
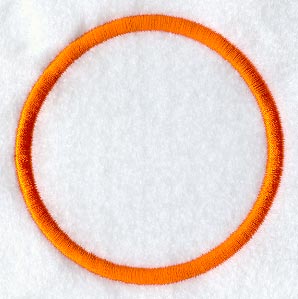
For my birdhouse tissue box cover, I used designs from the small size of the Perched with Petals (Redwork) Design Pack. I also used the small size of the Forest Rose, the small size of the Simply Bird and Blossoms Border, and the small size of the Circle (Applique) design.
Designs from the Spring into Redwork Design Pack or from the Bloom Where You Are Planted Decor Pack would be beautiful as well! Other borders that would be pretty are the Chinoiserie Birds in Branch Border and the Filigree Birds Border.
Finished size:
4 5/8" wide by 9" high by 4 5/8" deep
Designs Used

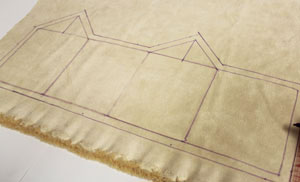
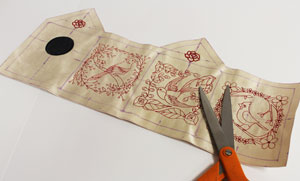
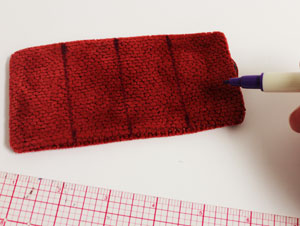
First, to prepare the fabric for the outer walls, lay the fabric flat (I used faux suede). Lay the tissue box flat on top of the fabric (on the far left side of the fabric) with the front of the box facing down (I chose one of the short sides of the box as the front). Using an air erase pen or other marking tool, trace the box.
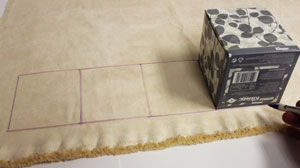
Roll the box over to the right to the next side and trace the box. Repeat this process for each of the four sides.
Starting from the left hand side, measure and mark the center of the top of the first and third shape (which are the front and back walls) by measuring and dividing by two. Draw a 2" vertical line up from each of the marks.
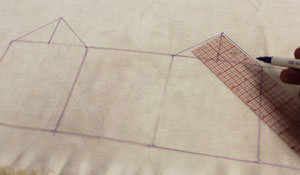
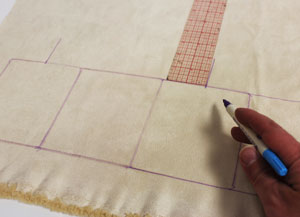
Draw lines connecting the top of the lines with the upper corners of each shape.
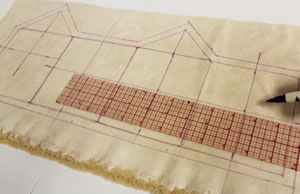
Add a seam allowance around the entire outer edges of the shapes -- measure and make marks 1/2" out along the top and bottom edges, and measure and make marks 3/4" out along the side edges. Draw lines connecting the marks.
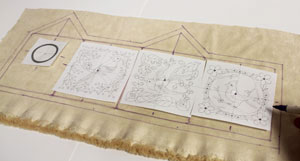
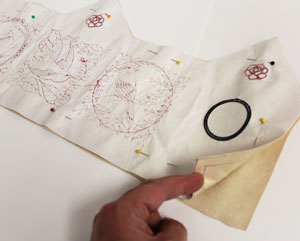
Create paper templates of the designs by printing them at full size using embroidery software. Position the templates on the fabric how you want them. I am embroidering a Circle (Applique) design to create the door to the house.
I placed the template for this design with the top edge of the design about one inch from the top edge of the rectangle shape. For more information on embroidering applique designs, click here. Poke holes in the center of the templates and mark the fabric. Also, mark the horizontal and vertical axis points.
Remove the templates and draw lines connecting the marks.
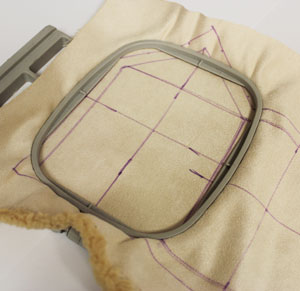
Spray a piece of medium weight cutaway stabilizer with temporary adhesive and smooth the fabric on top. Hoop the fabric and stabilizer together by aligning the marks on the hoop with the lines on the fabric. Attach the hoop to the machine and load the first design.
Move the hoop so that the needle is directly over the center point on the fabric. Embroider the design. When the design has finished, repeat the hooping and embroidering process for the remaining designs.
When all the designs have finished, cut out the shape. I left the stabilizer on the backside of the embroidery to help give the fabric more support.
To prepare the back fabric, lay the embroidered piece on top of the fabric, right sides together, pin in place, and cut out the shape. Sew a 1/2" seam along the side and top edges only; leave the bottom edge open for turning.
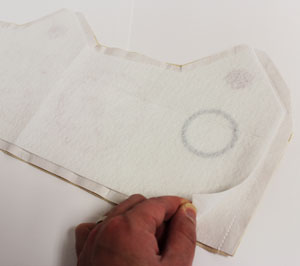
Lay the fabric piece over the fusible interfacing and trace the shape. Measure and make marks 1/2" in around the entire shape. Cut out the shape. Spray the backside of the interfacing with temporary adhesive and press it in place on top of the fabric within the seam allowance. Turn the fabric right side out (with the interfacing tucked inside between the layers).
Using a pressing cloth, turn the fabric of the opening in 1/2" and press. Press the seams and the both sides of the fabric to activate the fusible interfacing. Sew a 1/4" seam along the bottom edge only. Also, sew a vertical seam in between each shape (each of the seams will become a corner of the house) along the lines you drew earlier.
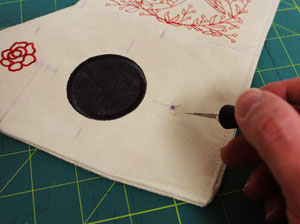
To add the perch, measure and mark one inch down from the center bottom of the door. Then, using a craft knife and cutting pad, cut a small "x" at the mark.
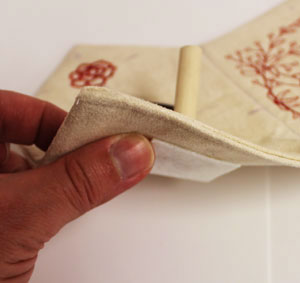
Cut a 2" long piece of 1/4" thick wooden dowel and a 1" by 1" piece of interfacing. Insert one end of the dowel through hole (from the front), and using hot glue or fabric glue, glue the interfacing onto the backside of the fabric and the end of the dowel.
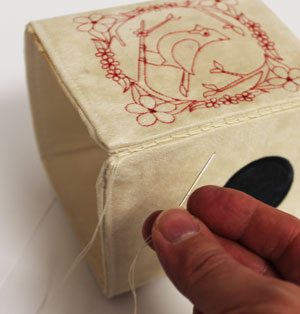
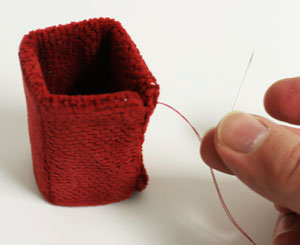
Bring the short ends of the fabric together and hand sew them together using needle and thread.
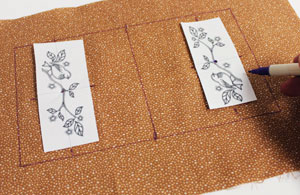
To prepare the roof fabric (I used quilter's cotton), measure one of the angled top sides of the front or back of the house. Take that measurement, multiply it by two, then add 3" (mine measured 3", so 3" multiplied by 2 equals 6" - 6" plus 3" equals 9"). This is the width of the roof fabric. Then, measure one of the top sides of the sides of the house. Take that measurement and add one inch (mine measured 4 1/2", so 4 1/2" plus one inch equals 5 1/2"). This is the height of the roof fabric.
Take your measurements and draw a rectangle on the fabric. Measure and mark the center of the top and bottom edges and draw a line connecting the marks. Position the templates on the fabric and mark the center and axis points. I positioned the templates with the bottom edges of the designs about one inch from the outer side edges of the fabric. Hoop the fabric with stabilizer and embroider the designs just as you did earlier.
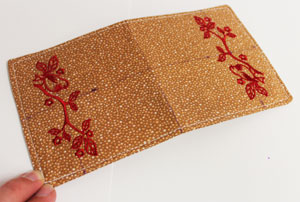
When the designs have finished, cut out the shape. Place the embroidered piece over the fabric, right sides together, pin in place, cut out the shape, and sew a 1/2" seam along the side and top edges. Leave the bottom edge open for turning.
Next, add a piece of interfacing (cut it down to fit within the seam allowance as you did earlier), and turn the fabric right side out. Turn the opening in 1/2" and press. Press the seams and both sides of the fabric just as you did with the wall piece. Sew a 1/4" seam along the entire out edges of the fabric and then fold the fabric at the center line.
To prepare the chimney fabric, cut two pieces of fabric (I used upholstery fabric) to 6" wide by 3 1/2" high. Layer the fabric, sew the seams, and add the interfacing just as you did for the roof piece. Measure and mark every 1 1/4" along the top and bottom edges. Draw lines connecting the marks and then sew a seam along each line.
Fold the fabric at each line, align the short ends together, and hand sew in place.
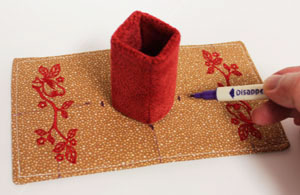
Center the chimney on top of the roof piece with the back seam of the chimney facing to the back. Mark the fabric at the front and the back of the chimney and 1/4" out from the sides of the chimney.
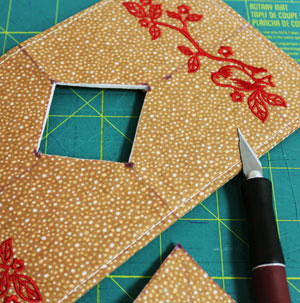
Remove the chimney, draw lines connecting the marks, and then cut out the shape (through all the layers) using a craft knife.
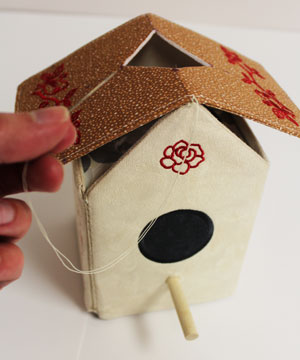
To add the roof, position it on top of the wall section and hand sew it in place at the front and back peaks of the roof. Add hot glue or fabric glue to the top edges of the walls and press the roof in place. Insert the chimney inside the hole in the roof, and tack it in place by hand sewing a few stitches at the front and back corners.
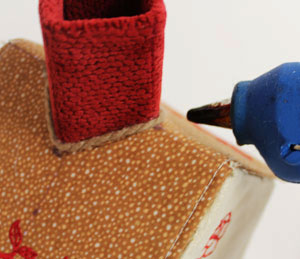
You can add decorative items like yarn along the bottom edges of the chimney and along the edges of the roof by simply gluing them in place. Glue a small decorative bird to the perch, and the tissue box cover is complete!
Make tissue boxes a lovely part of home decor with this fun cover. It has lots of space for embroidery you love. Add a perch and a bird, and you'll even have a little company to cheer you up when you're down with a cold!


