Deck the halls -- and clean out your closets -- with adorable and colorful sweater ornaments. Popular upcycled sweater ornaments are completely charming, and fast to make, too.
Create any size you like -- larger ones make great wall hangings and door hangers, smaller ones make fabulous Christmas tree ornaments. Embellish with your favorite embroidery design, and you'll have a very sweet holiday decoration!
Read on for instructions to create a sweater ornament or wall hanging!
Supplies
Supplies Needed:
**Old sweater
**Heavy weight fusible interfacing
**Medium weight cutaway stabilizer
**Temporary spray adhesive
**Water-soluble stabilizer (for topping -- I prefer Sulky Solvy or Sulky Super Solvy)
**Air-erase pen
**Fabric glue (or needle and thread for some hand sewing)
Supplies Needed continued:
**3/4" wide to 1 1/2" wide ribbon (I used different widths depending on the size of the ornament)
**Large piece of paper (optional: for tracing your pattern pieces)
Designs Used:
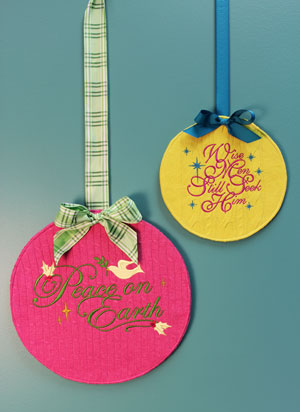
I used the large size of the Wise Men Still Seek Him design, the large size of the Peace on Earth design, and the small size of the Vintage Dasher design. Classic Christmas Wreaths and Blessed Christmas Melodies would also be merry and bright on sweater ornaments!
Special Project Notes:
You can make the ornaments any size you like! Create large ornaments for wall hangings and door hangers, and small ornaments to hang on the tree. Use the free patterns (see the pattern links below) or simply trace any round, flat object that is the size you like.
Choose a sweater with a flat, thin weave. Avoid heavy, open weave cable knits as the stitching might disappear into the weave or look rough and uneven.
Designs Used

To begin, choose the size of ornament you want to make. I made three different sizes: 12" diameter (large), 8 1/2" diameter (medium), and 5" diameter (small). Click the following links below to download a PDF of the pattern pieces. For the large size (add link), the pattern will print in four separate parts on four pieces of 8 1/2" wide by 11" high paper. For the medium size, the pattern will print in two pieces on two pieces of paper. And for the small size, the pattern will print in one piece on one piece of paper.
Print the pattern. If you would like to create a different size, simply trace a round, flat object (like a pan lid or jar lid) onto a piece of paper and cut out the shape. Note: the shape requires a 1/2" seam allowance, so, if you trace a 14" diameter round object, the final size of the ornament will be about 13" in diameter.
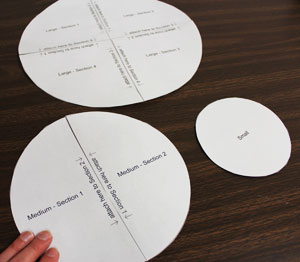
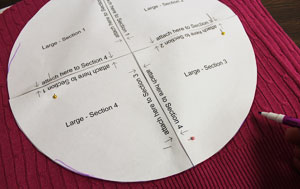
If using the large or medium size, cut out the pattern pieces and tape them together by following the instructions printed on the pattern pieces.
Next, cut out large pieces of fabric from the front and back of the old sweater. Then, lay one of the fabric pieces flat, right side facing up, and pin the pattern piece on top. Using an air-erase pen or other marking tool, trace the shape.
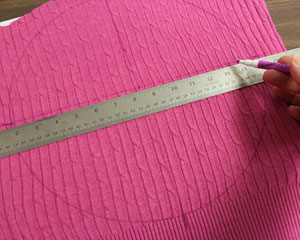
Draw a horizontal line through the center of the shape. Next, draw a vertical line through the center of the shape (perpendicular to the horizontal line). Where the lines meet is the center of the circle.
Remove the pattern and create a paper template of the design by printing it at full size using embroidery software. Poke a hole in the center of the template and align it with the center point on the fabric. Make sure that the design fits well within the shape; there should be at least one inch of space between the outer edges of the design and the edges of the shape.

Next, spray a piece of medium weight cutaway stabilizer with temporary adhesive and smooth the fabric on top. Lay one piece of water soluble stabilizer on top of the fabric. Hoop all three layers together by aligning the marks on the hoop with the lines on the fabric. The water soluble stabilizer topping helps the stitches from sinking into the fabric. For more information on embroidering on sweater knit, click here. Attach the hoop to the machine, load the design, and embroider the design.
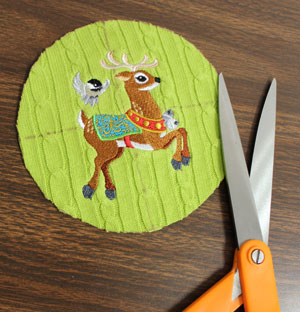
When the design has finished, tear off the topping. You can use a tweezers to remove the small bits left over. Or, wet your fingertips with water and gently brush the topping away. I left the cutaway stabilizer on the backside of the embroidery to help give the fabric more support. Then, cut out the shape.
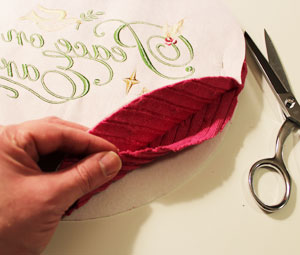
Now it is time to assemble the ornament! Lay one layer of heavy weight fusible interfacing flat. Then, align the back fabric (the remaining sweater fabric) on top, right side facing up. Lay the embroidered front piece on top of the back fabric, right sides together. Pin in place and cut out the shape following the outer edge of the front piece.
Sew a 1/2" seam along the outer edge of the shape leaving about 5" open at the top (leave about 3" open for the small size). Trim the seam allowance around the seamed edges (do not trim the top opening) leaving about 1/8" excess.
Turn the fabric right side out in between the front and back layers. Next, trim the stabilizer and interfacing at the top opening to match the seamed edges (trim off about 3/8") - do not trim the fabric at the opening. Turn the fabric of the opening in 1/2" and press with an iron. Using a pressing cloth, press the front and back of the ornament to activate the fusible interfacing (follow the instructions on the packaging).
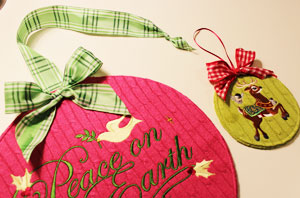
Top stitch a 1/8" seam around the entire outer edge of the ornament. To prepare the hanger for wall hanging ornaments, decide how long you want the hanger to be. I cut a piece of ribbon to about 20" long and tied a knot at one end.
Then, add fabric glue to the raw end of the ribbon and glue it in place at the back top center of the ornament. Cut a length of ribbon, tie it into a bow, and glue (or hand sew with needle and thread) it at the top center of the ornament just in front of the hanger ribbon.
For tree ornaments, cut a length of ribbon (about 8"), form it into a loop, tie the raw ends into a knot, and glue it in place at the back top center of the ornament. Add a bow at the top center, and you are done!
Sweater ornaments are a terrific way to create a unique and stylish holiday home decor item. They make wonderful gifts, too!


