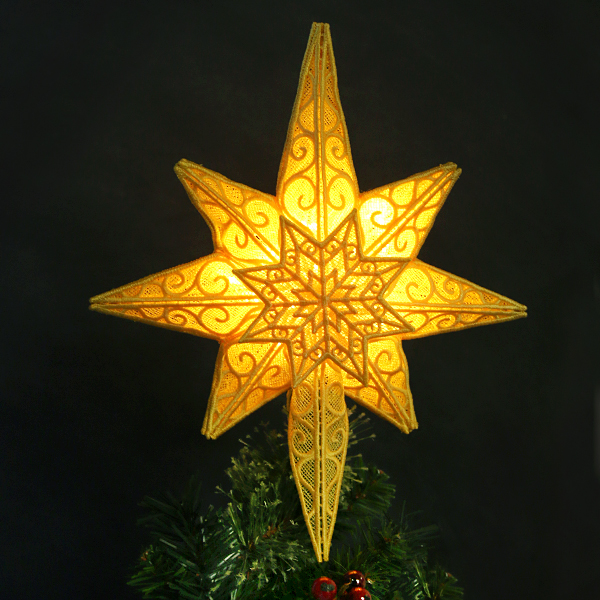
Put the perfect finishing touch on your creative Christmas tree with this beautiful tree topper! Stitch each freestanding lace piece individually, then assemble and fill with tiny LED lights to create a heavenly glow. Our step-by-step instructions will show you how!
Supplies
Project Needs & Notes:
- Heavy weight water-soluble stabilizer (we prefer Sulky Ultra Solvy or Vilene)
- Hand sewing needle, hot glue gun or fabric glue
- Fairy lights (optional)
- 75/11 sharp sewing needle
- Scissors
Special notes:
To make this tree topper, sew out 4 of file "a", 4 of file "b", 8 of file "c" and 1 of file "d".
Designs featured in this tutorial include:
- X14383, Star of Bethlehem Tree Topper (Lace)
Designs Used
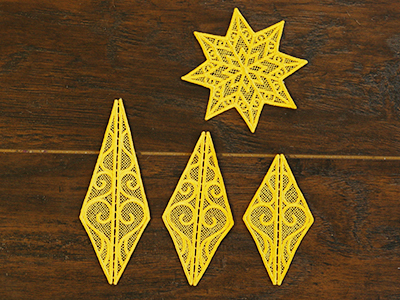
Freestanding lace designs have been specially digitized for water-soluble stabilizer. After the stabilizer is removed, beautiful lace remains behind.
When you download the design, you will find a total of four files which contain all of the pieces of the star.
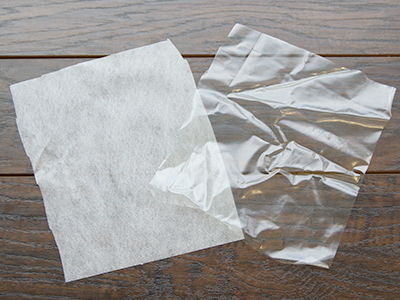
There are a couple of different kinds of water-soluble stabilizer. One is clear and plastic, and that brand is Sulky Ultra Solvy. The other is soft and fibrous, called Vilene. Both will work very well. Vilene is used in this demonstration.
Use a size 11 or 75/11 sharp sewing needle. A sharp sewing needle has a smaller, finer point than an embroidery needle. That means it will make smaller holes in the stabilizer.
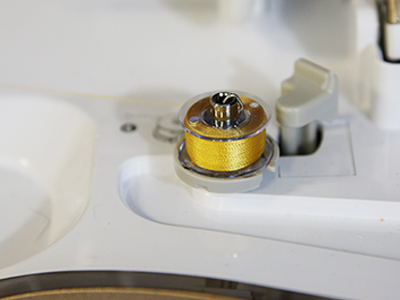
Freestanding lace is seen from both sides, so wind a bobbin with the same thread that you're using in the needle.
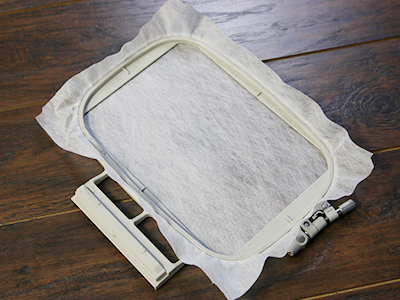
Hoop the stabilizer firmly. Make sure it is nice and tight with no wrinkles.
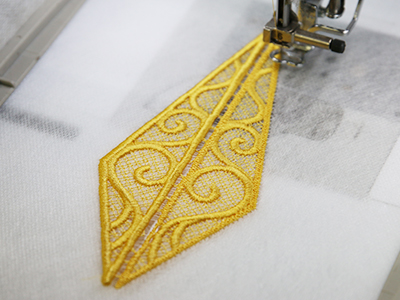
Attach the hoop to the machine and load file "a". Embroider the design.
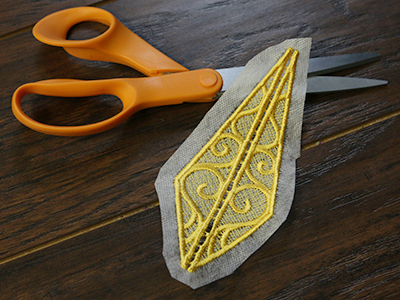
After embroidering, trim away the excess stabilizer.
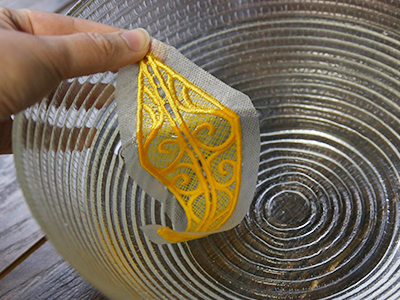
The stabilizer's packaging should give instructions for removing the excess. For Vilene, soak the lace pieces for a few moments.
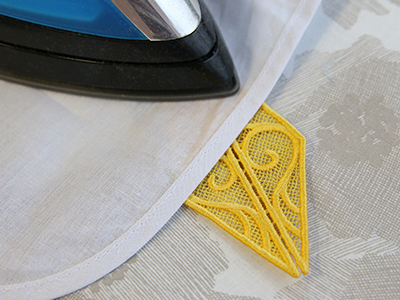
Allow the lace to air dry, then press with a pressing cloth on top.
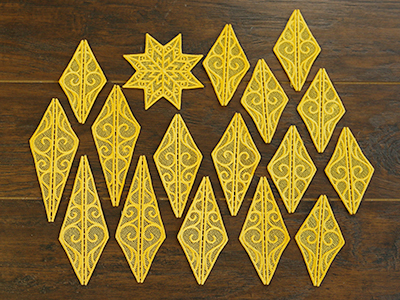
Repeat the steps above to embroider the rest of the lace pieces. Remember to sew a total of 4 copies of the pieces labeled with a "a" and "b", 8 copies of the piece labeled "c", and just one copy of the piece labeled "d".
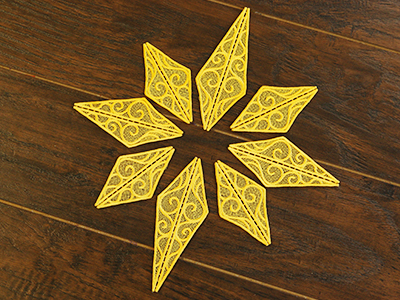
Lay out the eight pieces that will make up the front half of the star in the order that they will be sewn together. The star will have eight points. The top and bottom points will be file "a" which is the longest. The left and right point will be file "b" which is second longest. The four remaining small points ("c") will go in between the "a"s and "b"s.
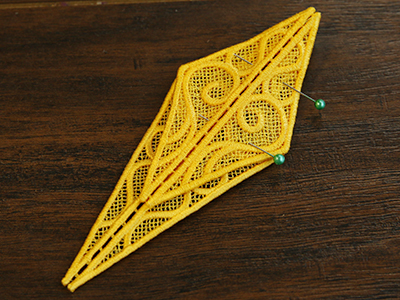
First take one piece "a" and one piece "c". Lay them on top of each other with the right sides together, and make sure the bottom points are lined up so the swirls match up. Pin along one short side.
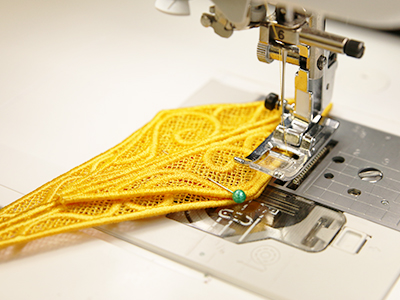
Make sure to use a matching bobbin when sewing. Using a sewing machine, sew a 3.5mm wide zigzag stitch and sew the two pieces together along one short side. Sew around the satin border of the pieces, so the needle "falls off" one side of the lace piece while sewing.
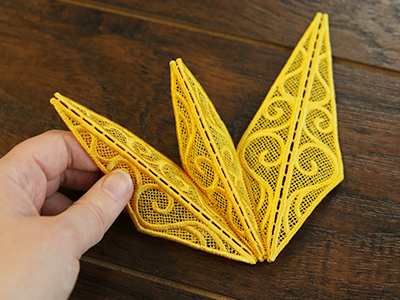
Next repeat to add a "b" piece onto the open short side of the attached "c" piece. Pin then together with right sides together, and just along the short side.
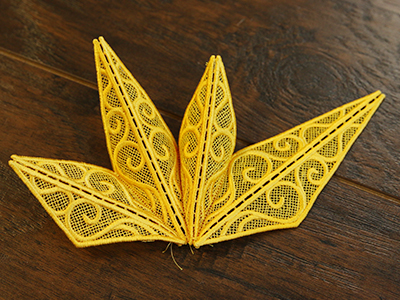
Then repeat again to sew another "c" piece onto the open short side of the "b" piece.
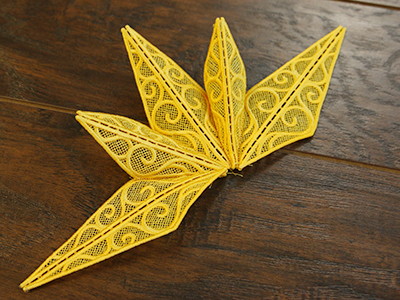
Then repeat again to sew the second "a" piece onto the open short side of the "c" piece.
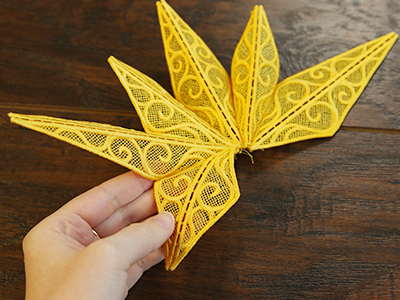
Then repeat again to sew another "c" piece onto the open short side of the second "a" piece.
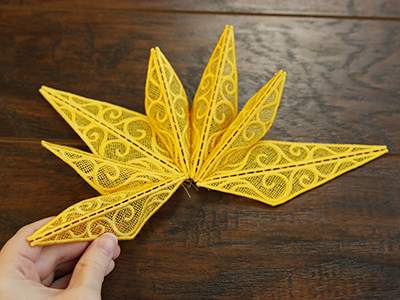
Then repeat again to sew the second "b" piece onto the open short side of the "c" piece.
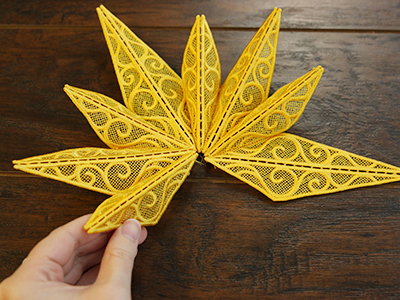
Then repeat again to sew final "c" piece onto the open short side of the second "b" piece.
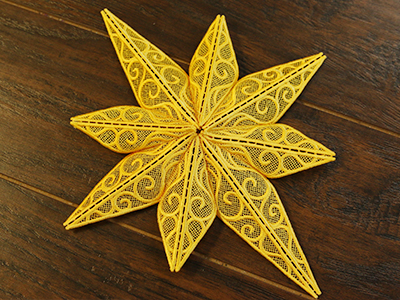
Finally, pin the open "c" and "a" pieces together along the short side. Make sure the right sides are together, and sew along the short side.
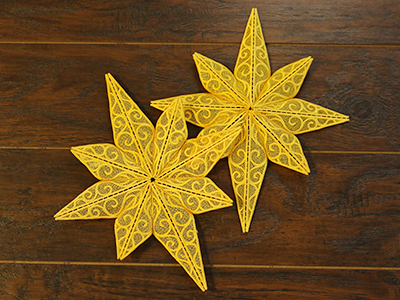
Then repeat to sew the back piece which is identical to the front.
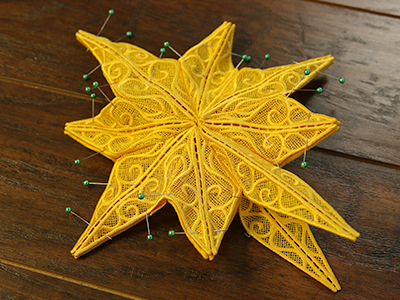
Put the front and the back pieces together with the wrong sides together. Line up the outer edges, and pin along them all except do not pin along the bottom "a" point.
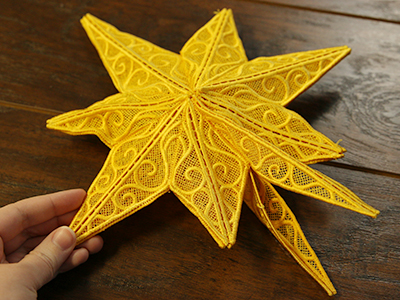
Then sew along the outside edges with a zigzag stitch as was done earlier. Make sure to leave the bottom "a" pieces unsewn as the top of the tree will be inserted there.
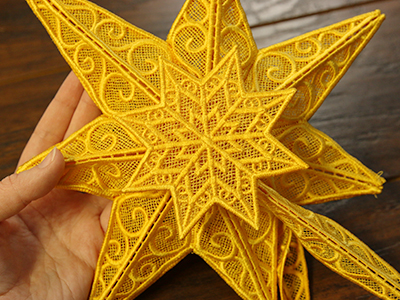
After the front and back pieces are sewn together, glue the front detail piece ("d") onto the front of the star tree topper, so the points rest in between the larger star points.
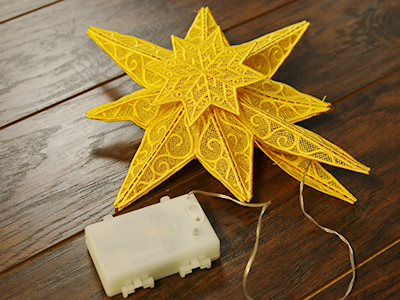
Fill the star with battery powered fairy lights to give the star its shape and make it light up. When placing the star on the tree, slide the top of the tree inside the star through the open bottom point. Then make sure to tie the battery pack for the fairy lights to the tree, so it doesn't fall.
