Want to add a colorful touch to a pillow cover, duvet, beach towel roll-up, purse, or tote? Instead of stitching a plain ol' buttonhole, add a decorative, colorful touch with machine embroidered buttonhole designs.
They're available in a variety of themes and subjects, and are teeny-tiny enough to fit into the smallest areas. Use them to add extra color and charm to your embroidery projects.
Please note: The designs are intended to become new buttonholes on garments and items you're constructing; they're not intended to be stitched over pre-existing buttonholes on pre-constructed garments or items.
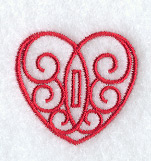
When you look at a buttonhole design, you'll see a size listed in the name. For example, this design is called Heart Buttonhole - 1/2 inch. That means that the size is for a 1/2 inch button.
We used the following supplies for marking the fabric and placing the design:
**Air-erase pen
**Stabilizer / backing. (We're stitching the buttonhole through a few layers of sturdy
fabric, so we'll use tear-away. If stitching on thinner fabric, cutaway may be a
better choice for you.)
**Temporary spray adhesive
**Craft knife and cutting pad
For this demonstration, we're adding a decorative buttonhole to the Monogrammed Clutch. Free instructions for making the clutch are here.
Designs Used

We've found that the easiest and most precise way to place a design is by using a template. A template is a printout of the design from an embroidery software program.
If you don't have an embroidery software program to print a template, then you can stitch a sample of the design and use that as a template. Or, cut a piece of paper to the approximate dimensions of the design. If you'd like a recommendation for a software program, we use Embird from www.embird.com, the Buzz products from www.buzztools.com, and Wilcom's TrueSizer.
After you have the template, position it on the item or garment. Using an air-erase pen or other marking tool, poke a hole in the center of the template and mark the fabric. Also, mark the horizontal and vertical axis points.

Remove the template and draw lines to connect the marks - these lines will be used for hooping.

Spray your stabilizer with a bit of temporary adhesive, and smooth the fabric on top. Hoop the fabric and stabilizer together by aligning the marks on the hoop with the lines on the fabric.
You can see from the photo that we're not able to hoop the entire piece of fabric. The spray adhesive will come in very handy to prevent the fabric from slipping and shifting!

Attach the hoop to the machine and load the design. Move the hoop so that the needle is directly over the center point on the fabric. Embroider the design.

When the design has finished, gently tear away (or trim) the excess stabilizer on the back of the embroidery. Then, carefully cut open the buttonhole using a craft knife and cutting pad.

Mark the center of the buttonhole where you want it to close, and sew a button at the mark.

Here's the finished result! The embroidery design adds a charming "frame" to the button -- an extra dash of color and charm to an already crafty project.
To find the buttonhole designs, click here. Enjoy dressing up your projects with these fun little designs!


