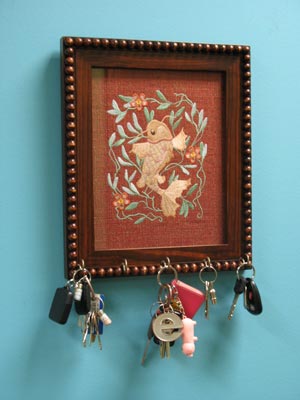
Frame a favorite design, then add hooks to make a beautiful key caddy!
Choose colors for the design that match your decor or personal taste - so flexible and fun, too. Read on for free project instructions!
Supplies
Supplies Needed:
**Wooden picture frame with a glass panel. (Ours is 8 inches by 10 inches but you may choose any size you would like.)
**Fabric, enough to cover the glass in the frame (we used upholstery fabric)
**Heavy weight interfacing, thin cardboard or tag board
**Medium weight cutaway stabilizer
**Temporary spray adhesive (we use KK100)
**Masking tape or air-erase pen (or other marking tool)
**Permanent marker
**Metal cup hooks (with screw ends)
**Small hammer and pliers
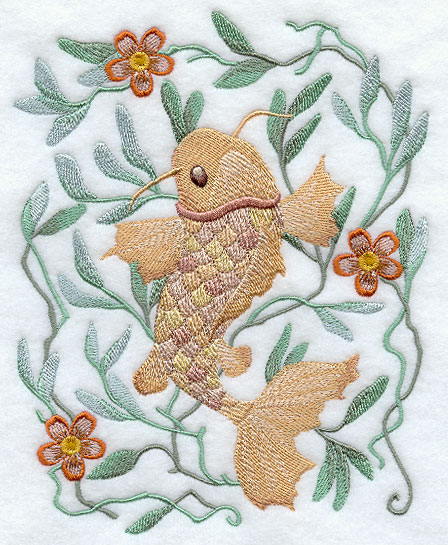
Design used:
Art Nouveau Koi Fish - Lg
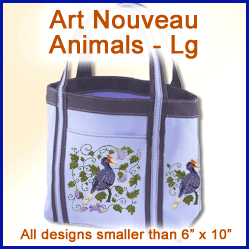
This design is also available in the following design pack:
A Art Nouveau Animals Design Pack - Lg
Designs Used
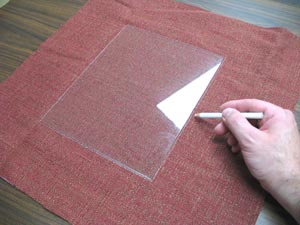
First, remove the backing and glass from the frame.
Lay the fabric right side up, place the glass on top and trace the shape.
Cut the fabric but leave a few inches of excess around the edges of the shape of the glass. This excess will be used later to wrap around the back of the frame.
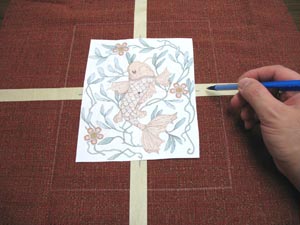
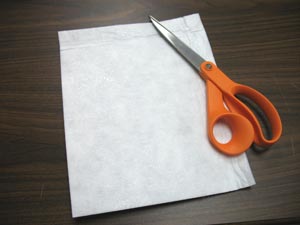
If you have embroidery software, print a template to use for placement. If you don't have embroidery software, you can cut a piece of paper the shape and dimensions of the design to help with placement and centering.
Lay the paper template inside of the shape on the fabric. Measure equal distances between the center of the design and the outer edges of the shape - this will center the design within the shape.
We're embroidering on dark fabric, so the air-erase pen that we normally use for marking isn't going to work very well. Masking tape is a handy (an inexpensive) way to mark placement on dark fabric.
Make a cross of the horizontal and vertical axis lines with the masking tape. To do that, place long strips of masking tape on the fabric, using the axis lines on the template as a guide.
Poke a hole in the center of the template and mark the tape. Also, mark the horizontal and vertical axis points.
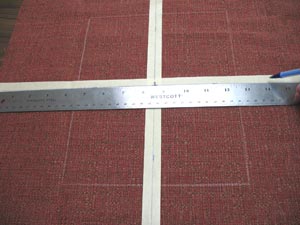
Remove the template and draw lines (on the masking tape) connecting the axis points. These lines will be used for hooping.
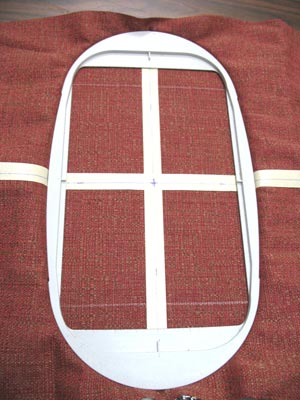
Spray a piece of cutaway stabilizer with a bit of temporary adhesive. Smooth the fabric on top and hoop the fabric and stabilizer together, aligning the marks on the hoop with the lines on the tape.
Attach the hoop to the machine and load the design.
Move the hoop so the needle is directly over the center point on the tape. Remove the tape and embroider the design.
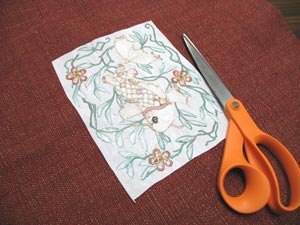
When the design has finished, unhoop the fabric and trim away the excess stabilizer on the back of the embroidery.
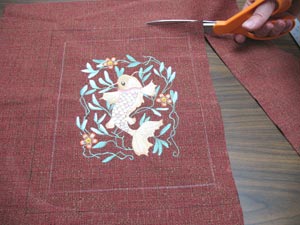
Flip the fabric over so the right side is facing up and mark a one inch allowance around the entire outer edge of the shape.
Then, cut out the shape.
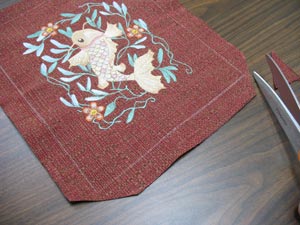
Next, trim all four corners of the fabric by making a diagonal cut about 1/4 inch from the corners of the original shape. This is so the folded parts won't be so bulky.
The fabric will need a sturdy base. We'll create this base by using heavyweight interfacing. You may also use a piece of thin cardboard (a cereal box works well) or tag board instead of interfacing.
Trace the glass panel onto the interfacing or board and cut out the shape.
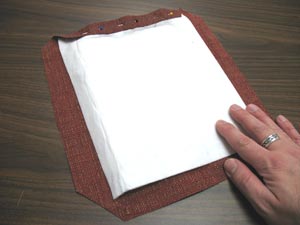
Flip the fabric over to the wrong side and align the interfacing or board on top.
Wrap the top edge of the fabric around to the back and pin in place.
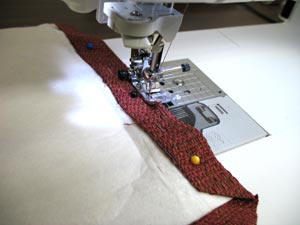
Sew a 1/8 inch seam along the outer pinned edge.
Next, wrap the bottom edge around the interfacing, pin, and sew in place.
Repeat this process for each side.
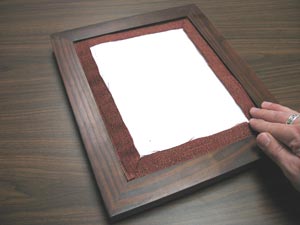
Then, place the glass panel back into the frame. Next, insert the assembled embroidered piece.
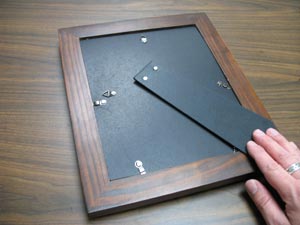
Now, add the backing of the frame and secure it in place.
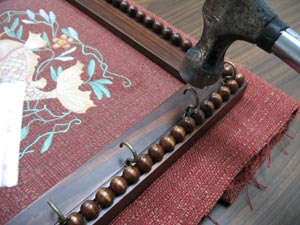
Finally, we will add the hooks.
Measure and mark equal distances across the bottom edge of the frame for the hooks. Be sure to also mark equal distances from the bottom edge of the frame.
Place some folded fabric underneath the frame to add some cushion.
Add the hooks by gently tapping them with a hammer to get them started.
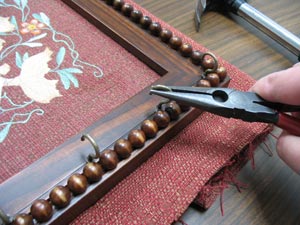
Turn the hooks by hand or use a pliers to twist them into place.
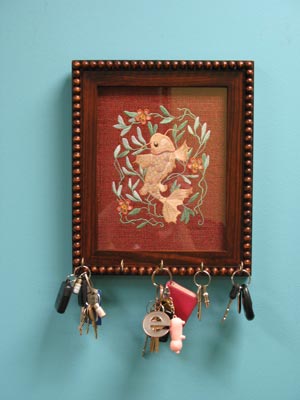
Hang the frame on the wall in a handy spot. Now you have a beautiful key caddy -- and an embroidered showpiece!


