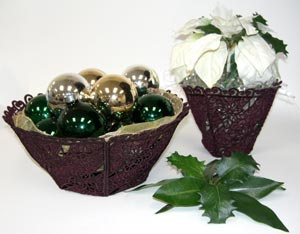
A freestanding lace bowl is a fun and festive way to dress up your table. Fill with glittering glass ornaments and tinsel for an eye-catching centerpiece for the holidays. Or, place a serving bowl inside and make treats and edibles even more enchanting!
Supplies
- Water-Soluble Stabilizer
- Cardboard
- Glass Bowl
- Paper Towels
Designs Used
A note about sizes:
- The large pieces will make a bowl that is 9 1/2" in diameter, and 4"high.
- The small pieces will make a bowl that is 8" in diameter, and 3 1/4" high.
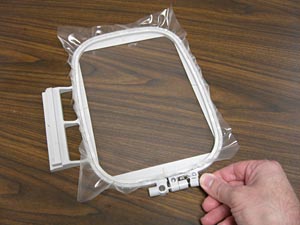
Hoop one piece of watersoluble stabilizer (WSS). We use Sulky Ultra Solvy.
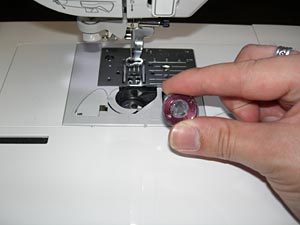
Because freestanding lace is two-sided, and both sides of the bowl will be seen, wind a bobbin with the same thread that you'll be using in the needle.
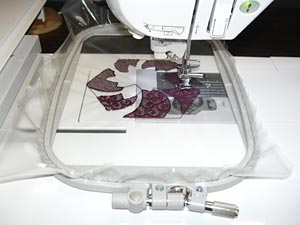
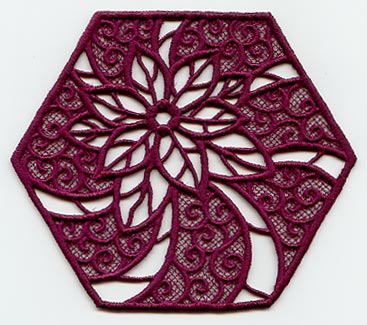
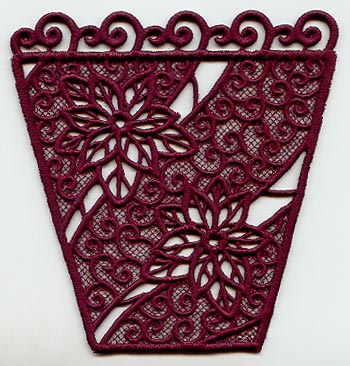
Embroider the lace hexagon design, and six of the lace side pieces. We use a size 11 sharp needle when embroidering free-standing lace.
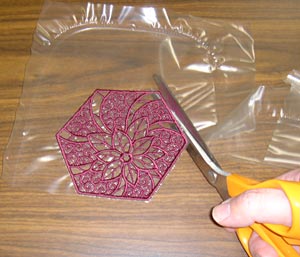
After each design has finished, unhoop the stabilizer and cut away the excess WSS. Trim as close to the embroidery as possible, without cutting any of the stitches. Set the scraps of WSS aside -- you can make spray starch with them later, if you wish.
Don't soak any of the pieces yet. We've found that it's easier to assemble the bowl with the WSS intact.
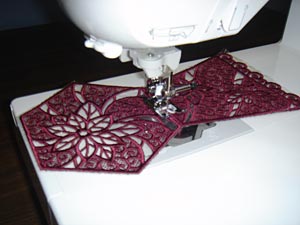
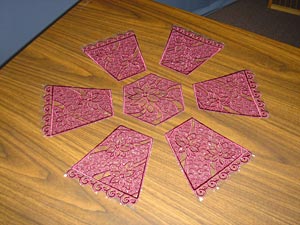
Lay the base hexagon piece right side up. Align the short side of a side piece, wrong side up, with the edge of the base. Using a matching thread color and a zig-zag stitch, sew the pieces together.
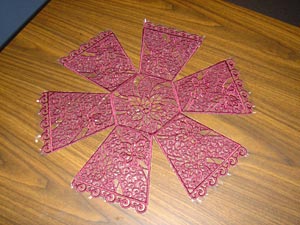
Repeat until all the side pieces are attached to the hexagon.
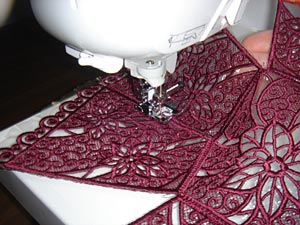
Next, sew the side pieces together. Bring two side pieces together so they touch, and using a zig-zag stitch, sew them together. Repeat until all side pieces are sewn together.
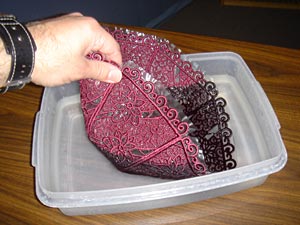
Soak the entire bowl in hot tap water. If you're using Sulky Ultra Solvy, soak for about ten minutes. If using a different brand of WSS, soak for more or less time as needed. It is helpful if some WSS remains behind in the embroidery, to add stiffness and stability to the bowl.
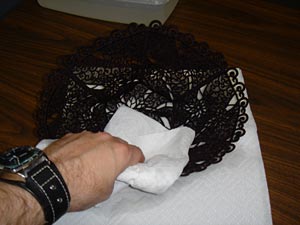
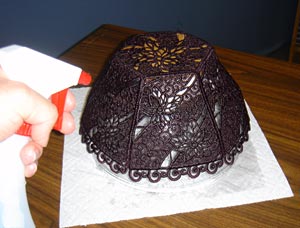
Blot the lace with paper towels.
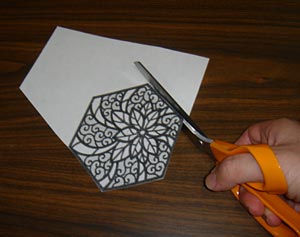
Next, make a cardboard template of the hexagon to help mold the lace as it dries. To do this, we printed a template of the design from embroidery software. If you don't have embroidery software, you can trace the shape of the lace hexagon directly onto a piece of cardboard.
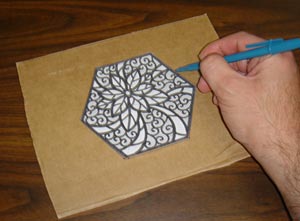
Trace the template onto cardboard.
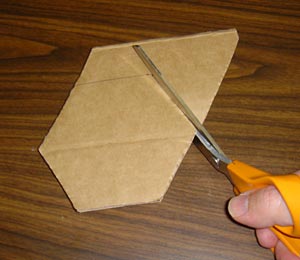
Cut the shape from the cardboard.

Place the cardboard form in the bottom of the bowl.
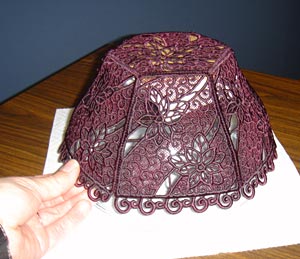
Place the lace, with the cardboard form inside, onto a glass bowl. This will help shape the bowl to ensure a nicely-formed end result. You might need to add some paper towels on the top or sides to help shape and support the lace.
For added support and body, you may spray the lace with starch. Spray starch can be made by mixing scraps of WSS with water in a spray bottle.


