Treat yourself to 70% off Storewide! Click the deals tab for details.
 Treat yourself to 70% off Storewide! Click the deals tab for details.
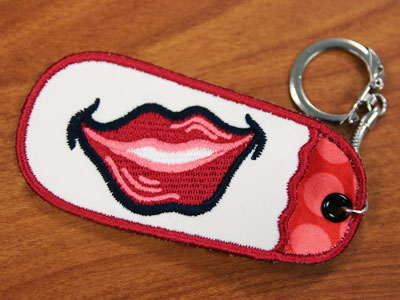
Add pizzazz to a set of keys, backpack, or purse with in-the-hoop keychains! They're a fun and fashionable way to personalize your belongings with stylish embroidery.
Supplies
- 1/8 yard of sturdy woven cotton or twill
- Tear-away stabilizer
- Medium-weight (2.5 ounce) cutaway stabilizer
- Temporary spray adhesive (Gunold's KK100)
- Small eyelet
- Key ring
Tools
- Craft knife and cutting pad
Designs Used
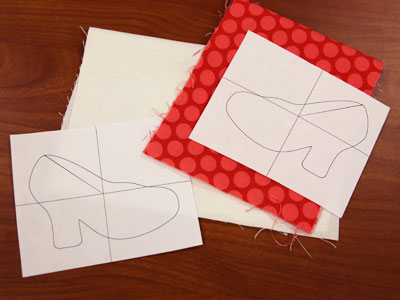
When you download an in-the-hoop keychain design, you will find multiple files. Some are the embroidery files, and the others are dieline files marked with the letters "DL". Dielines are used to cut the fabric to the correct shape and size. Open and print each dieline file using an embroidery software. If you do not have an embroidery software, take a look at our helpful video on using dielines.
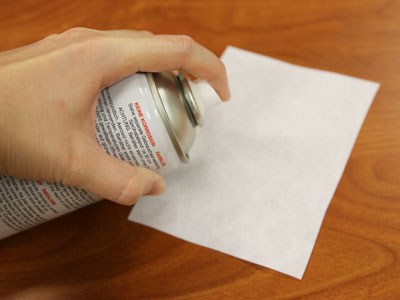
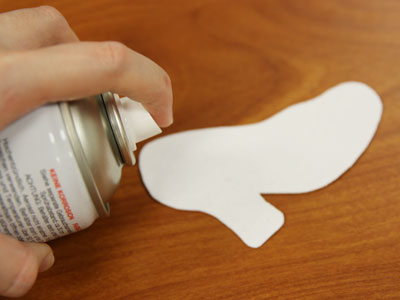
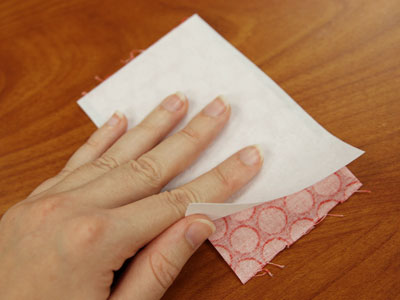
Spray a piece of cutaway stabilizer with temporary adhesive
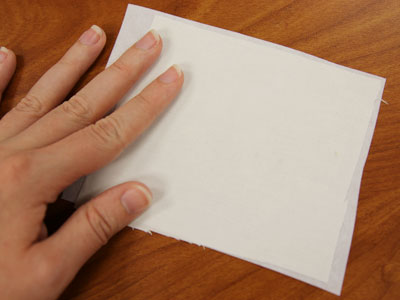
Smooth a piece of cotton fabric on top of the stabilizer.
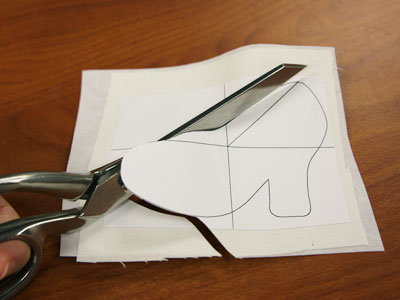
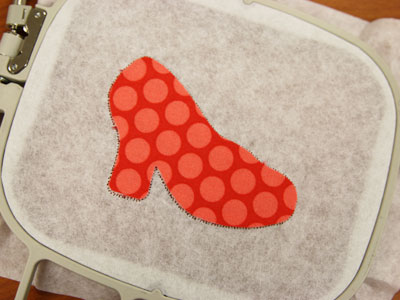
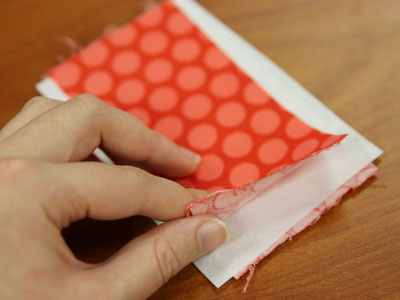
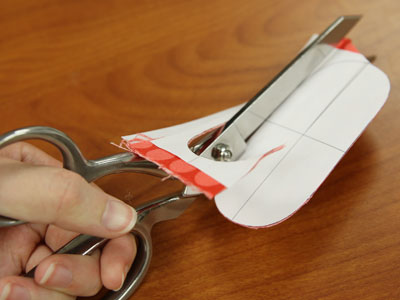
Place the dieline printout for the front of the keychain on top.
Cut out the shape.
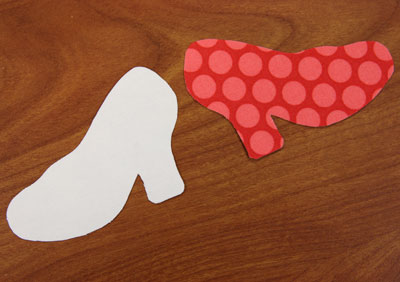
Repeat the steps, using the back dieline, to cut fabric and stabilizer for the back of the keychain.
Note: If using a keychain design that has a pocket, follow the special steps near the end of this tutorial to make double-sided fabric for the back piece.
Now that the fabric pieces are cut to the proper shape and size, it's time to embroider the design.
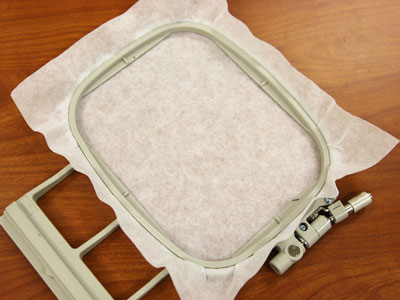
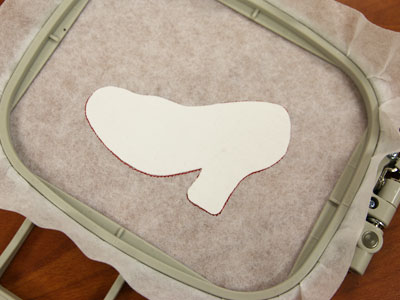
Hoop a piece of tear-away stabilizer.
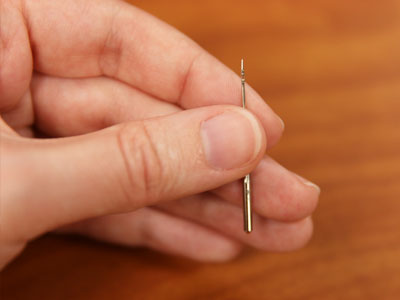
Use a size 11 sharp sewing needle in the machine rather than an embroidery needle.
A sharp sewing needle is the best choice when embroidering in-the-hoop designs.
Load the full embroidery file (not a dieline file) to your embroidery machine.
Attach the hoop, and begin embroidering the design.
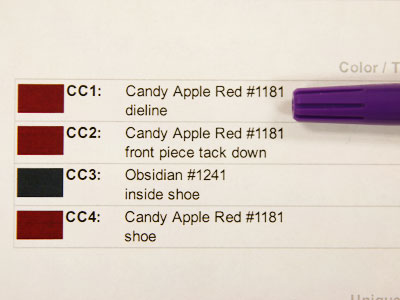
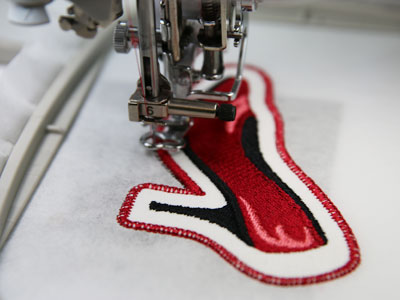
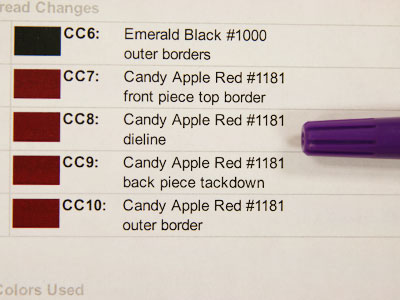
Reference the color change sheet for the design as you stitch. That sheet tells you what is stitched in each step.
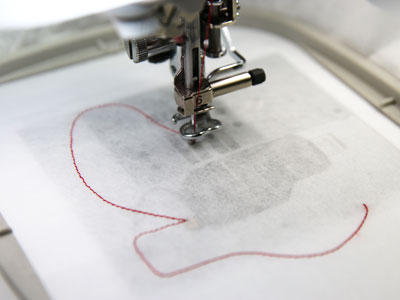
CC1 is a dieline, or outline stitch, that traces the shape for the front fabric pieces.
After the outline has stitched, spray the back of the front fabric and stabilizer piece with temporary adhesive.
Place that right inside the sewn dieline.
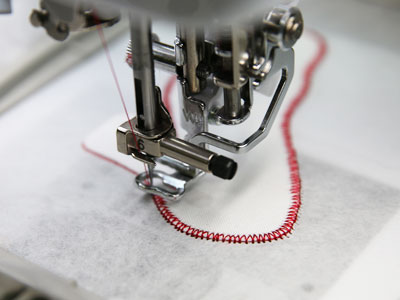
Continue embroidering the design.
The next thing to stitch is a tack down or zigzag stitch. This binds the fabric piece to the stabilizer.
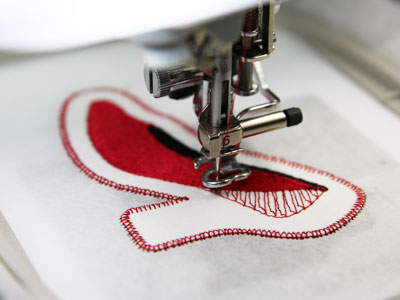
Other elements of the design will sew. Keep referencing the color change sheet as you stitch.
When you see the step on the color change sheet that says "back piece tack down" stop the machine.
Remove the hoop and turn it over.
Do not remove the stabilizer from the hoop.

Spray the backside of the back fabric and stabilizer piece with a bit of temporary adhesive.
Place that fabric and stabilizer piece on the back of the embroidery, right inside the dieline.
The next steps will be seen from both sides of the keychain.
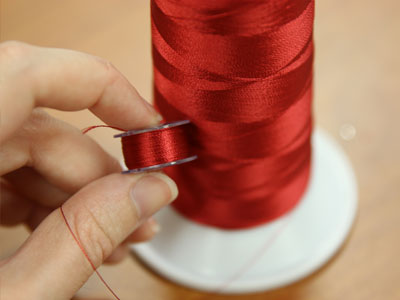
Wind a bobbin with the same thread that's used in the top.
Attach the hoop to the machine and continue embroidering the design.
A tack down or zigzag stitch will sew, binding the layers together. And finally, a satin stitch finish.
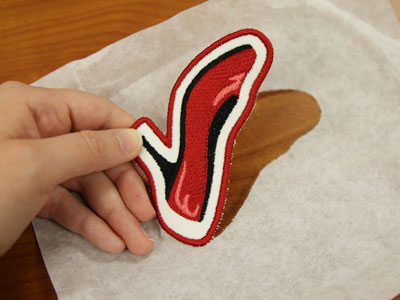
After the design has finished, unhoop the stabilizer and gently tear it away.
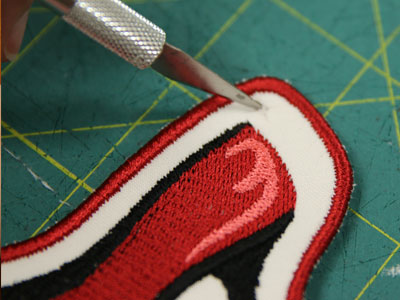
Add an eyelet to the outer edge of the keychain, right next to the satin stitch border.
Cut a small X through the layers with a craft knife, being careful not to cut through any of the stitches.
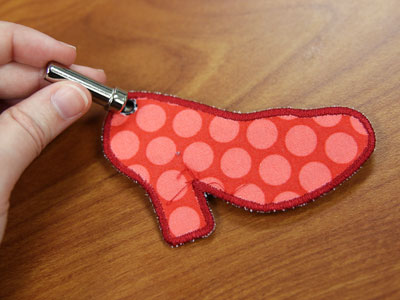
Tap the eyelet into place

Add a key ring.
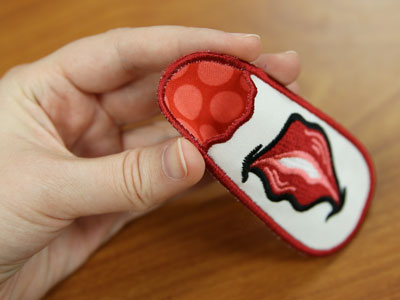
Some keychain designs have a pocket for lipstick or chapstick.
The back piece is seen from both sides, so an extra step is taken when preparing that fabric and stabilizer piece.

Spray temporary adhesive on the wrong sides of two pieces of fabric.
Place a piece of cutaway stabilizer on one of the fabric pieces, and smooth it down.
Place the wrong side of the second fabric piece on top.
Place the dieline printout for the back fabric piece on top.
This is the back fabric piece. Add it to the stabilizer after the "back piece dieline," step, and before the "back piece tack down."
This gives the pocket a nice finished front and back.
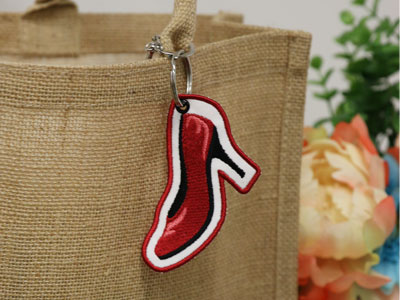
Clip the finished keychains onto a purse, a set of keys, or a backpack to show off your embroidery. Great for back-to-school, too!


