
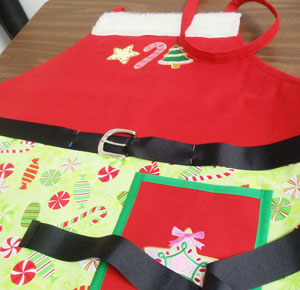
Baking delicious treats is a fun Christmas tradition. Make your kitchen even warmer with this bright Mrs. Claus apron!
Sweet embroidered cookies, colorful fabric, contrasting pocket, white fur trim, and Santa-style belt add up to an apron that is sure to be a ho-ho-holiday hit.
So treat yourself with this adorable apron, or stitch one up as a very cute gift for your favorite Santa's helper!
Read on for free project instructions!
Supplies
Supplies Needed:
**1 yard denim, twill, or lightweight canvas (for top and back of apron and top apron straps)
**1/2 yard print cotton fabric (for bottom of apron and pocket lining)
**1 1/4 yards - 4" wide fur trim
**Medium weight cutaway stabilizer
**Temporary spray adhesive
**Air-erase pen
**2 3/4 yards (about 100" long) - 1 1/2" wide ribbon (we used grosgrain ribbon)
**One 1 1/4" buckle
**Two D-rings -- 1" to 1 1/4" (for adjustable top strap)
**Extra wide double fold bias tape
**Fabric glue
**Needle and thread for some hand sewing
Special Project Notes:
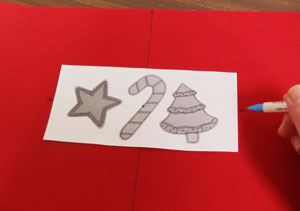
In this project I used the Bright Star Christmas Cookie design and the Christmas Cookie Trio design. I also think designs from the Christmas is Sweet Design Pack, the Dash of Christmas Cheer Design Pack, or the Christmas Sweet Treats Design Pack would also make delightful additions to an apron!
For more Christmas goodies, we have chosen dozens of Christmas designs perfect for creating a festive spirit, and put them on sale for only $1.24 each. Dash on over to the sale page to find designs fa-la-la fabulous for holiday decorating!
Finished size: 25 3/4" wide by 28" high
Designs Used


First prepare the fabric for the top front of the apron. Cut a piece of denim, twill, or lightweight canvas to 27" wide by 15" high (we used lightweight canvas).
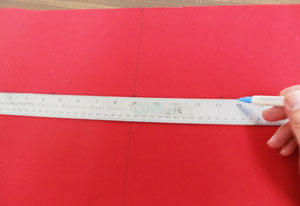
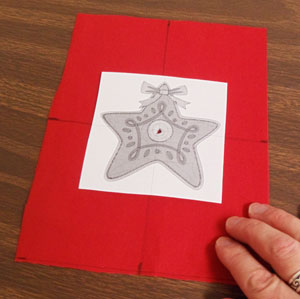
Create a paper template of the design by printing it at full size using embroidery software. Place the template on the fabric and center it from side to side by measuring in between the two sides and dividing by two.
Place the design about 4" from the top edge of the fabric to the top edge of the design. Using an air-erase pen, poke a hole in the center of the template and mark the fabric. Also, mark the horizontal and vertical axis points.
Remove the template and draw lines connecting the marks; these lines will be used for hooping.
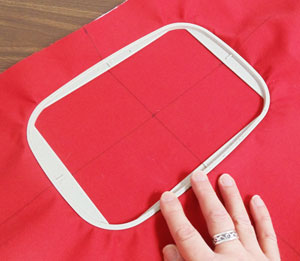
Spray a piece of medium weight cutaway stabilizer with temporary adhesive and smooth the fabric on top. Hoop the fabric and stabilizer together by aligning the marks on the hoop with the lines on the fabric.
Attach the hoop to the machine and load the design. Move the hoop so that the needle is directly over the center point on the fabric. Embroider the design.
After the design has finished, trim away the excess stabilizer on the backside of the embroidery.
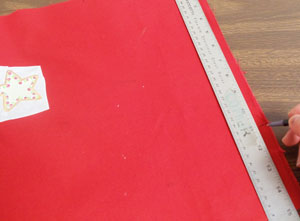
Fold the fabric widthwise (bring the short ends together). Measure and mark in 7" from the top corner of the raw edge on the top edge of the fabric. Then, measure and mark down 11" from the top corner of the raw edge along the side.
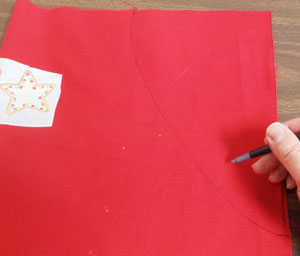
Draw a curved line between the two marks you just made.
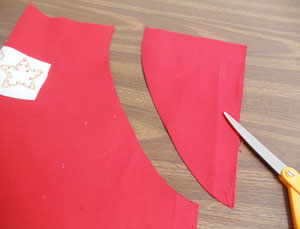
Cut through both layers of fabric along the line.
To prepare the fabric for the pocket, cut a piece of fabric to 7" wide by 9" high. Mark the center of each side by measuring and dividing by two.
Draw lines connecting the marks. Create a paper template of the design, poke a hole in the center of the template, and align it with the center point on the fabric. Make sure the design fits well within the shape - there should be at least one inch of space between the outer edges of the design and the edges of the fabric.
Hoop the fabric with medium weight cutaway stabilizer as you did earlier, embroider the design, and trim away the excess stabilizer on the backside of the embroidery.
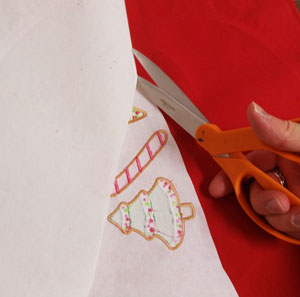
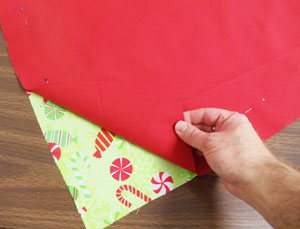
Lay the embroidered pocket fabric on top of the print cotton fabric, wrong sides together, pin in place, and cut out the shape.

Wrap bias tape around the top edge of the fabric, pin in place, and sew a seam along the inner edge of the tape.
To prepare the fabric for the bottom of the apron, cut a 27" wide by 14" high piece of the print cotton. Place the pocket on the fabric with the right side of the pocket about 4" from the right edge of the fabric.
Center the pocket top to bottom by measuring equal distances from the top edge of the pocket to the top edge of the fabric and from the bottom edge of the pocket to the bottom edge of the fabric. Wrap bias tape around the side and bottom edges of the pocket, pinching and folding the tape at each corner and pinning in place as you go.
Sew a seam along the inner edges of the bias tape at the sides and bottom of the pocket.

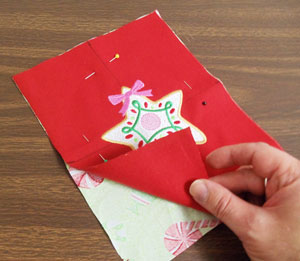
Align the bottom edge of the top portion of the apron with the top edge of the bottom portion, right sides together, pin in place, and sew a 1/2" seam along the pinned edge only. Press the back seam open with an iron.
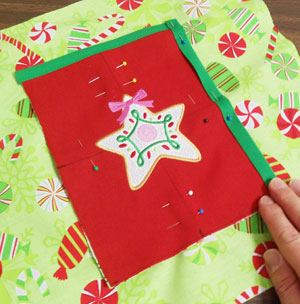
To prepare the fabric for the back of the apron, lay the assembled front panel on top of the fabric, pin in place, and cut out the shape. Remove the pins and set the back fabric aside for now.
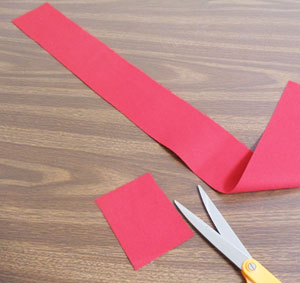
To prepare the top straps, cut one piece of fabric (we used lightweight canvas) to 30" long by 4" wide and one piece to 4" long by 3" wide.

For the long strap, fold one short end in 1/2" to the wrong side and press with an iron. For both straps and the loop (the small piece), fold the long sides in 1/4" and press. Then, bring the folded edges together and press. Sew a 1/8" seam along each side and end of each strap.
Lay the assembled front panel right side up. Then insert the small strap (4" long) through the two D-rings and fold the strap into a loop. Place the loop at the top left corner about 1/2" from the left edge of the fabric.
Align the raw ends of the loop with the top edge of the fabric and pin in place (the rings will be facing in towards the center of the front panel).
Align the raw end of the long top strap (30" long) with the top edge of the fabric at the top right corner about 1/2" from the right edge of the fabric and pin in place. Pin the long strap in place in the center of the front panel to insure that it will not be sewn over in the next step.
Align the back fabric on top of the front panel and the straps with the right sides together and pin in place. Sew a 1/2" seam along the sides and top only; leave the bottom open for turning. You may sew back and forth over the ends of the straps to strengthen the seam.
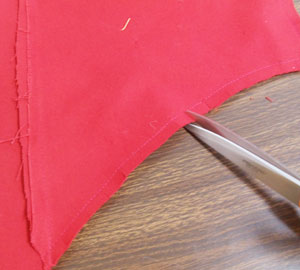
So the fabric will turn properly, cut a slit in the seam allowance about every 1/2" along the curved edges.
Turn the fabric right side out and press the seams. Top stitch a 1/2" seam along the side and top edges of the apron.
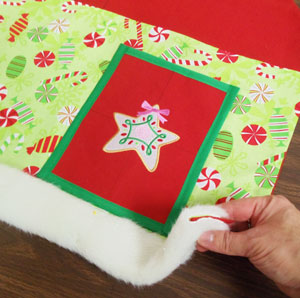
Cut a 27" length of the fur trim and wrap it around the bottom edge of the apron (fold it equally with 2" on each side). Pin in place sew a 1/2" seam along the top and side edges of the fur.
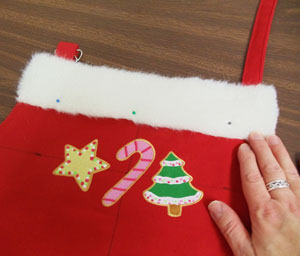
Cut a 12" wide by 2 1/2" high piece of fur trim. Align the trim with the top edge of the apron, pin in place, and sew a 1/2" seam along the entire outer edge of the trim.
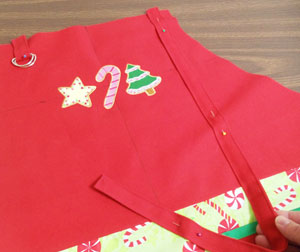
To add the waist strap, cut a piece of 1 1/4" wide ribbon to 100" long. Fold the ends of the ribbon over 1/4" and then another 1/4" and press.
Sew a seam along the folds to tack them in place. Measure and mark the center of the ribbon and align it with the center mark on the apron (just below the embroidery). Center the ribbon top to bottom along the center seam of the apron.
Slide the buckle onto the ribbon up to the center point on the fabric and pin the ribbon in place. Poke a hole in the ribbon and insert the tab of the buckle through the hole.
Stitch the buckle in place with needle and thread. Sew a 1/2" seam along the top and bottom edges of the ribbon along both sides of the buckle. Finally, add a few drops of fabric glue under the buckle and the buckle tab and press them in place.
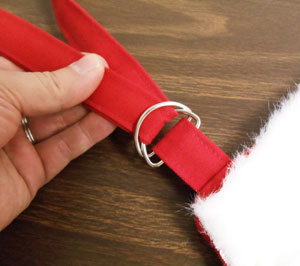
To attach the adjustable top strap, thread the end of the long top strap through the D-rings. Thread the strap back through the first loop and pull tight.
Your apron is complete!

Bring the spirit of Mrs. Claus alive in your kitchen! Holiday baking will be a breeze with such a festive apron. Stitch one for you and one for a friend!


