Using vinyl fabric with your applique embroidery adds a fun layer of dimension and interest to any project. See how easily it can be done with the steps in this helpful tutorial!
Supplies
Project Needs & Notes:
- 1/4 of a yard of clear vinyl
- Large flake glitter, sequins, or shaped confetti (optional)
- Medium-weight cutaway stabilizer
- Air-erase pen for marking
- Masking tape
Designs featured in this tutorial include:
- Y5063, Winter Snowglobe (Vinyl Applique)
Special Notes:
In this tutorial, glitter can be added inside of the applique snow globe. For best results, use large flakes of glitter, sequins, or shaped confetti. Do not use normal or fine glitter as it could get inside your embroidery machine while embroidering.
Spray adhesive will show on clear vinyl. For best results, avoid spraying any adhesive onto the actual applique piece to keep it clean.
Trim all unwanted threads from the embroidery before placing and sewing the vinyl applique piece. Otherwise all unwanted threads will be trapped and seen in the final product.
Designs Used
When you download the applique snow globe design, you'll find two files. One of the files is an embroidery file and the other is a dieline. The dieline file is marked with the letters DL.
Dielines are used to cut the fabric to the right shape and size. Open the dieline file with embroidery software, and print it.
If you do not have embroidery software, Wilcom's TrueSizer is a free program to use.
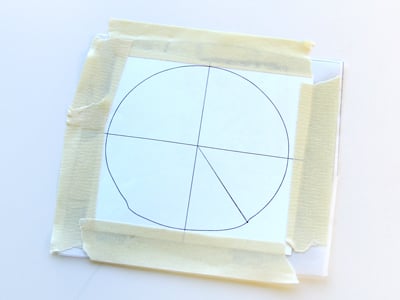
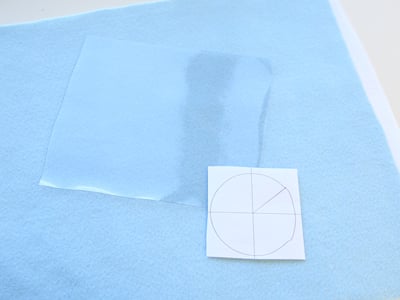
Cut around the paper shape, leaving a good amount of space around the dieline circle.
Tape the paper dieline onto the vinyl fabric, making sure it is completely flat.
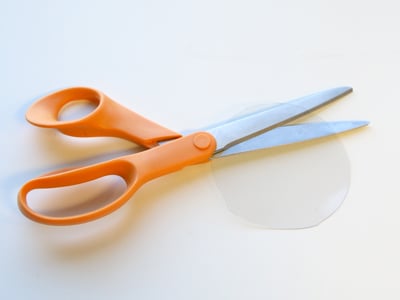
Cut out the shape, and remove the paper and tape.
Now that the applique piece is ready, it is time to prepare the fabric for embroidery.
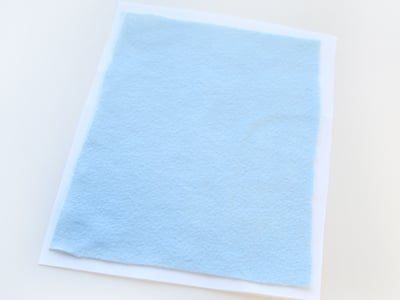
Cut a piece of cutaway stabilizer a bit larger than the hoop.
Spray the stabilizer with a temporary adhesive, and smooth it onto the back of the fabric.

Print out a template of the design from the embroidery program you used to print the dieline.
A template, or printout of a design, is an excellent tool to help with placement.
Position the template where you want the embroidery to stitch out on the fabric.
Mark the center point, as well as the horizontal and vertical axis lines with an air erase pen.
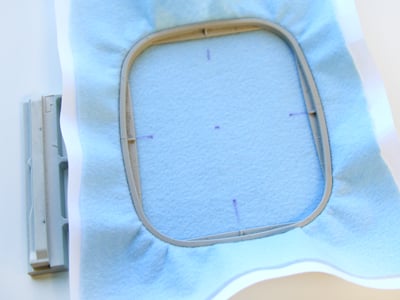
Hoop the fabric and stabilizer together, aligning the marks on the hoop with the marks on the fabric.
Use a size 11 or 75/11 sharp sewing needle. A sharp sewing needle has a smaller, finer point than an embroidery needle. That means it will make smaller holes in the vinyl.
Attach the hoop to the machine and load the design.
Move the hoop so the needle is directly aligned with the center point on the fabric.
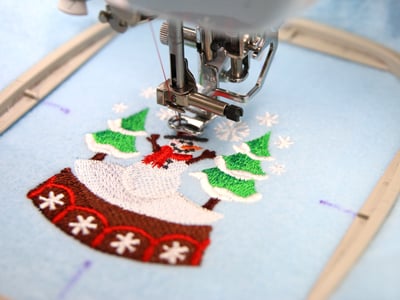
Begin embroidering the design. The inner detail of the snow globe and the base will embroider first.
Follow your color change sheet. After embroidering the "dieline" step, remove the hoop from the machine, but do not unhoop the fabric or stabilizer.
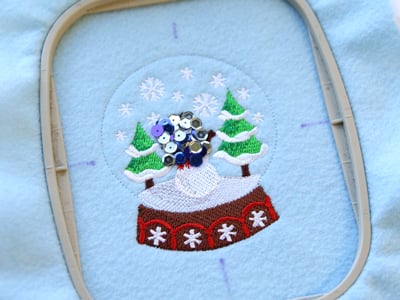
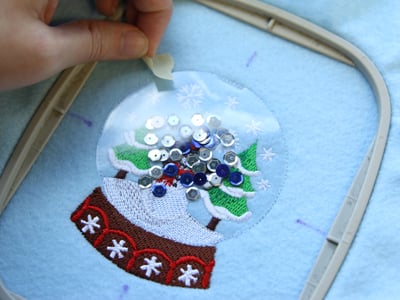
Trim away all unwanted threads. Then carefully place the sequins in the center of the embroidery, making sure to keep them away from the edge where the vinyl will be sewn down.
Also, do not pile the sequins or glitter too tall, as this will affect the placement of the vinyl piece.
Place the vinyl circle inside of the dieline.
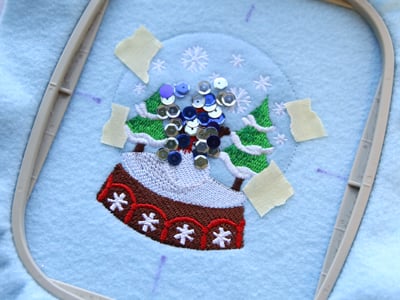
Hold the vinyl piece in place by sticking a small piece of tape on both sides of the circle to adhere it to the fabric.
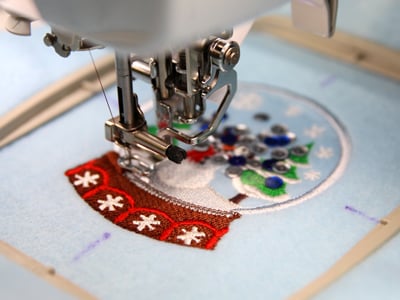
Place the hoop back onto the machine, and continue with the design.
Follow the color change sheet to embroider the "preliminary tack down" step. Here two small stitches will sew along the top and bottom edge of the vinyl dieline, adhering it to the fabric.
Once the preliminary takedown has sewn, carefully remove the tape.
Follow the color change sheet to embroider the remaining steps of the design.
A tack down will sew first, followed by the finished satin edge of the globe, and then the final edge of the base.
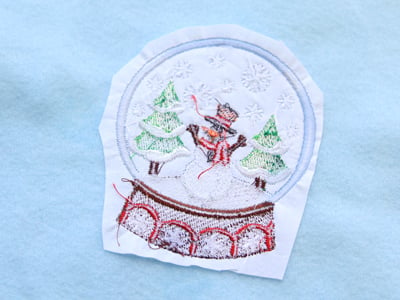
Once the embroidery is completed, trim away the excess stabilizer from the back of the design leaving about a 1/2" around the embroidery to finish.
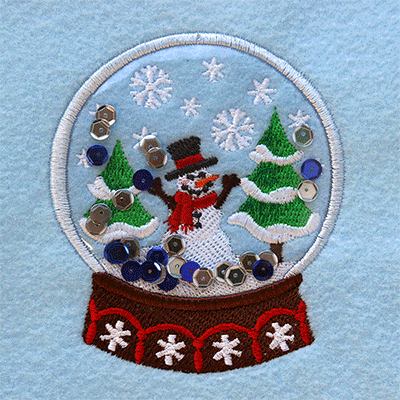
Vinyl applique is a unique way to add interest and dimension to your embroidery!
Here the addition of sequins gives it the look of glass in a wintry snowglobe design.
