
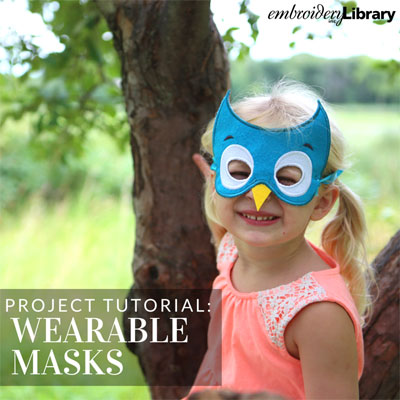
Stitch-filled wearable masks are a great way to incorporate embroidery into your Halloween costumes, dress-up supplies, birthday parties, and more. Choose a design that matches your theme, and get stitching! These tips and tricks will help you master making stitch-filled masks.
Supplies
Project Needs & Notes
- Felt or ultra suede (for front and back of mask)
- Medium-weight (2.5 ounce) cutaway stabilizer
- Temporary spray adhesive (like Gunold KK100)
- Air-erase pen
- 1/2" - 5/8" wide ribbon (for ties)
- Large eye tapestry needle
- Small sharp scissors or craft knife and cutting pad
- Fabric glue
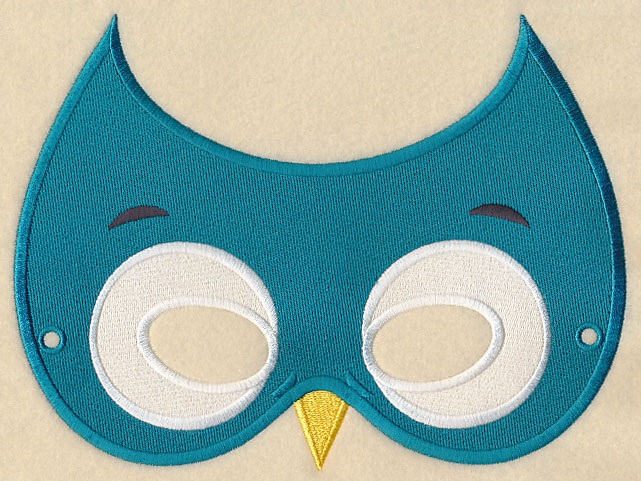
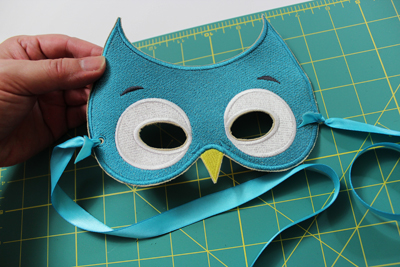
For this tutorial, I used the small size of the Woodland Owl Mask design.
Find even more mask designs in the Masks (Halloween and Mardi Gras) category here.
Sizing Notes:
The masks are available in three different sizes: large, medium, and small. Use the chart below for choosing the appropriate size. Measure between the pupils of the eyes (this will insure that the eye holes will sit properly when the mask is worn):
Large: 3 3/16"
Medium: 2 3/4"
Small: 2 3/8"
Cut ribbon ties according to mask size (see below):
Large: two 29" lengths
Medium: two 24 1/2" lengths
Small: two 20" lengths
Designs Used
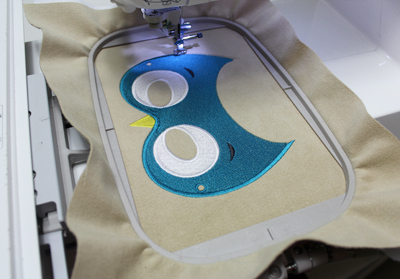
To get started, cut a piece of fabric (I used ultra suede) a bit larger than your hoop. Spray a piece of medium-weight cutaway stabilizer with temporary adhesive and smooth the fabric on top. Hoop the fabric and stabilizer together.
Attach the hoop to the machine and load the design. Then, embroider the design.
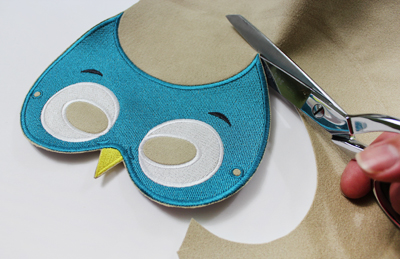
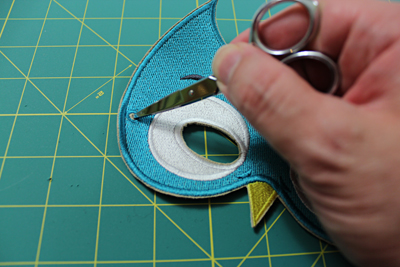
When the design has finished, unhoop the fabric and cut out the mask by cutting as close as you can to the outer border stitches. Cut all the way around the outer shape of the mask -- be careful to not cut any of the stitches. If by chance you do cut any of the stitches, you can use a drop of fabric glue to tack the stitches in place so they will not unravel.
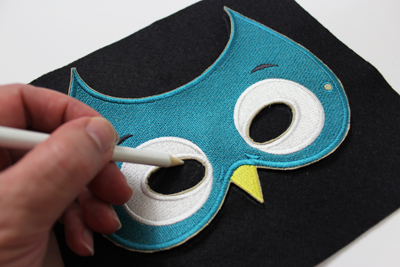
Here's a tip for cutting the eye holes: fold the mask in the middle of each eye hole and cut a slit in the fabric to get it started. Then cut around the shape of the holes.
To add the back, place the embroidered front on top of the fabric (I used felt). Felt or ultra suede are excellent choices for the back of the mask as they are both soft fabrics and they will not fray.
Using an air-erase pen or dressmaker�s pencil, trace the outer shape of the mask and the eye holes.
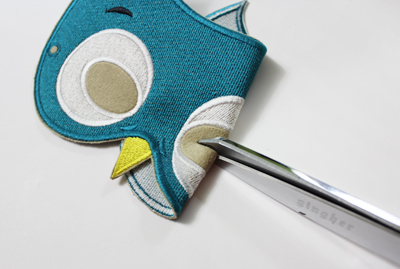
Remove the front of the mask and cut out the shape cutting about 1/8 inch in from the outer shape and 1/8 inch out from the eye hole shapes (this makes the back just a bit smaller so it will not poke out past the outer edges of the front piece).
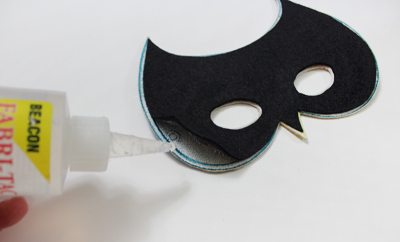
Lay the front piece flat with the wrong side facing up. Add fabric glue to the backside of the front piece, align the back piece on top, and press in place.
Using a small sharp scissors or craft knife, lay the mask on top of a cutting pad and poke holes in the center of the ribbon holes on each side of the mask.
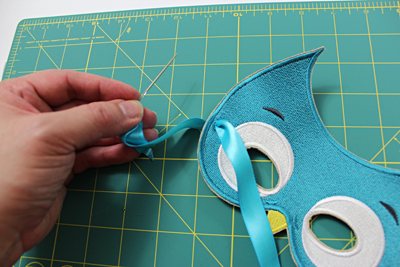
Thread one end of the ribbon through a large eye tapestry needle and work the ribbon through one of the ribbon holes. Tie that end of the ribbon in place with a knot and trim the ribbon.
Cut the ribbon to the desired length (see above) and repeat for the opposite side of the mask to finish.
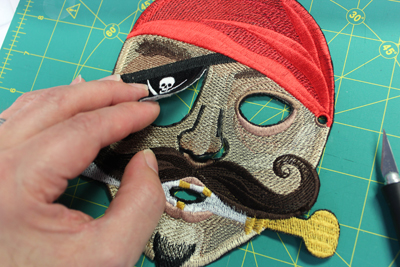
If you're working with a full-face mask, then there are areas to cut around the nose as well.
The pirate mask has a special place to free the patch so that the wearer can peek through.
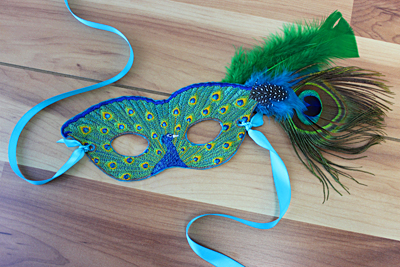
Use feathers, bits, bobs, and other embellishments to decorate your mask. These additional touches make it even more eye-catching!
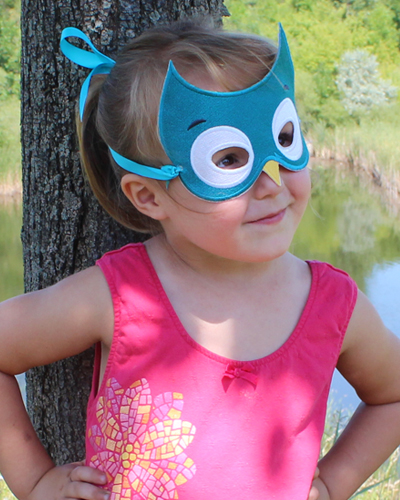
Adults and kids alike will love donning this masks for whatever occasion arises. Adults can wear them to masked balls and costume parties; kids will love them for Halloween and playing dress-up.
This project is featured on the Embroidery Library Pinterest page.
Pin it yourself using the "Pin It" button on this page.


