
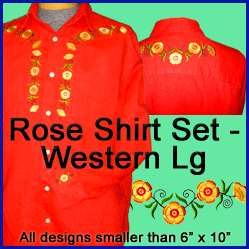
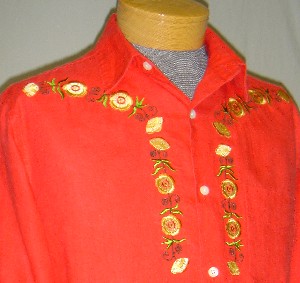
Kick up your heels in this fancy western-themed shirt. We gave this regular-cut, button-down shirt a country flavor using the Square Dancing and Western designs at Embroidery Library.
Turn up the country music in your sewing room and have a toe-tappin' good time while you embroider up your own shirts for an upcoming dance, horse show, or rodeo.
Yee Haw!
Supplies
Supplies needed:
Button-down shirt
Printed templates of each embroidery design
Disappearing marking pen
Embroidery designs from Embroidery Library:
Designs Used
Laying out the templates
Print and cut out each template around the outside of the design. Make sure that you can see the horizontal and vertical axis lines for each design on the templates.
Lay out the templates on the shirt. Now is the time to play; try out different placements, and see what pleases you.
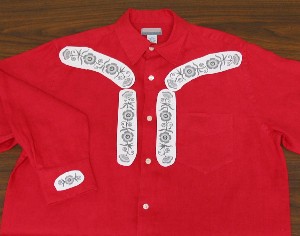
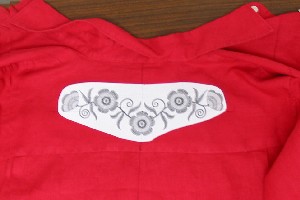
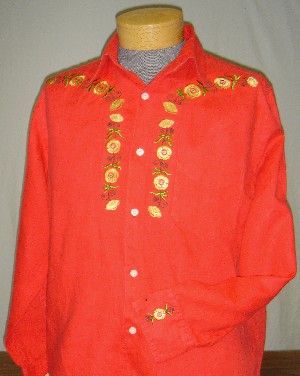
On the front of the shirt we decided to place the front yoke designs so that they arch over the pocket. We placed the placket designs on either side of the button placket, so that they meet up with the bottom of the front yoke designs.
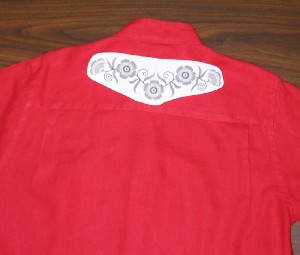
We placed the back yoke design in the center of the back yoke.
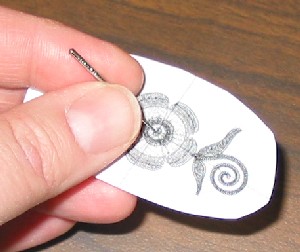
Using an old machine needle, punch a hole at the center point of each paper template piece (where the axis lines cross). Push the needle all the way through to create a hole that is just the right size for the tip of your marking pen.

Marking the shirt
With the shirt buttoned up, mark the placement for each embroidery design by using the center point and axis lines. You will make a center mark through the hole in the template, and at the edge of the template, you will make marks at each axis line.
Now lift the template off the shirt and make lines that correspond with the horizontal and vertical axis of the template. Extend the lines several inches so that they will meet the edge of the hoop.
Extend the horizontal axis lines across the button placket and onto the other side of the shirt. This will make your embroidery straight across the front of the shirt.
Mark the back yoke and the cuffs using the same marking method.
Hooping and sewing
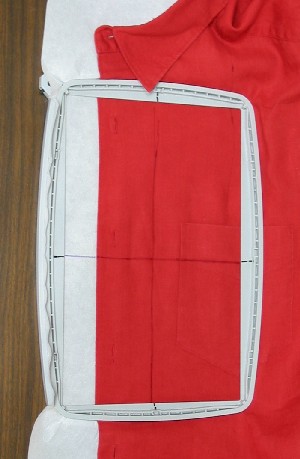
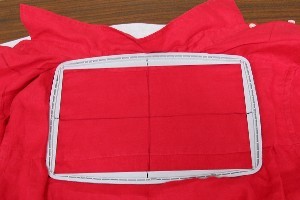
Front Yoke designs: Line up the axis lines of the design with the center marks on each side of your hoop. Hoop the fabric and stabilizer in the hoop together.
Sew out the embroidery.
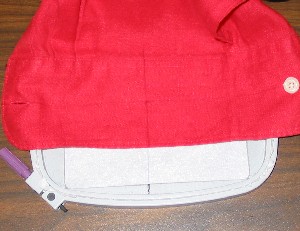
Front placket designs: Use a small amount of spray adhesive to affix the shirt front to the stabilizer. Extend the horizontal axis line onto the stabilizer, and hoop the combination together, lining up the axis lines with the center markings on each side of the hoop.
Sew out the embroidery.
Here's a look at the finished shirt front.
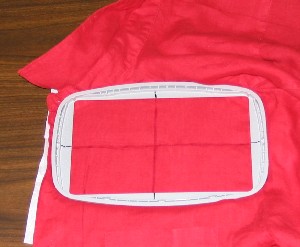
For the cuff design, hoop the stabilizer and mark the stabilizer with axis lines between the center markings on the sides of the hoop. Spray the stabilizer with spray adhesive and match up the marked lines on the cuff with the lines that you marked on the stabilizer.
Sew out the embroidery.
Repeat the steps on the other cuff.
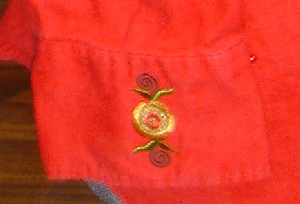
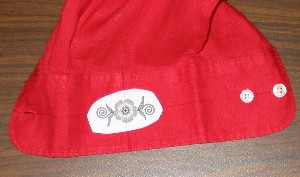
Here's a look at a finished cuff.
Hoop the back yoke together with stabilizer. Match up the axis markings on the shirt with the center marks on the sides of the hoop.
Sew out the embroidery.
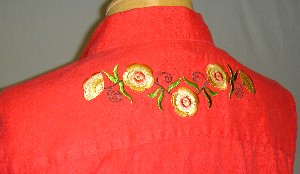
Here's the embroidered back yoke.
Whether you're twirling around the dance floor or riding a bronco, you'll look your western best in this fantastic shirt!


