November's installment of the Placemat of the Month series has arrived just in time for Thanksgiving! With this new project, setting a beautiful table just got a little easier.
Embroidered placemats and napkins really dress up a table setting. Contrasting fabric makes the pocket a striking part of the placemat, while the embroidered napkin adds even more interest. Just right for adding elegance to any gathering!
Read on for free project instructions!
November's Give Thanks Pocket Placemat is the 11th installment of the Placemat of the Month series. Check back the first Wednesday of each month and you'll find a new placemat project, absolutely free for your use! Each project will demonstrate how to combine your love of embroidery with classic quilting methods.
Have you missed an installment? Links are below!
January - Snowball Block Placemat
February - Lots of Love Placemat
March - Patchwork Placemat & Patchwork Table Runner
April - Spring Pinwheel Placemat
May - Sunflower Fiesta Placemat
June - Summertime Trapunto Placemat & Summertime Trapunto Table Runner
July - Crafty Cravings Placemat
August - Puppy Love Placemat
September - Autumn Abundance Placemat & Autumn Abundance Table Runner
October - Sumi-e Embroidered Placemat
December - Rudolph's Run Placemat & Rudolph's Run Table Runner
Supplies
- 1/2 yard solid-colored quilter's cotton (for embroidered panel and borders)
- 1/4 yard solid-colored quilter's cotton (for pocket area)
- 1/4 yard print quilter's cotton (for pocket)
- 1/4 yard print quilter's cotton (for borders)
- Batting
- Medium weight cutaway stabilizer
- Temporary spray adhesive
- Air-erase pen
- Straight edge
- Nylon monofilament thread
- 6" length of extra wide double-fold bias tape
- Needle and thread for some hand sewing
Designs Used
In this project I used designs from the Fall into Color Design Pack - Md on the placemat. I also think designs from the Autumn Watercolor Medallions Design Pack and from the Seasoned with Floral Fauna Design Pack would work beautifully as well. For the quilting designs, I used designs from the Feather Quilting Design Pack - Sm. Find hundreds of feather quilting designs that will also work on your placemat. Pick your favorite embroidery designs to match your decor!
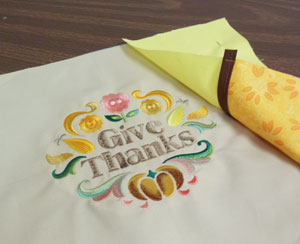
For the napkin, I used the coordinating Fall into Color Give Thanks design. This design is the perfect size to tuck into corners of napkins and placemats.
Finished size: 21 1/4" wide by 14 1/2" high
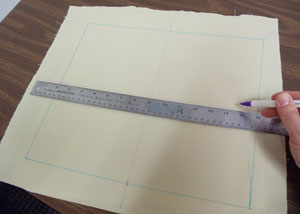
First, prepare the fabric for the embroidered panel. Using an air-erase pen, draw a 14" wide by 12" high rectangle on the solid-colored cotton fabric. Leave a couple of inches of excess fabric around the shape.
Mark the center of each side of the shape by measuring and dividing by two. Draw lines connecting the marks -- these lines will be used for hooping.

Spray a piece of medium weight cutaway stabilizer with temporary adhesive and smooth the fabric on top. Hoop the fabric and stabilizer together by aligning the marks on the hoop with the lines on the fabric.
Attach the hoop to the machine and load the design. Be sure to choose a design that fits well within the shape: we are embroidering a design that is about 6" wide by 6" high. This leaves a few inches of excess fabric around the edges of the design which will leave enough room for the quilting designs later on.
Move the hoop so that the needle is aligned with the center point on the fabric and embroider the design.
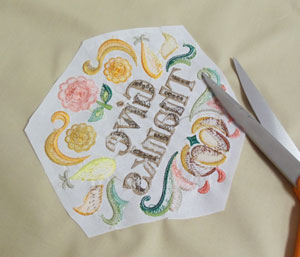
When the design has finished, trim away the excess stabilizer on the backside of the embroidery.

Next, cut out the shape.
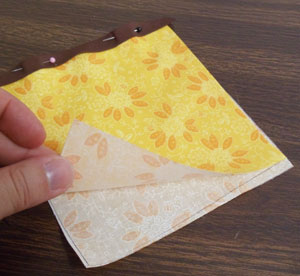
To prepare the fabric for the pocket, cut a 5 1/2" wide by 12" high piece from the print cotton.
Fold the fabric lengthwise, wrong sides together, with the short ends aligned and press the fold with an iron.
Wrap bias tape around the folded end, pin in place, and sew a seam along the inner edge of the tape.
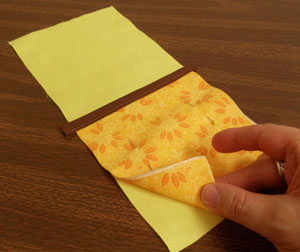
To prepare the fabric for the back pocket area, cut a piece of the solid-colored cotton to 5 1/2" wide by 12" high.
Align the pocket with the bottom edge of the fabric, pin in place, and tack the pocket in place with a 1/8" seam along the side and bottom edges.
Align the pocket piece with the right side of the embroidered panel, right sides together, pin in place, and sew a 1/4" seam along the pinned edge only. Press the back seam open.

To prepare the fabric for the side borders, cut two pieces of print cotton to 2 1/2" wide by 12" high.
Align the pieces with the side edges of the assembled front panel, right sides together, pin in place, and sew a 1/4" seam along the pinned edges. Press the seams.
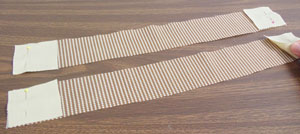
To prepare the fabric for the top and bottom borders, cut two pieces of print cotton to 18 3/4" wide by 2 1/2" high. Also, cut four pieces of the solid-colored cotton to 2 1/2" by 2 1/2".
Align the square pieces with the ends of the large pieces, right sides together, pin in place, sew a 1/4" seam along the pinned edges, and press the seams.
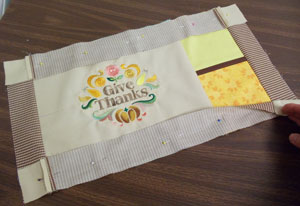
Align the assembled border pieces with the top and bottom edges of the front panel (with the seams aligned), right sides together, pin in place, sew a 1/4" seam along the pinned edges, and press the seams.

Next, embroider the feather quilting designs. Create paper templates of the designs by printing them at full size using embroidery software.
Lay the template on the fabric where you want it (I placed my design on the top of the pocket area) and center it side to side and top to bottom by measuring equal distances between the edges of the design and the outer edges of the area to be embroidered.
Poke a hole in the center of the template and mark the fabric. Also, mark the horizontal and vertical axis points. Remove the template and draw lines connecting the marks.

Lay the assembled front panel on top of the batting and cut out the shape. Cut a piece of stabilizer and spray it with adhesive. Smooth the stabilizer on the backside of the area to be embroidered.
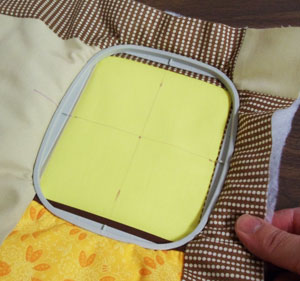
Hoop the fabric, batting, and stabilizer together by aligning the marks on the hoop with the lines on the fabric.
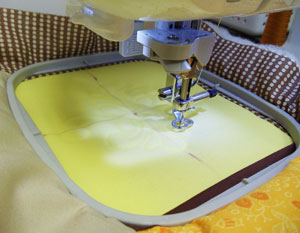
Attach the hoop to the machine and load the design. Move the hoop so that the needle is directly over the center point on the fabric, and embroider the design -- we matched the thread in the needle with the color of the fabric.
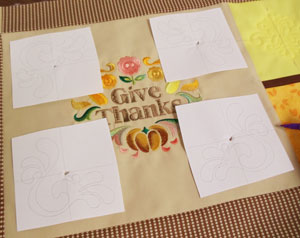
I also embroidered quilting designs in all four corners of the embroidered panel. I positioned the templates with the edges of the designs 3/4" away from the outer edges of the shape.

To prepare the fabric for the back of the placemat, lay the assembled front panel on top of the fabric, right sides together, pin in place, and cut out the shape. Sew a 1/2" seam along the top, bottom, and one side edge -- leave the other side edge open for turning.
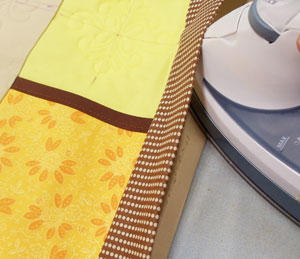
Turn the placemat right side out and press the seams. Also, turn the fabric of the opening in 1/2", press, and pin in place.
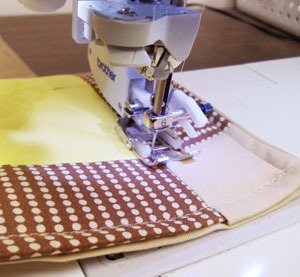
Sew a 1/4" seam along the entire outer edge of the placemat. With nylon monofilament in the needle and matching thread in the bobbin, (thread that matches the back fabric), quilt through all the layers by stitching along the existing seams of the front panel.

I stitched the Fall into Color Give Thanks design into the corner of this napkin.
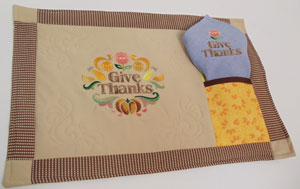
Pocket placemats and coordinating napkins are a fun and functional way to personalize a table with your favorite embroidery designs. Stitch an entire set for Thanksgiving!


