FREE Snowman with $5 order PLUS Double Reward Points! Click the deals tab for details.❄️
 FREE Snowman with $5 order PLUS Double Reward Points! Click the deals tab for details.
Give any nursery a bright and cheery update with an adorable baby mobile! Too-cute sleep and sea life motifs hang from these precious mobiles.
Supplies
Project Needs & Notes:
- Small pieces of craft felt
- Small pieces of stiffened felt or wool felt for additions
- Tear-away stabilizer
- Polyester fiberfill
- Needle and thread for some hand sewing
- 9" - 10" hand embroidery hoop for mobile
- 1/4" wide to 3/8" wide ribbon for hangers
- 1/2" to 1" wide ribbon
- Fabric glue
- Decorative beads
- Large eye tapestry needle
The designs featured in this tutorial include:
- X11655, A Lullaby and Goodnight Stuffies Design Pack
- X13385, A Sea Life Stuffies (In-the-Hoop) Design Pack
Designs Used
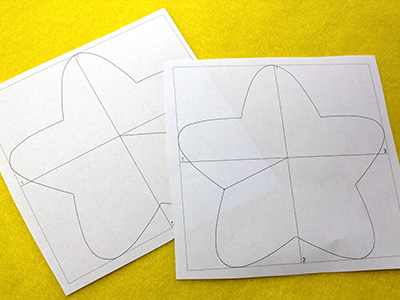
In-the-hoop stuffie designs have a full embroidery file and dielines. Dieline files are marked with the letters "DL." There are either three or four dieline files with each stuffie design.
One is the full embroidery file. The others are dieline files marked with the letters DL. Dielines are used to cut the fabric to the right shape and size.
Open the dielines files with embroidery software and print them.
If you do not have embroidery software, Wilcom's TrueSizer is a free program to use.
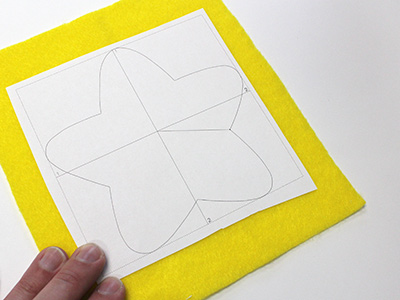
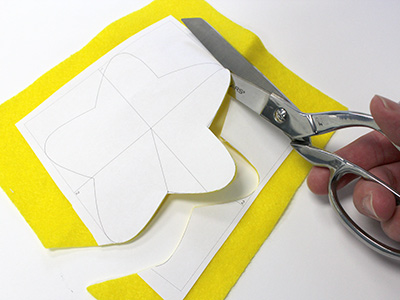
Cut out the shape and remove the paper.
Repeat this process for all of the dieline files.
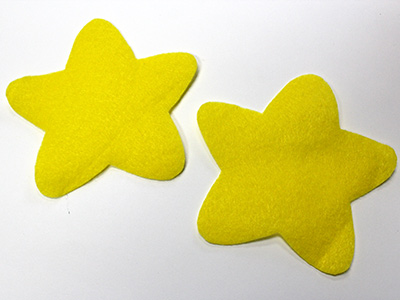
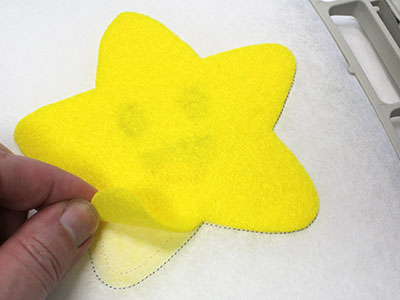
Craft felt is a good choice for the main parts of the stuffies.
For additional pieces, like sheep legs and sun rays, wool felt or stiffened felt is a good choice.

Now that the fabric pieces are cut to the proper shape and size, it's time to embroider the design.
Hoop a piece of tear-away stabilizer.
Madeira E-Zee Tear 1.5 oz. or Floriani Tearaway Medium are good choices. Those brands are more fibrous, less paper-like, and will tear more cleanly.
Attach the hoop to the machine and load the full embroidery design (not the dieline files).
Use a size 11 or 75/11 sharp sewing needle, rather than an embroidery needle. A sharp sewing needle has a smaller, finer point than an embroidery needle, so that will make smaller perforations in the stabilizer.
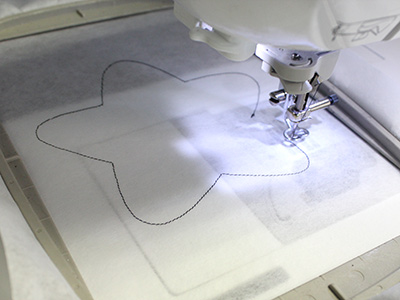
Embroider the design. The first thing to embroider will be a dieline or outline. This marks the area on the stabilizer for the front fabric piece.
Remove the hoop from the machine, but do not unhoop the stabilizer.
Spray the back of the front fabric piece with a small amount of temporary adhesive.
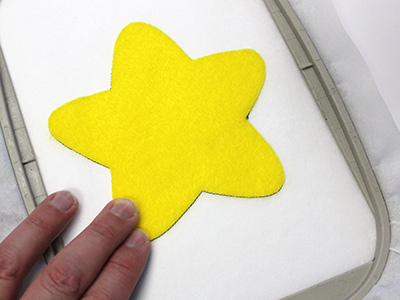
Place the fabric right inside the sewn outline.
Attach the hoop back onto the machine and continue with the design.
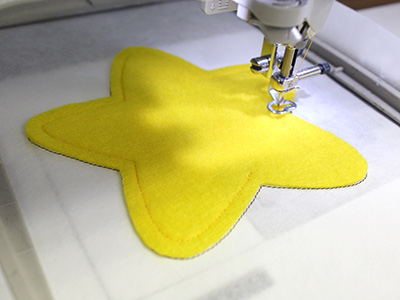
A running stitch tack down will sew next. This holds the front fabric in place for the remainder of the design.
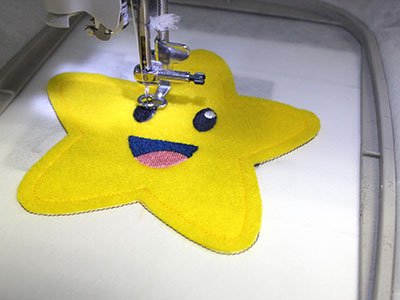
All of the inside elements will sew next.
On the color change sheet, look for the note that says "finishing seam." When you get to this section, stop the machine and remove the hoop from the machine but do not unhoop the stabilizer.
If working with a design with additional felt pieces, add them at this time. Instructions are below.
Special Steps For Additional Pieces:
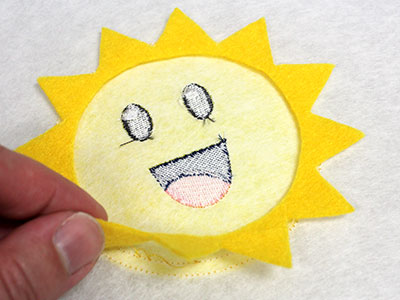
If working with stuffies with additional felt pieces, turn the hoop over. Spray the felt fabric pieces with temporary adhesive and place on the backside of the embroidery.
Finishing Steps for All Crafty Cut Stuffie Designs:
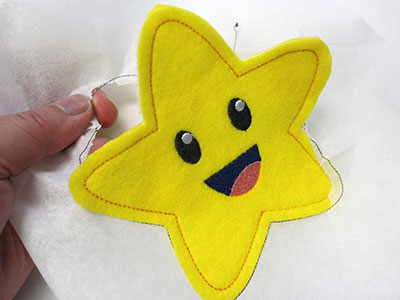
Spray the wrong side of the back fabric piece with a couple of quick shots of spray adhesive along the outer edges. Place the back piece right over the front piece.
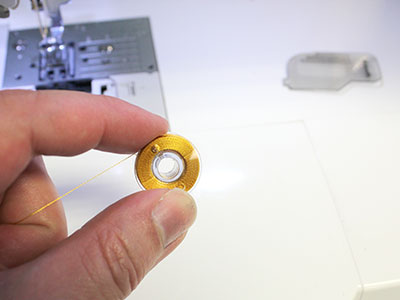
The remaining steps will be seen from both sides. Wind a bobbin with the same thread used in the top.
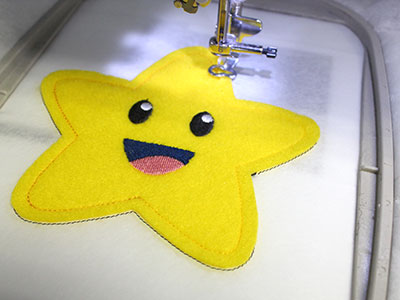
Attach the hoop back onto the machine and continue with the design. A running stitch tack down will sew -- this binds all the layers together.
Remove the hoop from the machine, unhoop the stabilizer, and carefully tear it away (the dieline will be removed with the stabilizer).
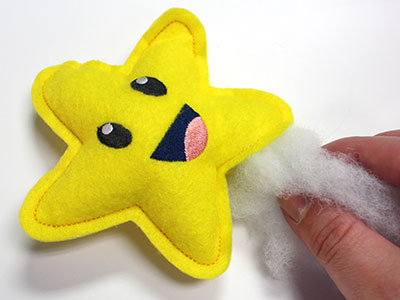
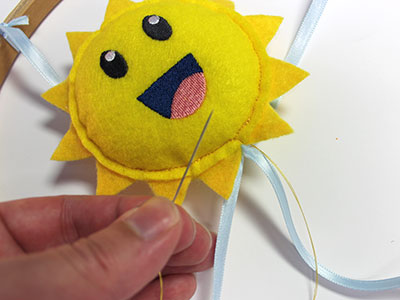
Fill the stuffie, using polyester fiberfill, through the opening at the bottom until it is nice and firm.
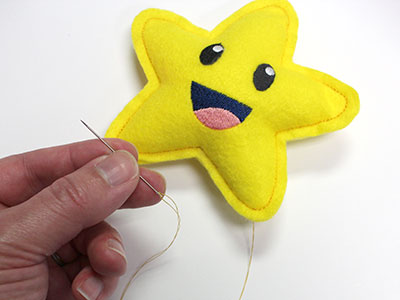
Using needle and thread, sew the opening closed by stitching along the original tack down seam.
Repeat this process for as many stuffies as you would like to add to your mobile.
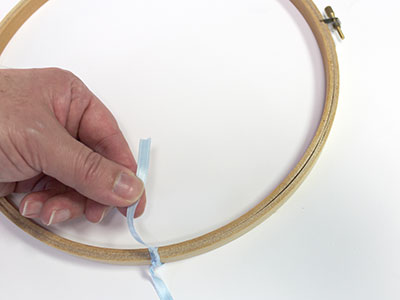
To begin assembling the mobile, lay the hand embroidery hoop flat.
Add the bottom hangers:
Using 1/4" wide to 3/8" wide ribbon, tie one end of the ribbon into a secure knot on the hoop. Then, add a couple of drops of fabric glue to the knot to secure it in place.
Cut the ribbon to 15" long starting out from the edge of the hoop.
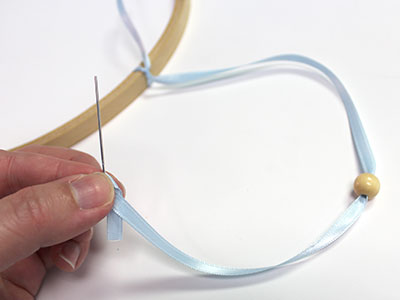
You can add a decorative bead to the hangers. To do this, thread the end of the ribbon through a large eye tapestry needle and add the bead to the ribbon.
Push the bead up to the top of the hanger and then tie a knot (or knots if necessary) at the middle of the ribbon -- the knot will hold the bead in place.
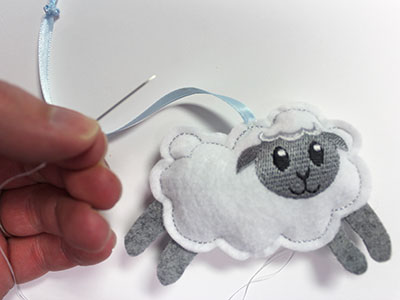
Add fabric glue to the end of the ribbon and press it in place in between the layers of felt at the top center of the stuffie.
With needle and thread, sew a few stitches where the ribbon meets the stuffie to secure it.
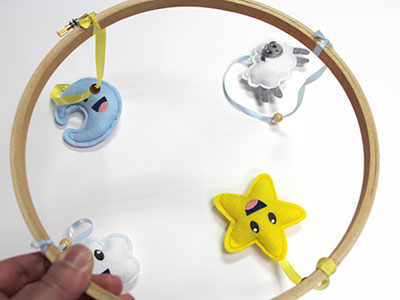
Continue to add hangers and stuffies around the hoop.
This example shows four hangers spaced evenly around the hoop.
Each of the four hangers comes in a different length: The second hanger is 12" long starting out from the edge of the hoop, the third hanger is 9" long, and the fourth hanger is 6 1/2" long.
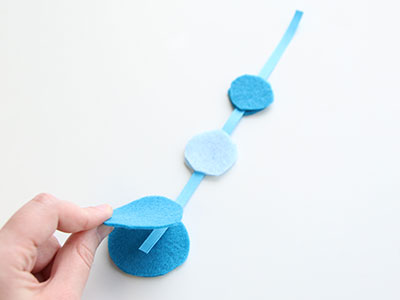
You can also add cute bubbles to the mobile for an under the sea version!
Cut a ribbon to your desired length, and tie it to the embroidery hoop. Fold your felt in half and cut circles, making cut you are always cutting two of each size. Then, glue the pairs of circles on either side of the ribbon as shown. Repeat for as many bubbles as you'd like for your mobile.
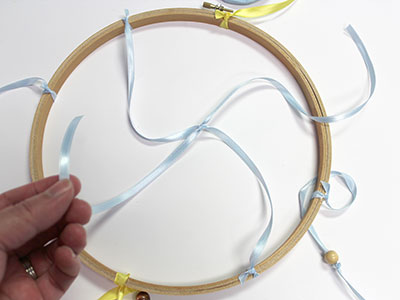
To add the top hangers, cut two 24" lengths of ribbon. Tie both ends of one ribbon to opposite sides of the hoop (spaced evenly in between the bottom hangers).
Tie the remaining ribbon piece in place at the middle of the first piece leaving equal lengths on both sides.
Tie the ends of the second piece to opposite ends of the hoop, spacing the ribbon evenly in between the bottom hangers.
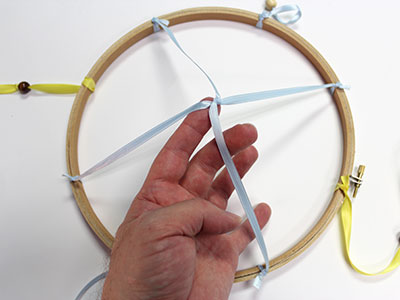
Add a stuffie at the top of the top hangers (where they intersect).
Hand sew the top of the hangers to the bottom edge of the stuffie.
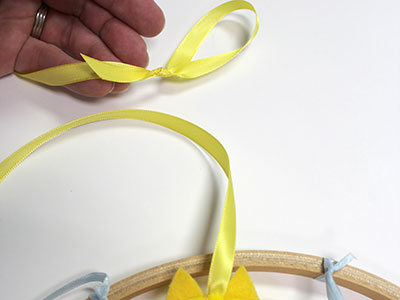
Now, add another ribbon hanger to the top of the stuffie to hang the mobile. (You can also add bubbles to the top hanger!)
Cut a length of ribbon as long as you like -- attach one end to the top of the stuffie, just as you did the others. On the opposite end, form the ribbon into a loop and tie a knot.
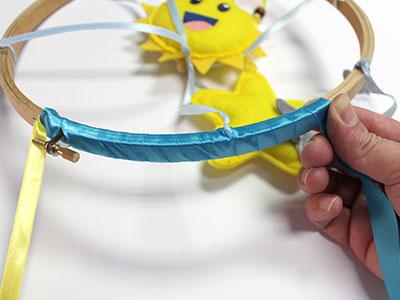
Using 1/2" to 1" wide ribbon, secure one end in place at the inside of the hoop with fabric glue then wrap the ribbon all the way around the hoop.
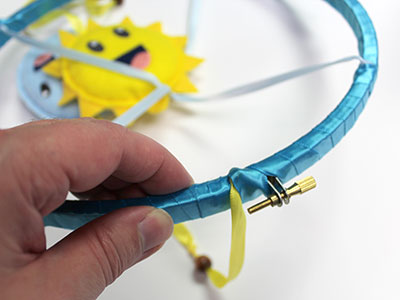
When you reach the point where you started, trim the ribbon and secure it in place with fabric glue to finish.

Sea life stuffies and bubbles create a too-cute underwater look! Find these in-the-hoop designs right here.


